
Tellit User Manual
Content
- 1. Registration and use Tellit – short version
- 2. General
- 3. Registration (one-time)
- 3.1 Register with Tellit
- 3.2 Login and connect to your entity (e.g. community)
- 4. Use Tellit
- 4.1 Send an incident
- 4.2 Look up your sent incidents
- 5. Reset your password / password forgotten
- 6. I have a new mobile phone - how to move my Tellit account?
- 7. Settings
- 7.1 Change your password
- 7.2 Change your registration settings
- 7.3 Disconnect the chosen entity
- 7.4 Send emails to yourself
- 7.5 User settings
- 7.6 Delete account
- 8. Contact
1. Registration and use Tellit – short version
Simply do what is intuitive to be done
- Click "register" and key in your name, phone number, email, home address, select a language
- Wait for the email with the verification code sent to your email
- If it does not show up please check your spam folder
- Enter the received PIN code
Now you need to connect to your organization which serves you.
- Click on the QR code symbol and scan the QR code you have received
To send a report just click "Report an incident" and then the buttons which best characterize the issue you have. It will be sent automatically once you have completed the (few) pages as provided.
2. General
Please note that these pages describe how to register and use Tellit in general.
Shown pictures may not always reflect the exact version you have due to continuous enhancements.
To connect to an organization to really be able to usilize Tellit you will need a QR code as described below.
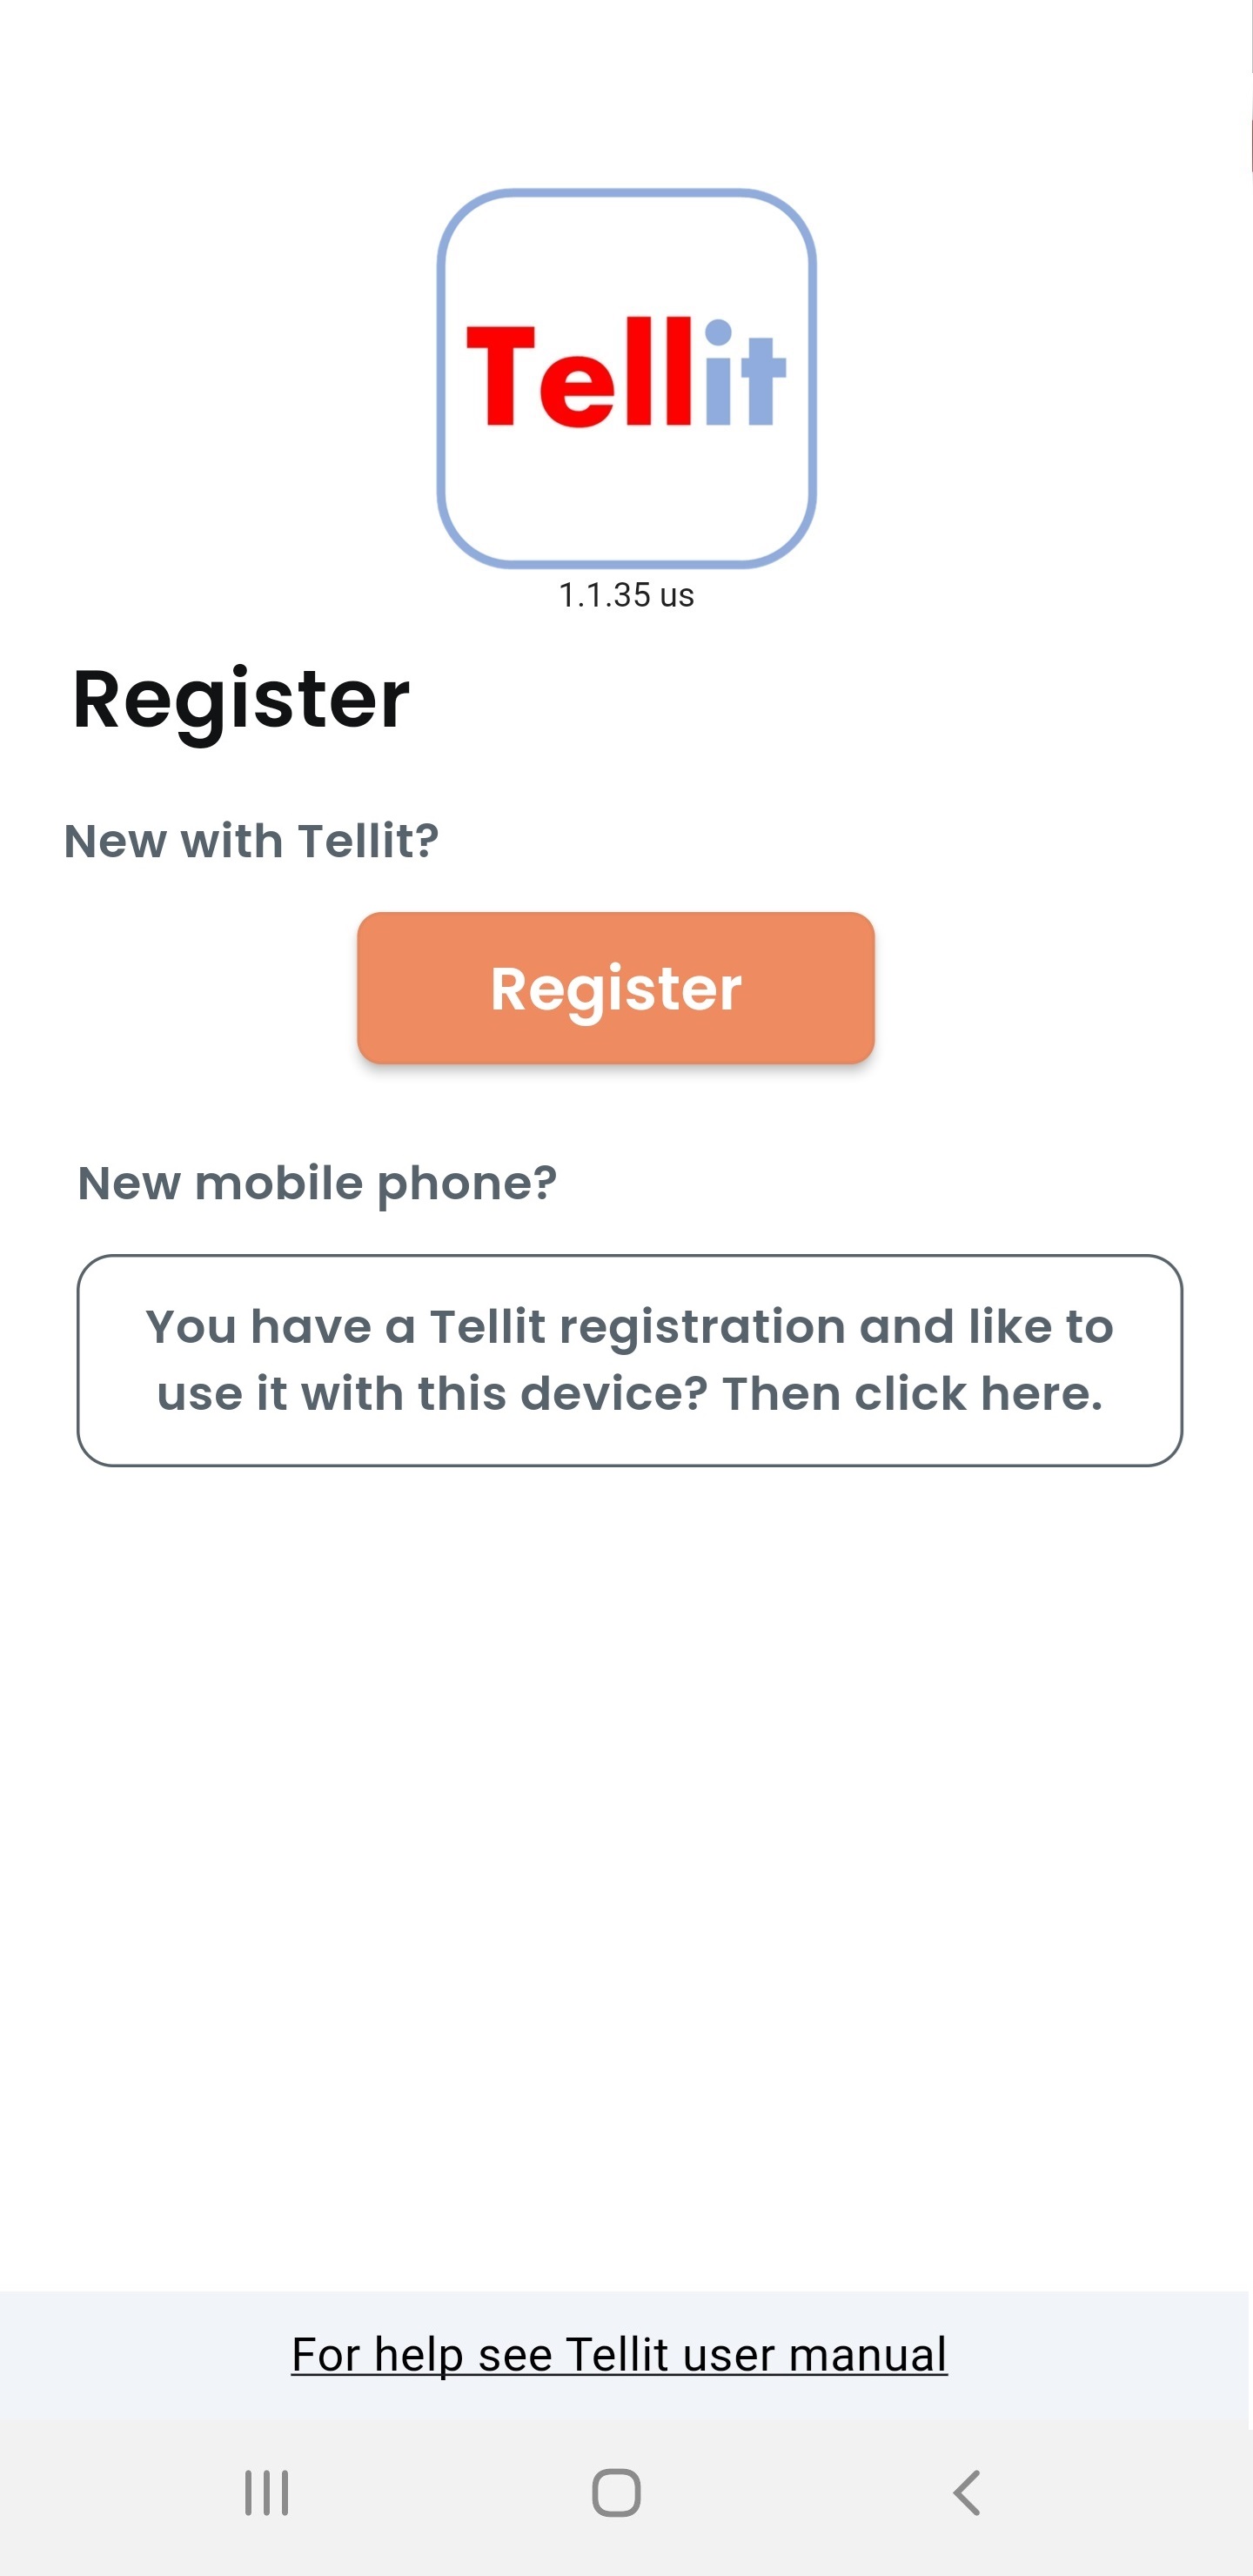
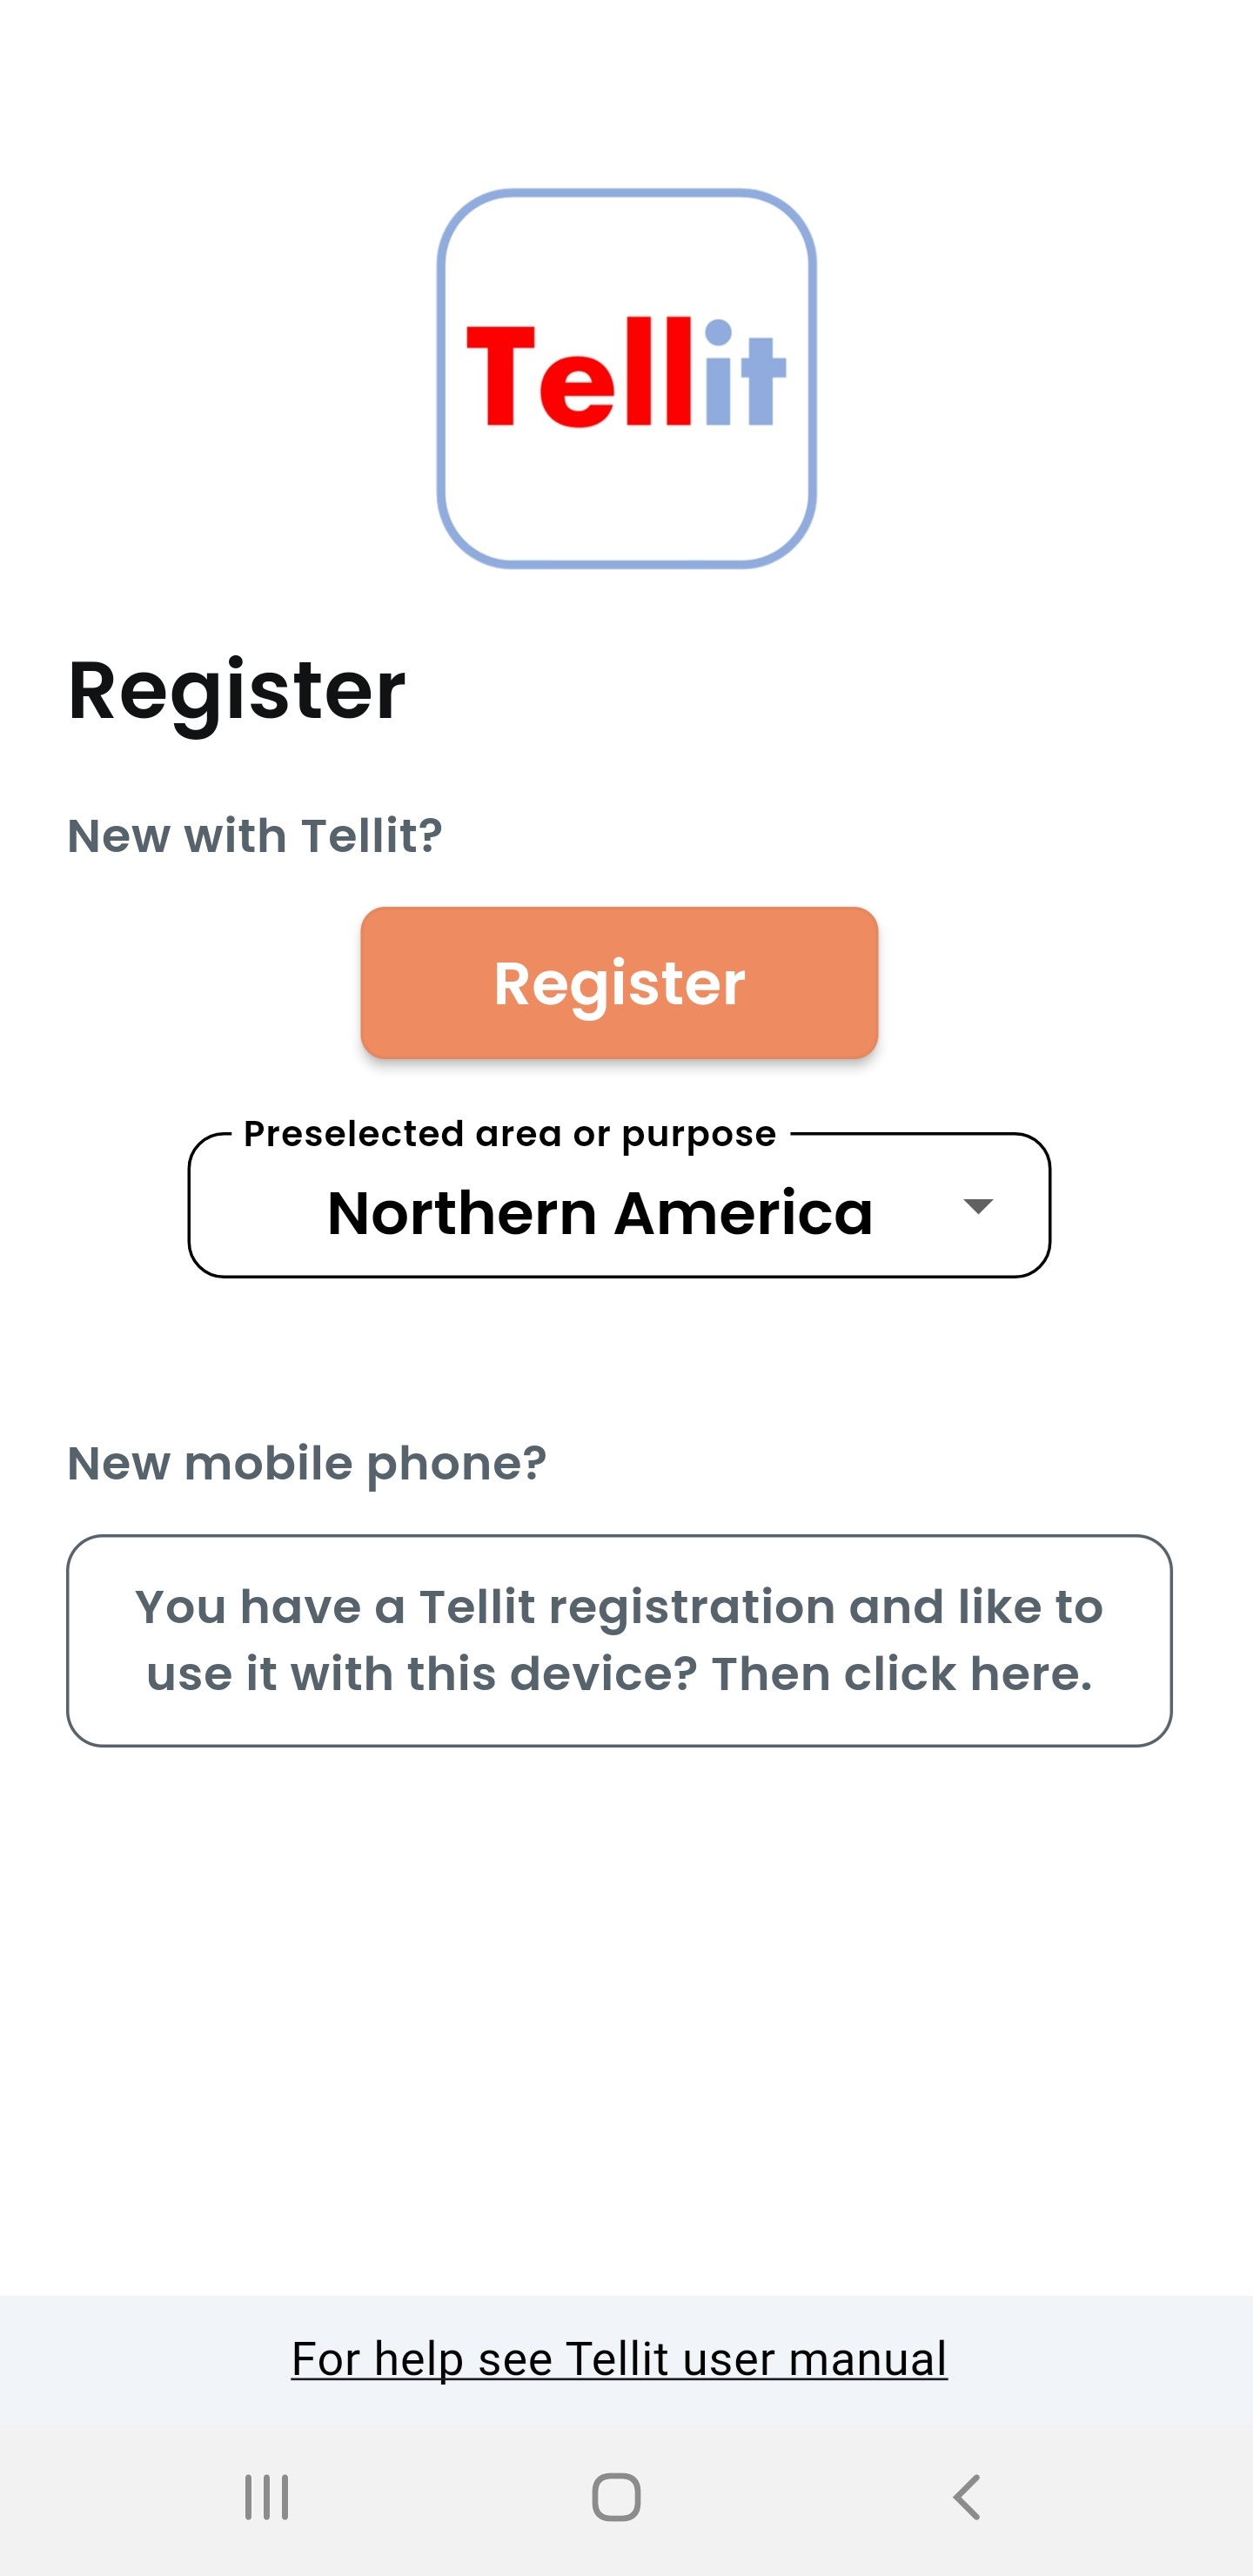
3. Registration (one-time)
To use Tellit please register first and connect to your entity / community.
Tellit displays the following screen to start the registration.
- Preselected area or pupose: It may be that there is a lower part which shows the respective area or a specific purpose. Normally the shown pre-selection fits and should not be changed. Only in rare cases and depending on the settings of your mobile phone the drop down menu allows to select the correct region. The different areas host different organization. I.e. you will find your organization only in the area where the organization belongs to. Accordingly the registration will be performed for the selected area only.
- New mobile phone: This is only relevant if you have a Tellit registration and you have changed your mobile phone. See a later chapter please.
- If you need any help the link at the end of the page normally directs to (this) user manual.
3.1 Register with Tellit
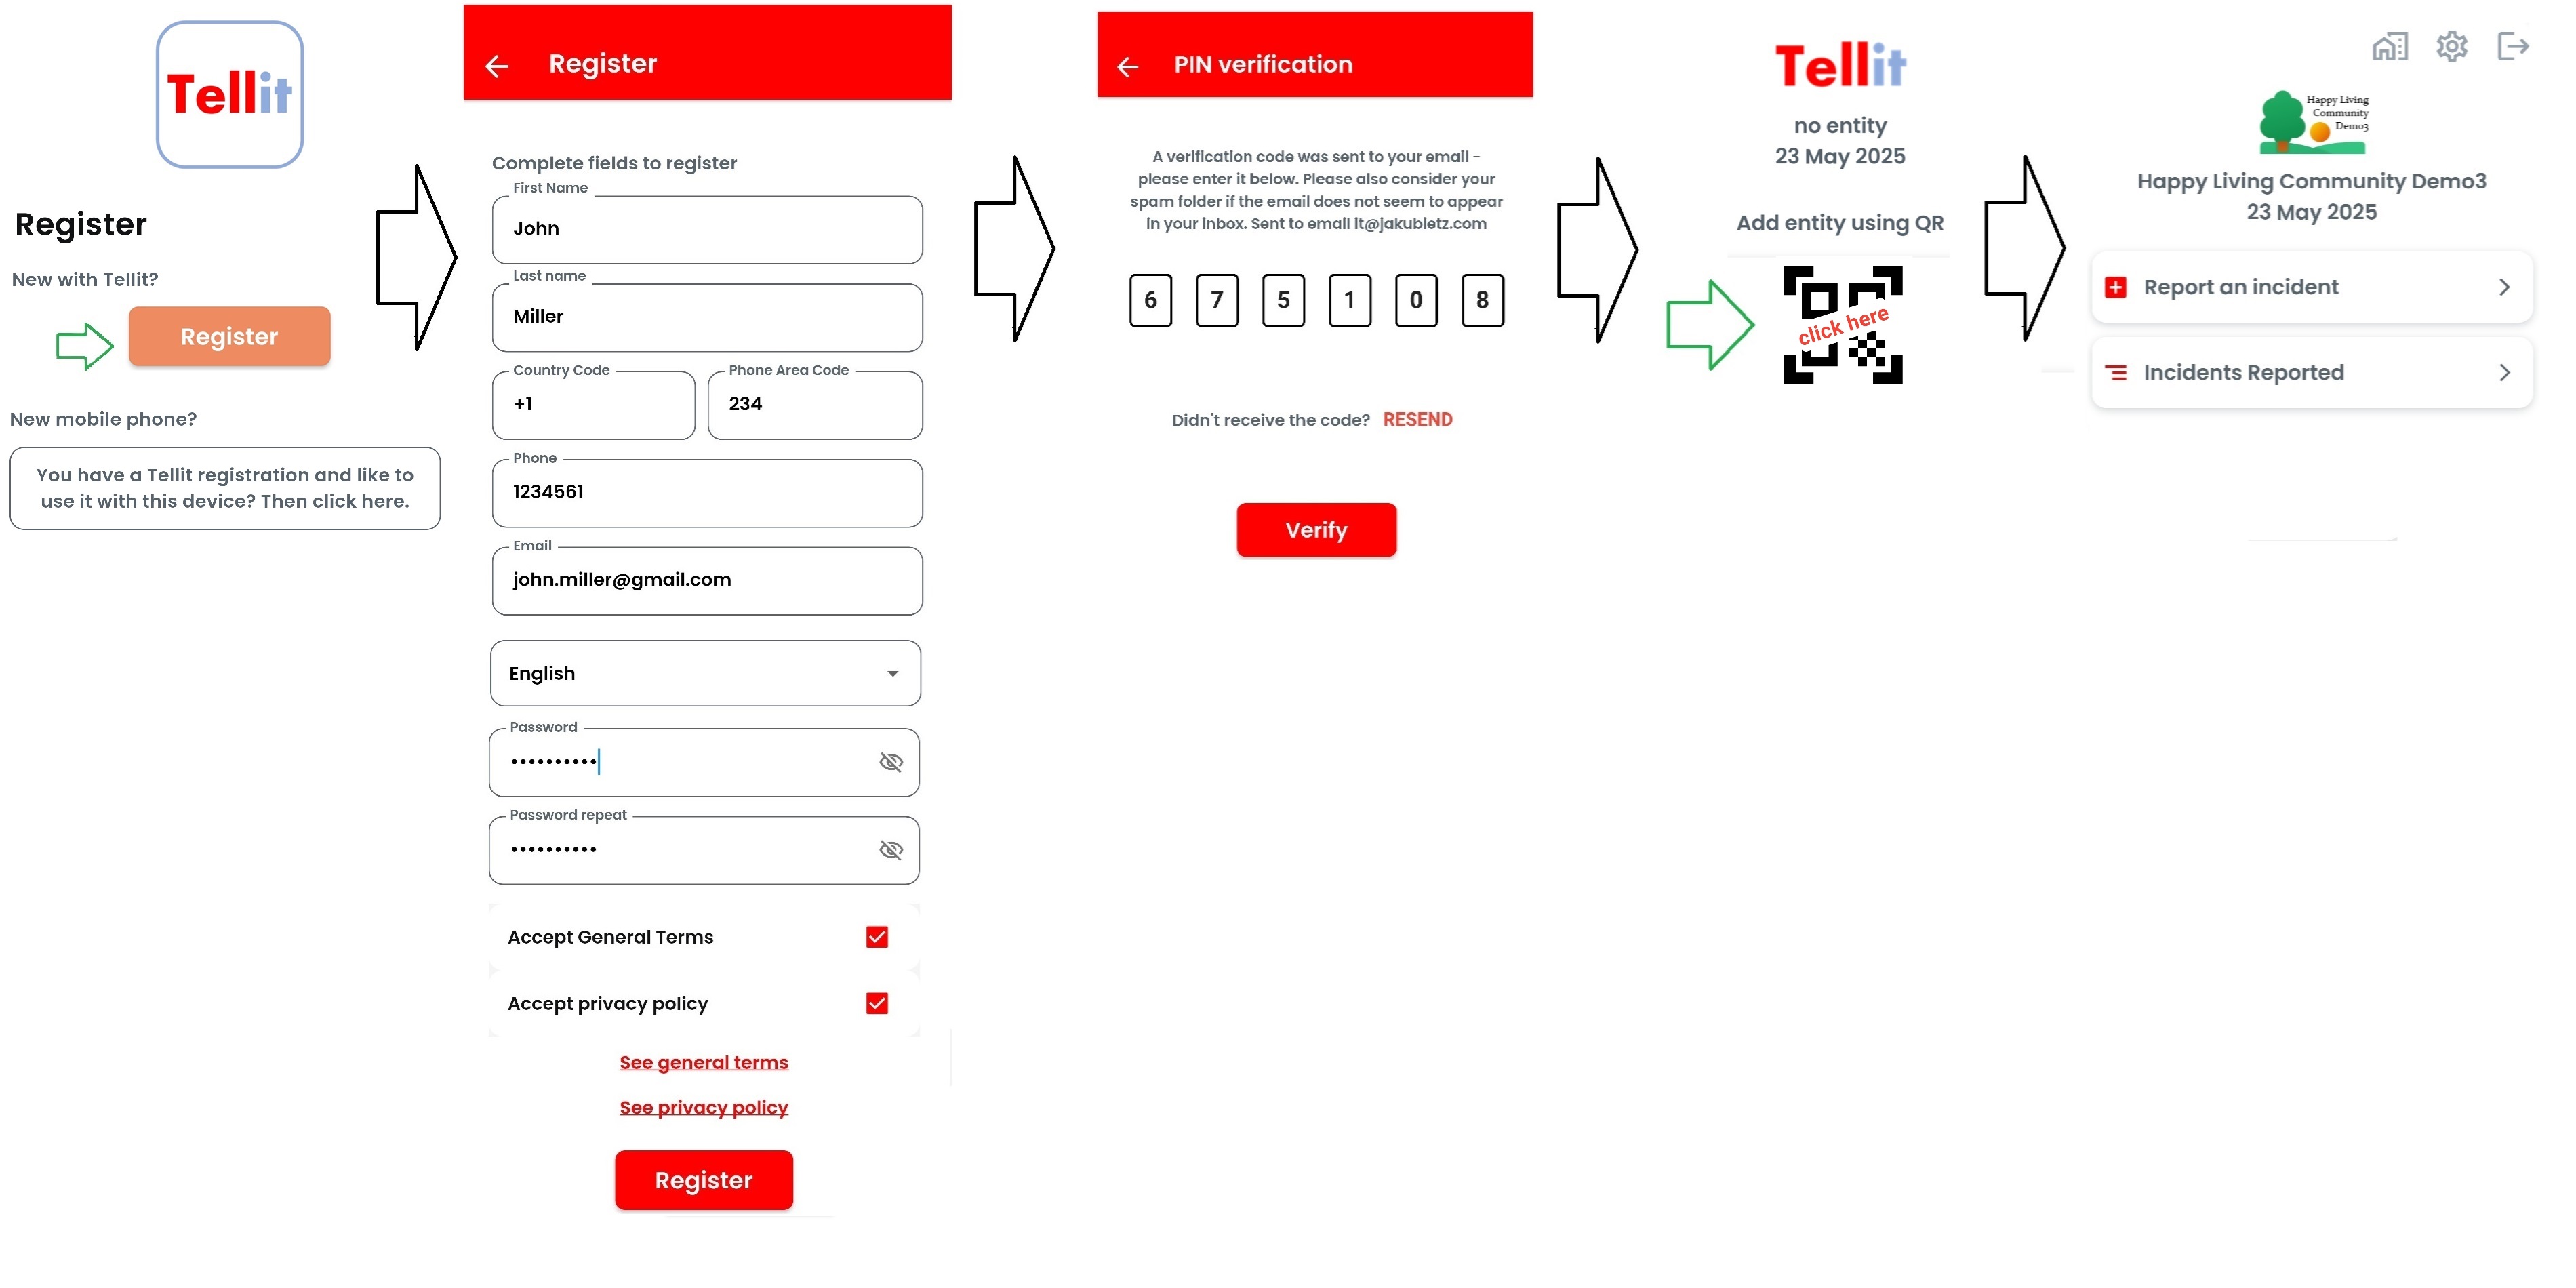
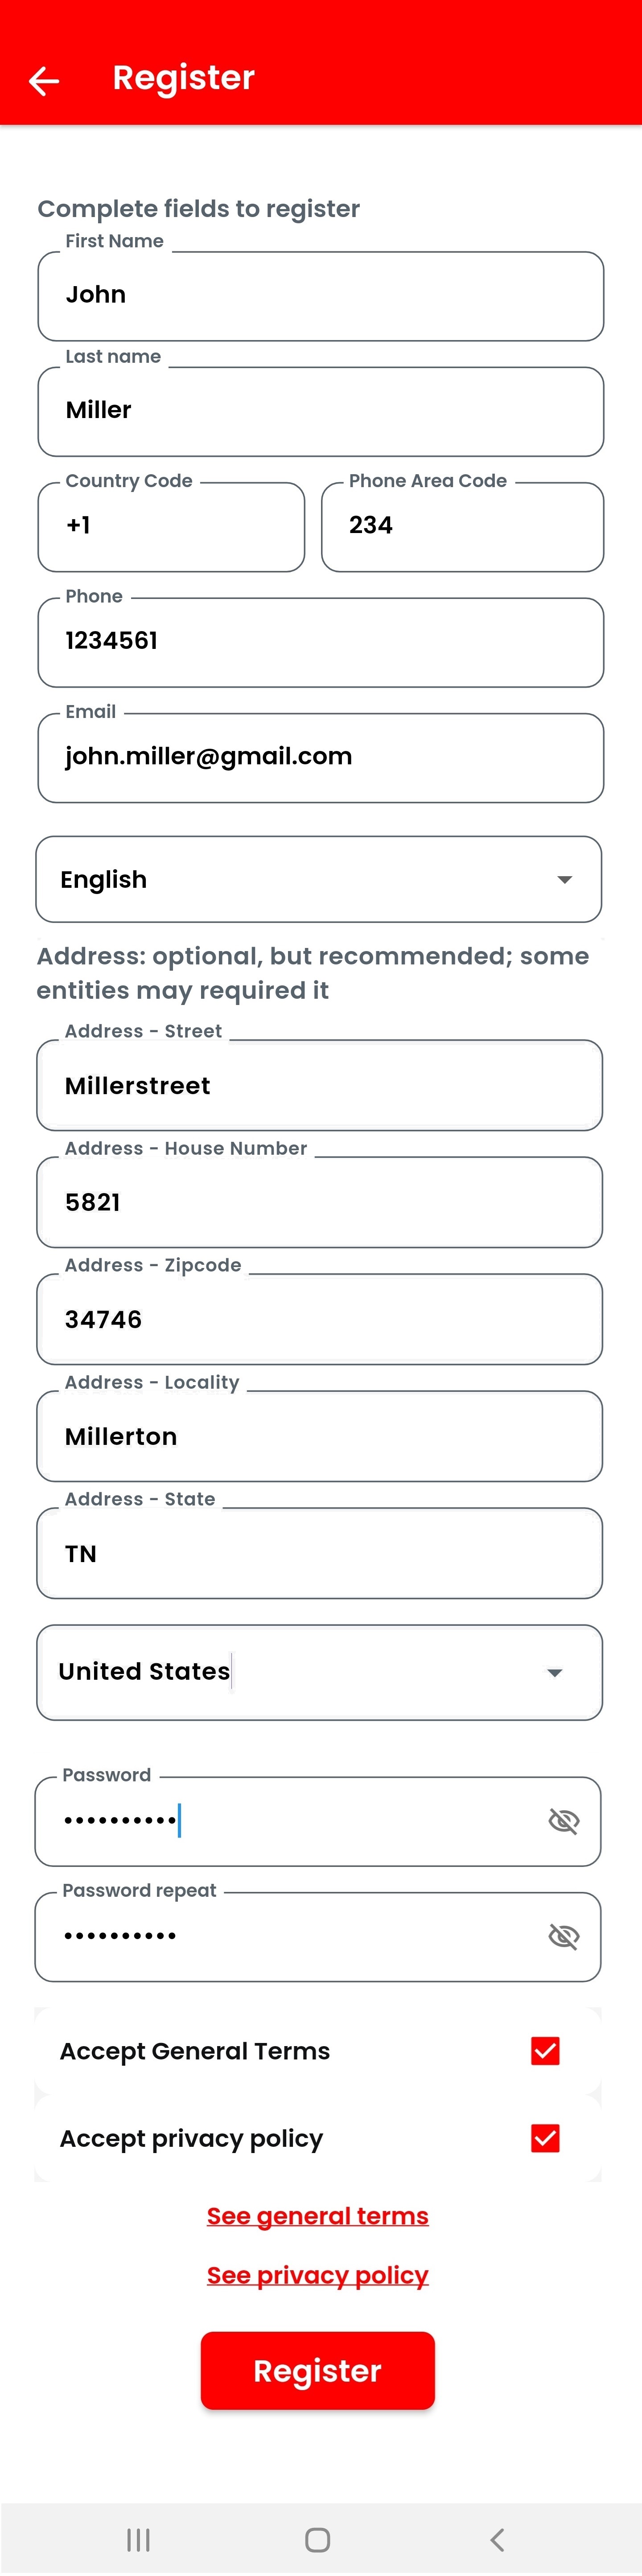
Click on "Register" to get the registration screen and fill the fields accordingly.
- The language will be pre-selected based on the setting of the mobile device and the languages Tellit is providing.
- The homeaddress, even if it is shown as optional, should be added because many organizations will require it in a later step. It helps to more quickly complete incidents if they are around your own home.
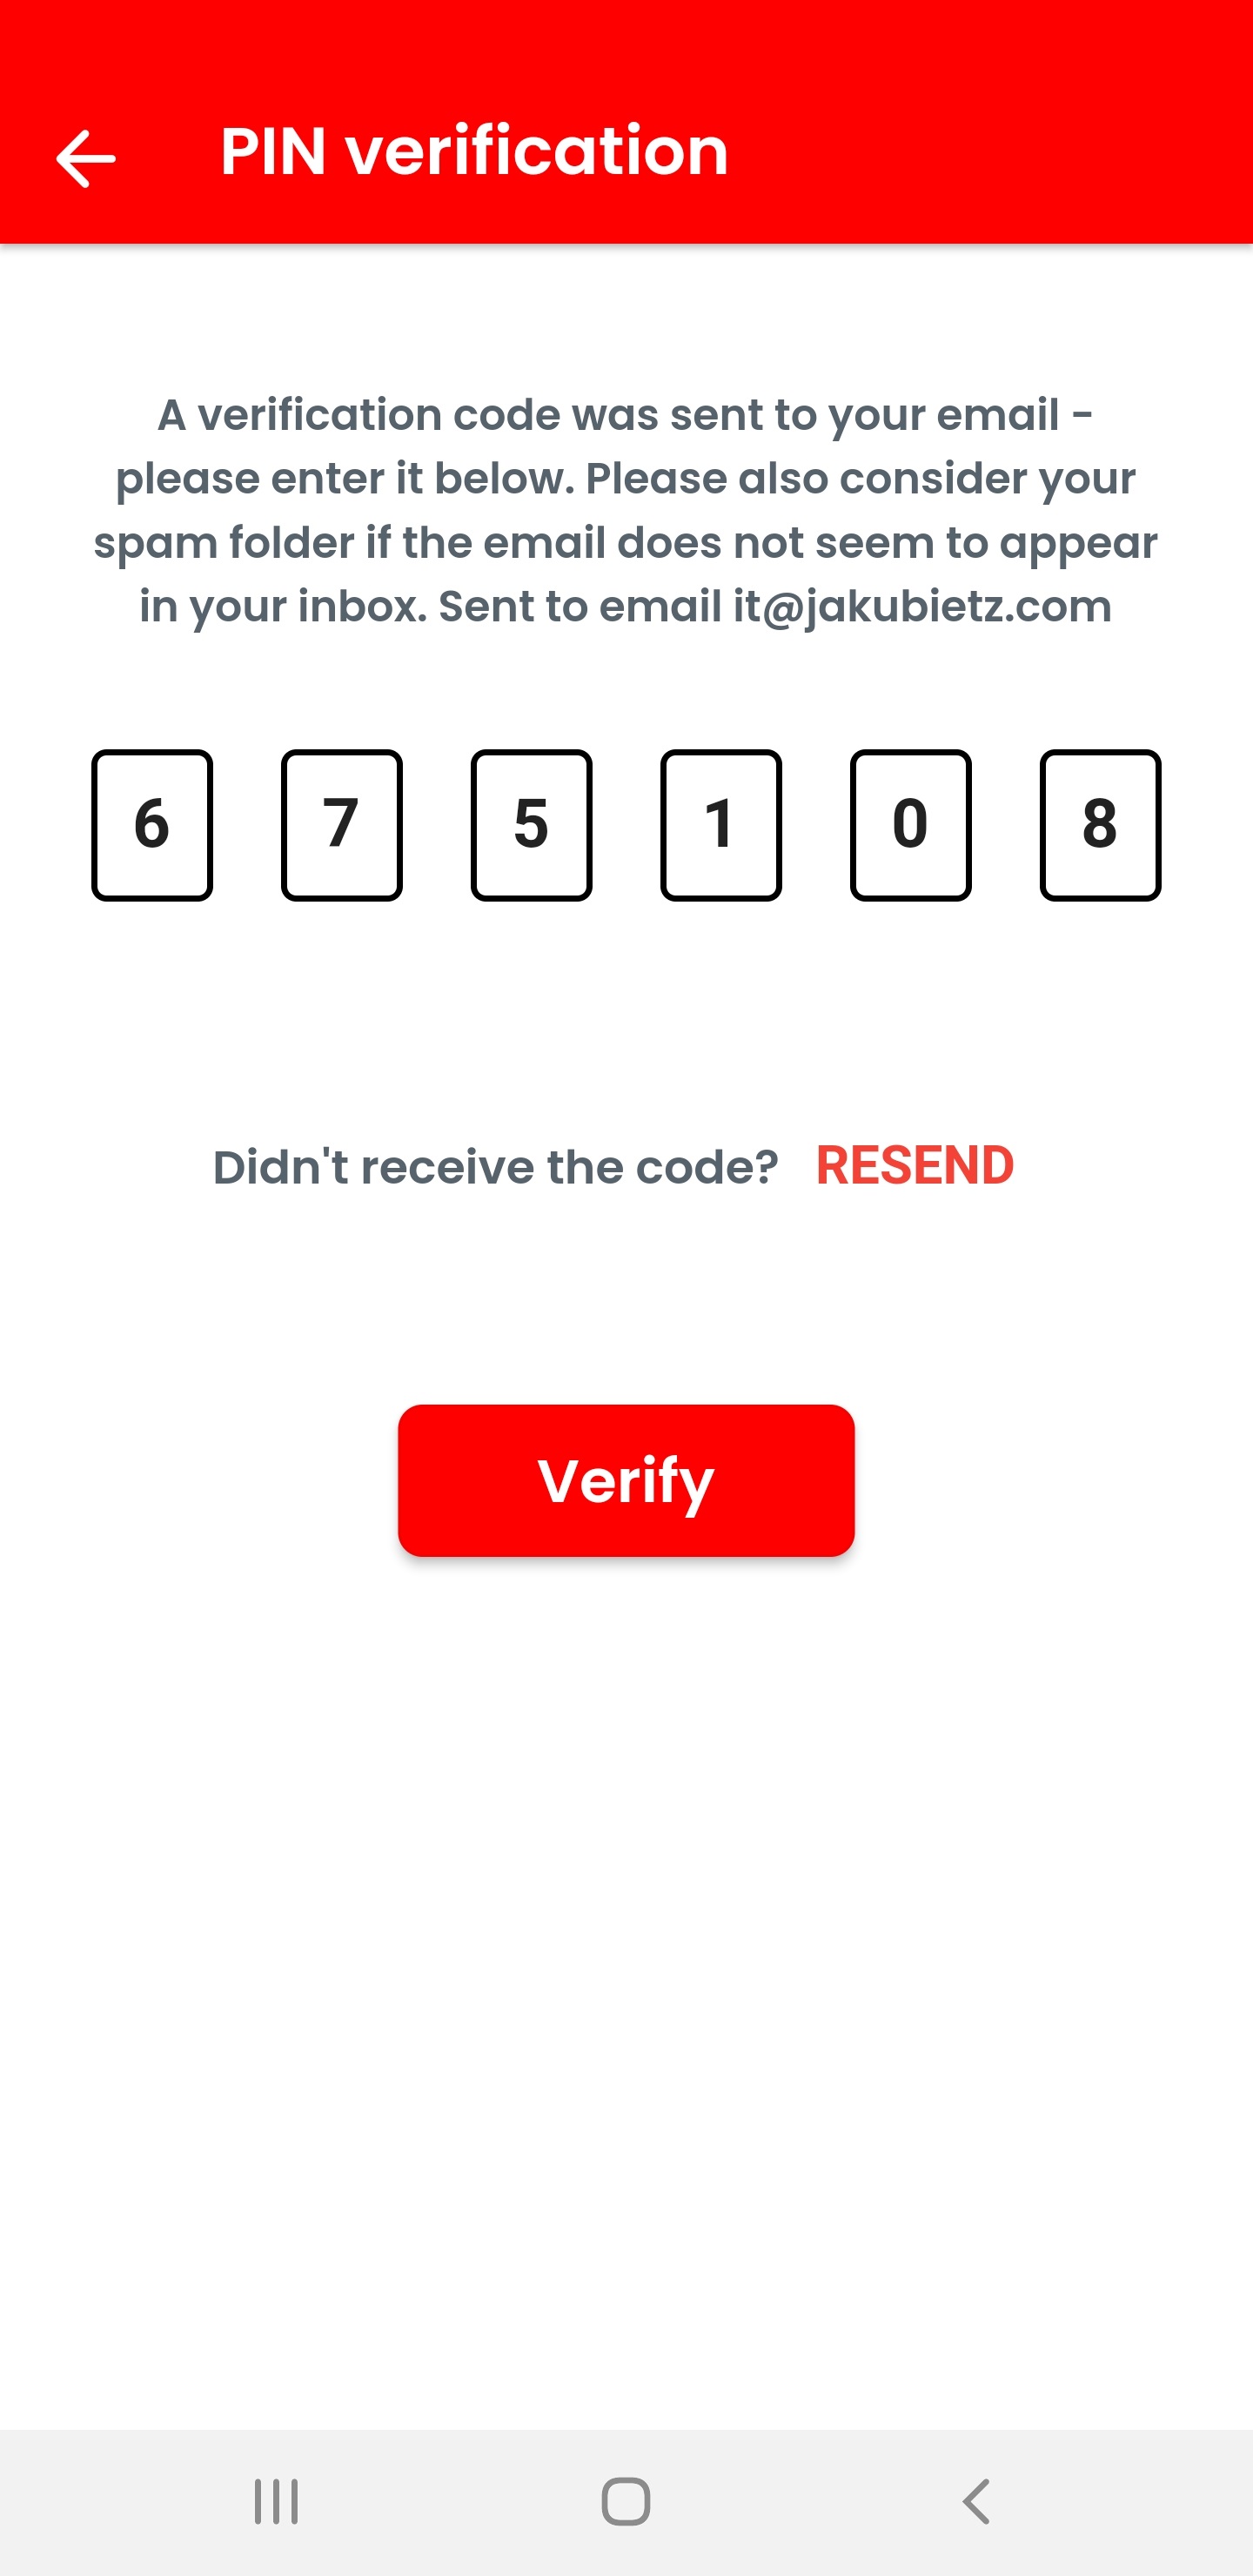
Click "Register" and look out for an email sent to you with a verification code. Check the spam folder please in case the email cannot be found:
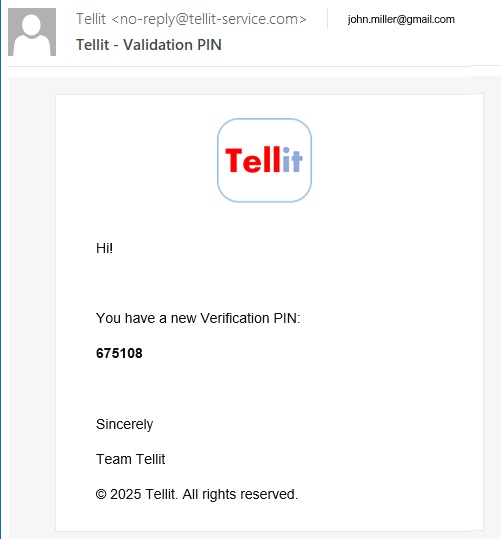
Enter the sent PIN code into the verification screen:
Clicking on continue completes the registration:

3.2 Login and connect to your entity (e.g. community)
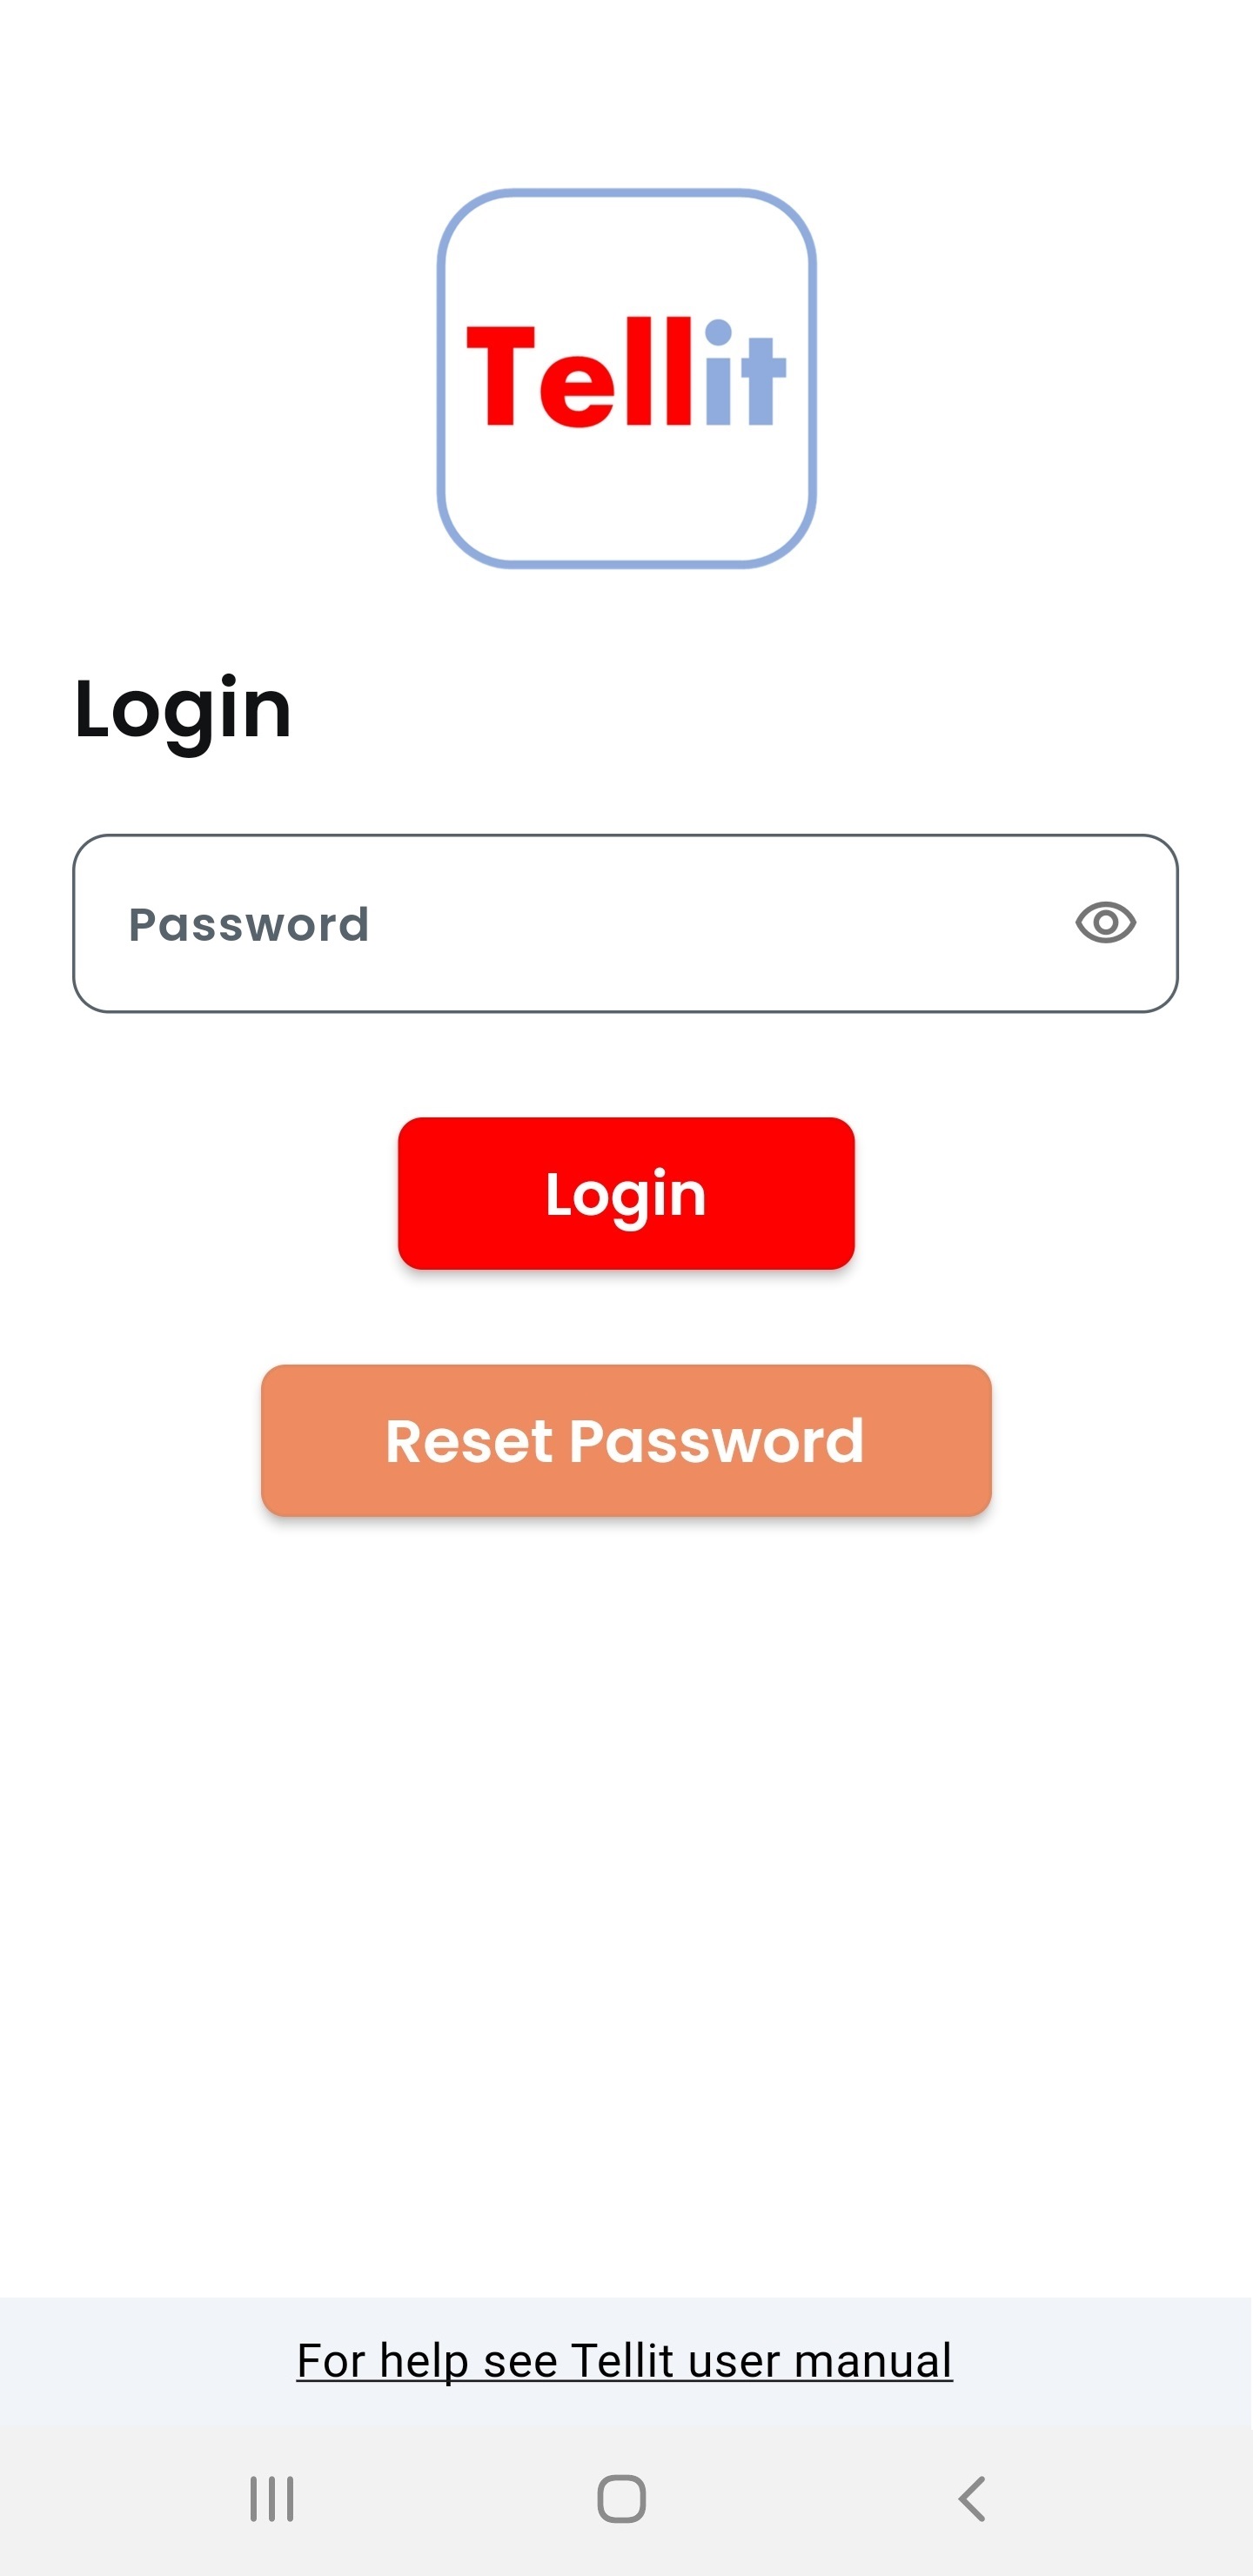
Please login with the password you selected:
The next screen indicates that there is no entity / community / organization connected yet.
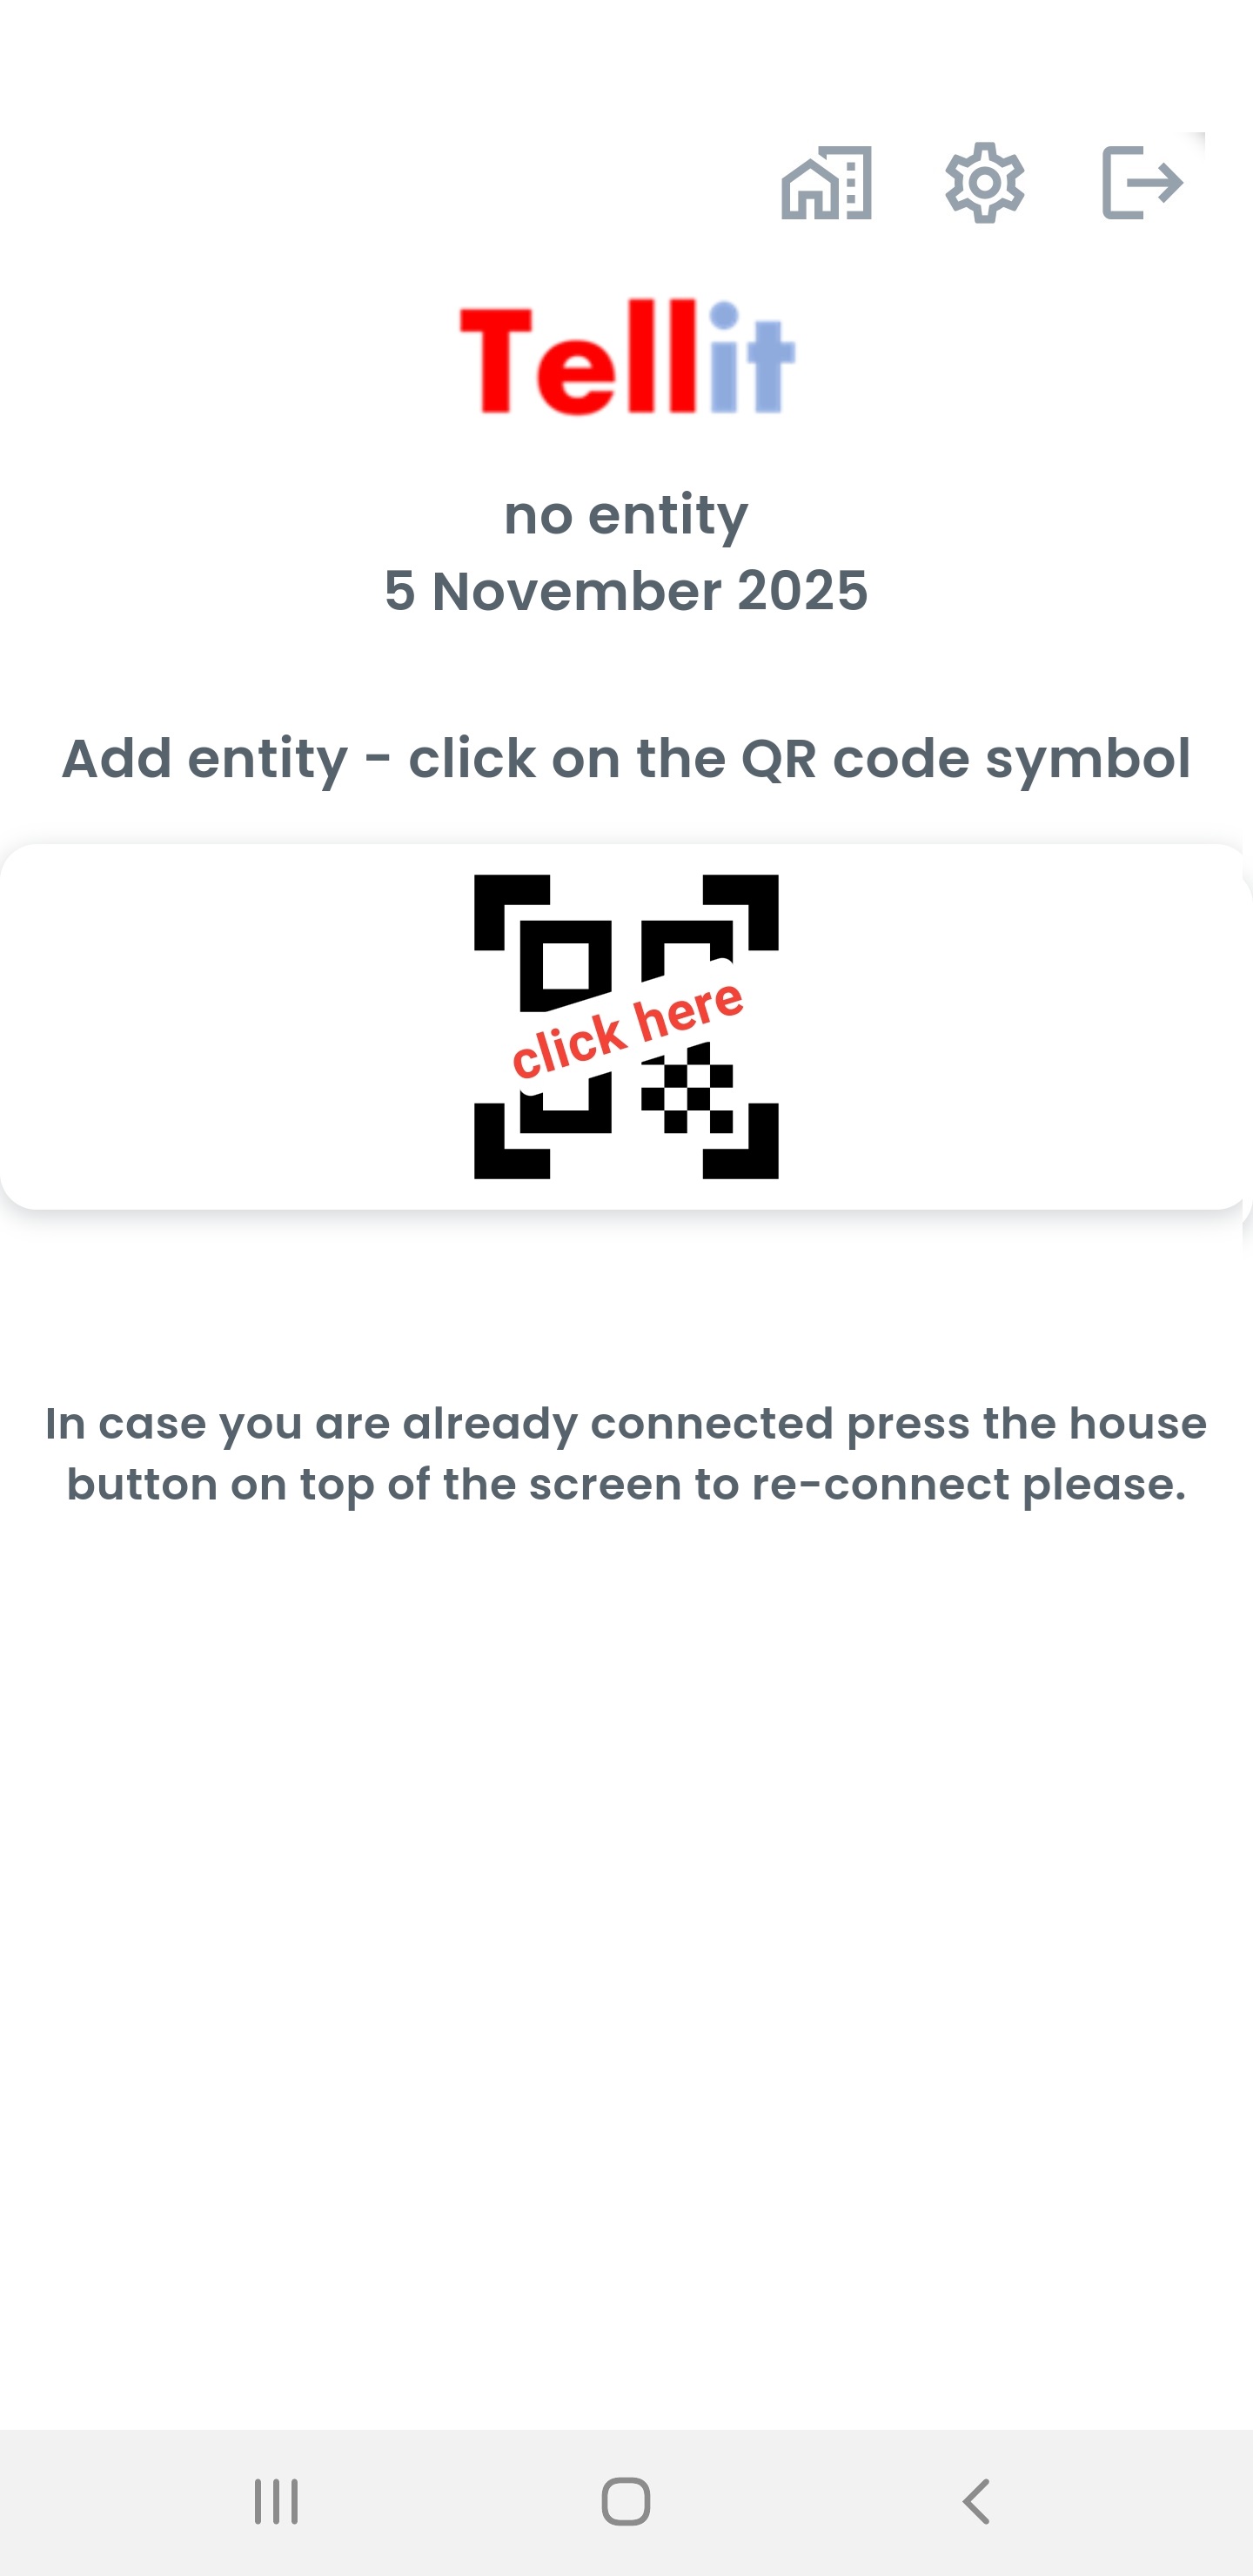
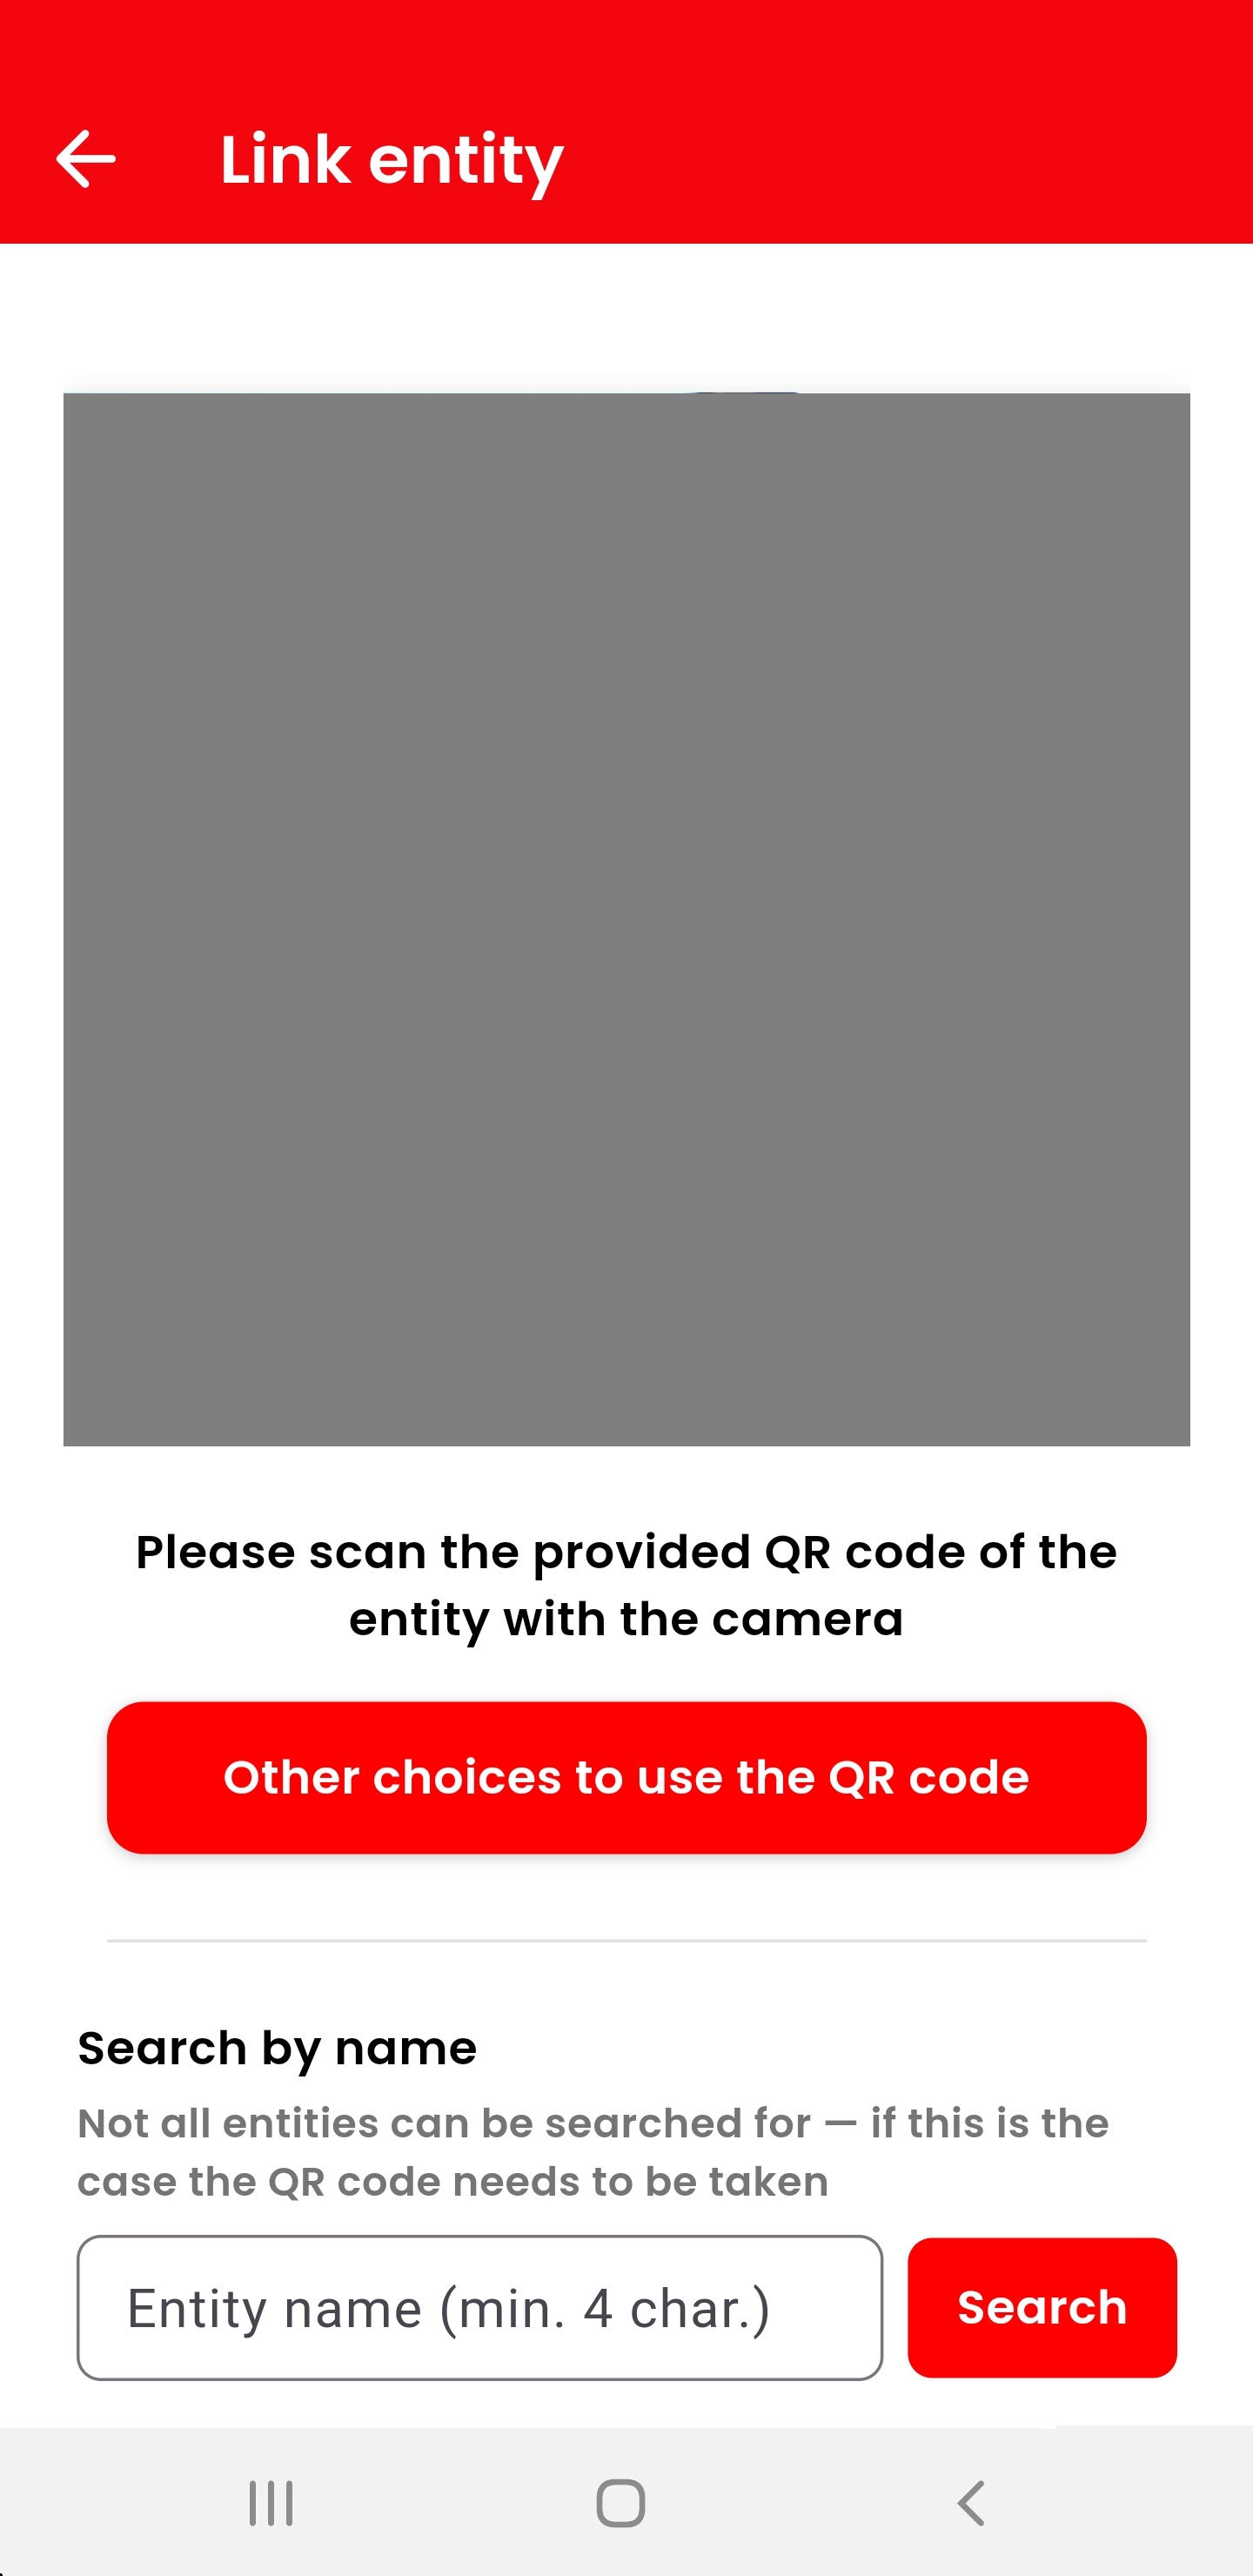
Clicking on the QR code symbol shows the active camera lense to scan a QR code and one or more alternatives to continue.
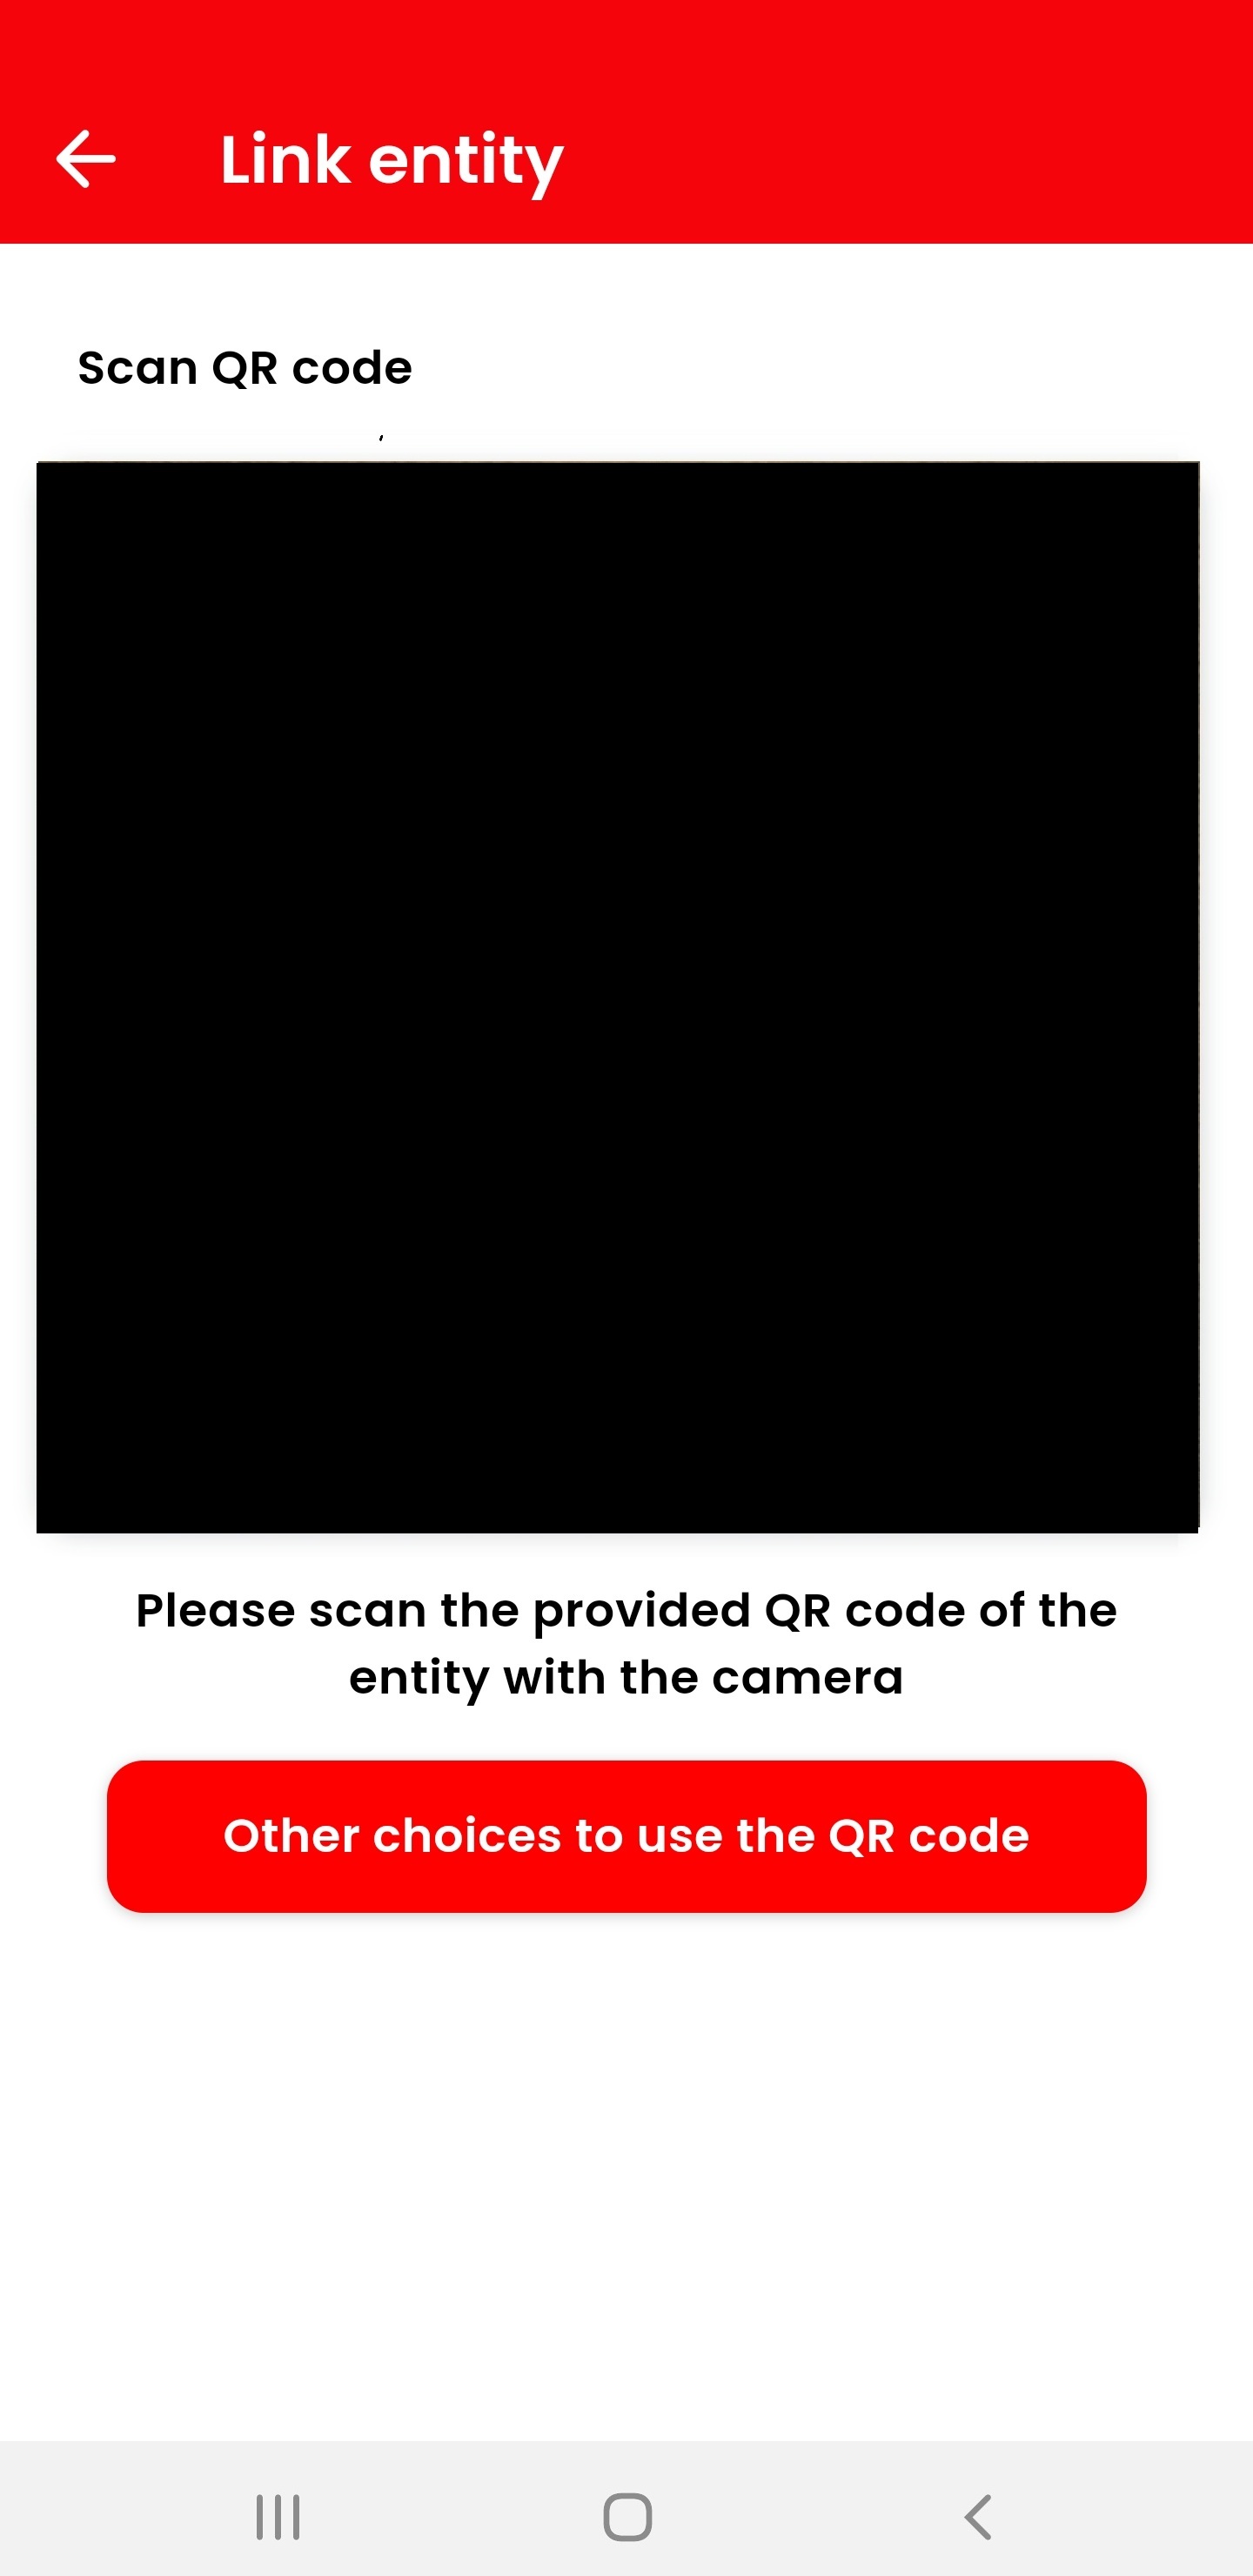
The following choices can be used to connect
- Scan a provided QR code with the camera from another source like a flyer, the web page etc. The easiest way!
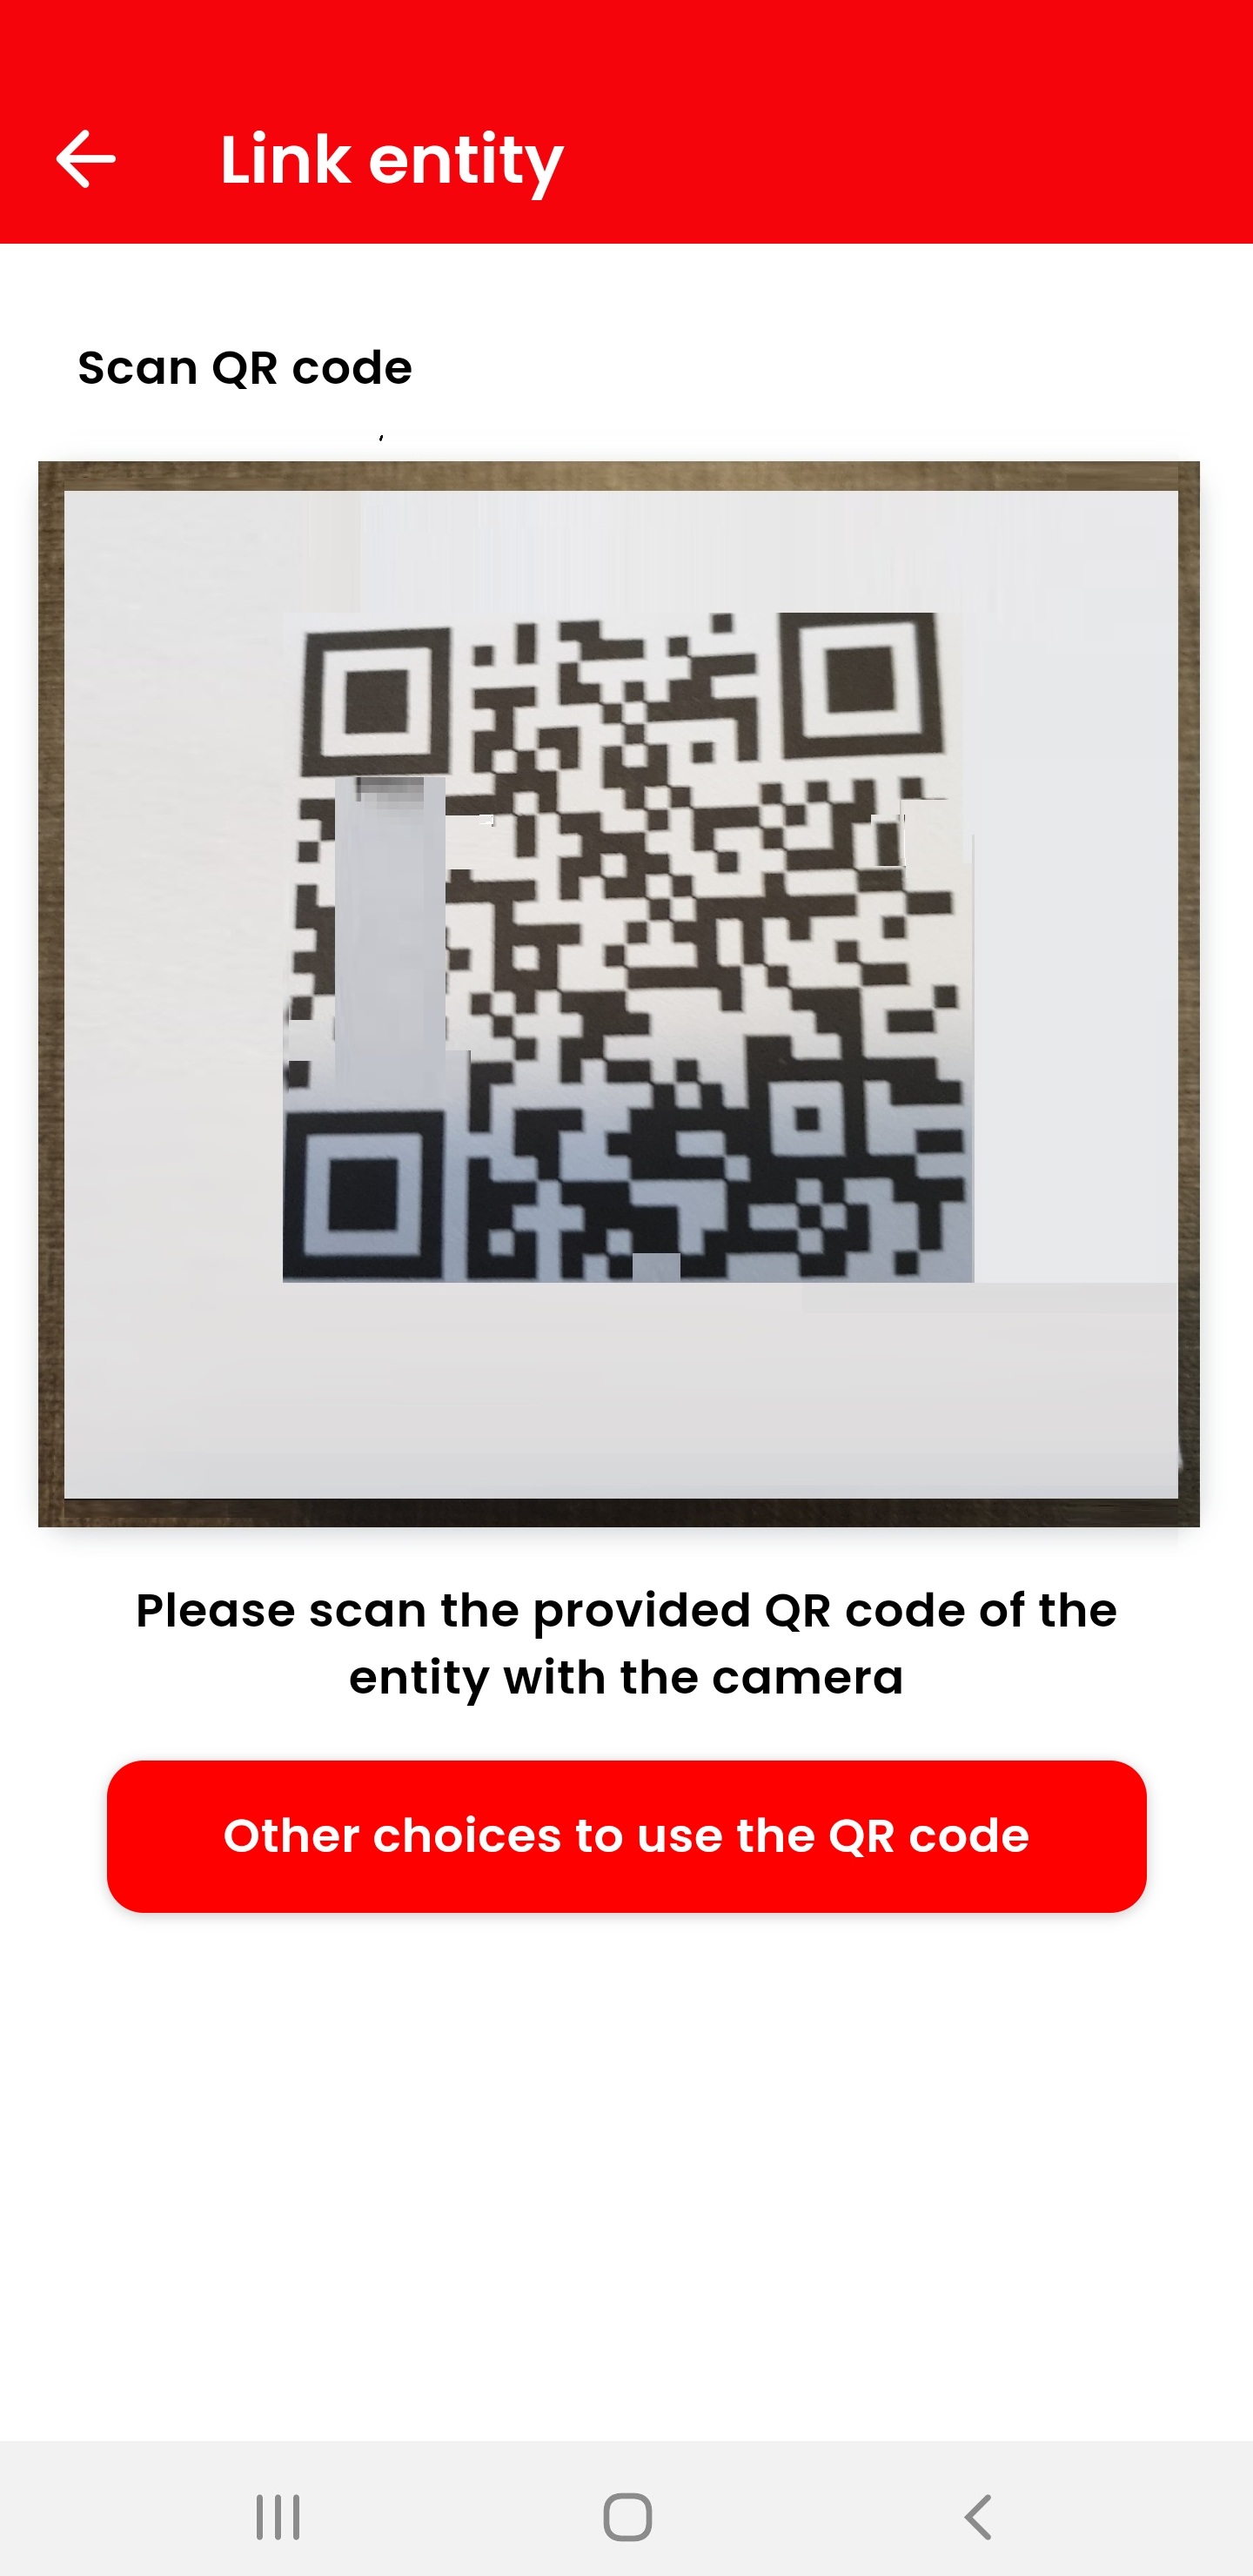
If the scanned code is known it will show the respective entity/organization instantly.
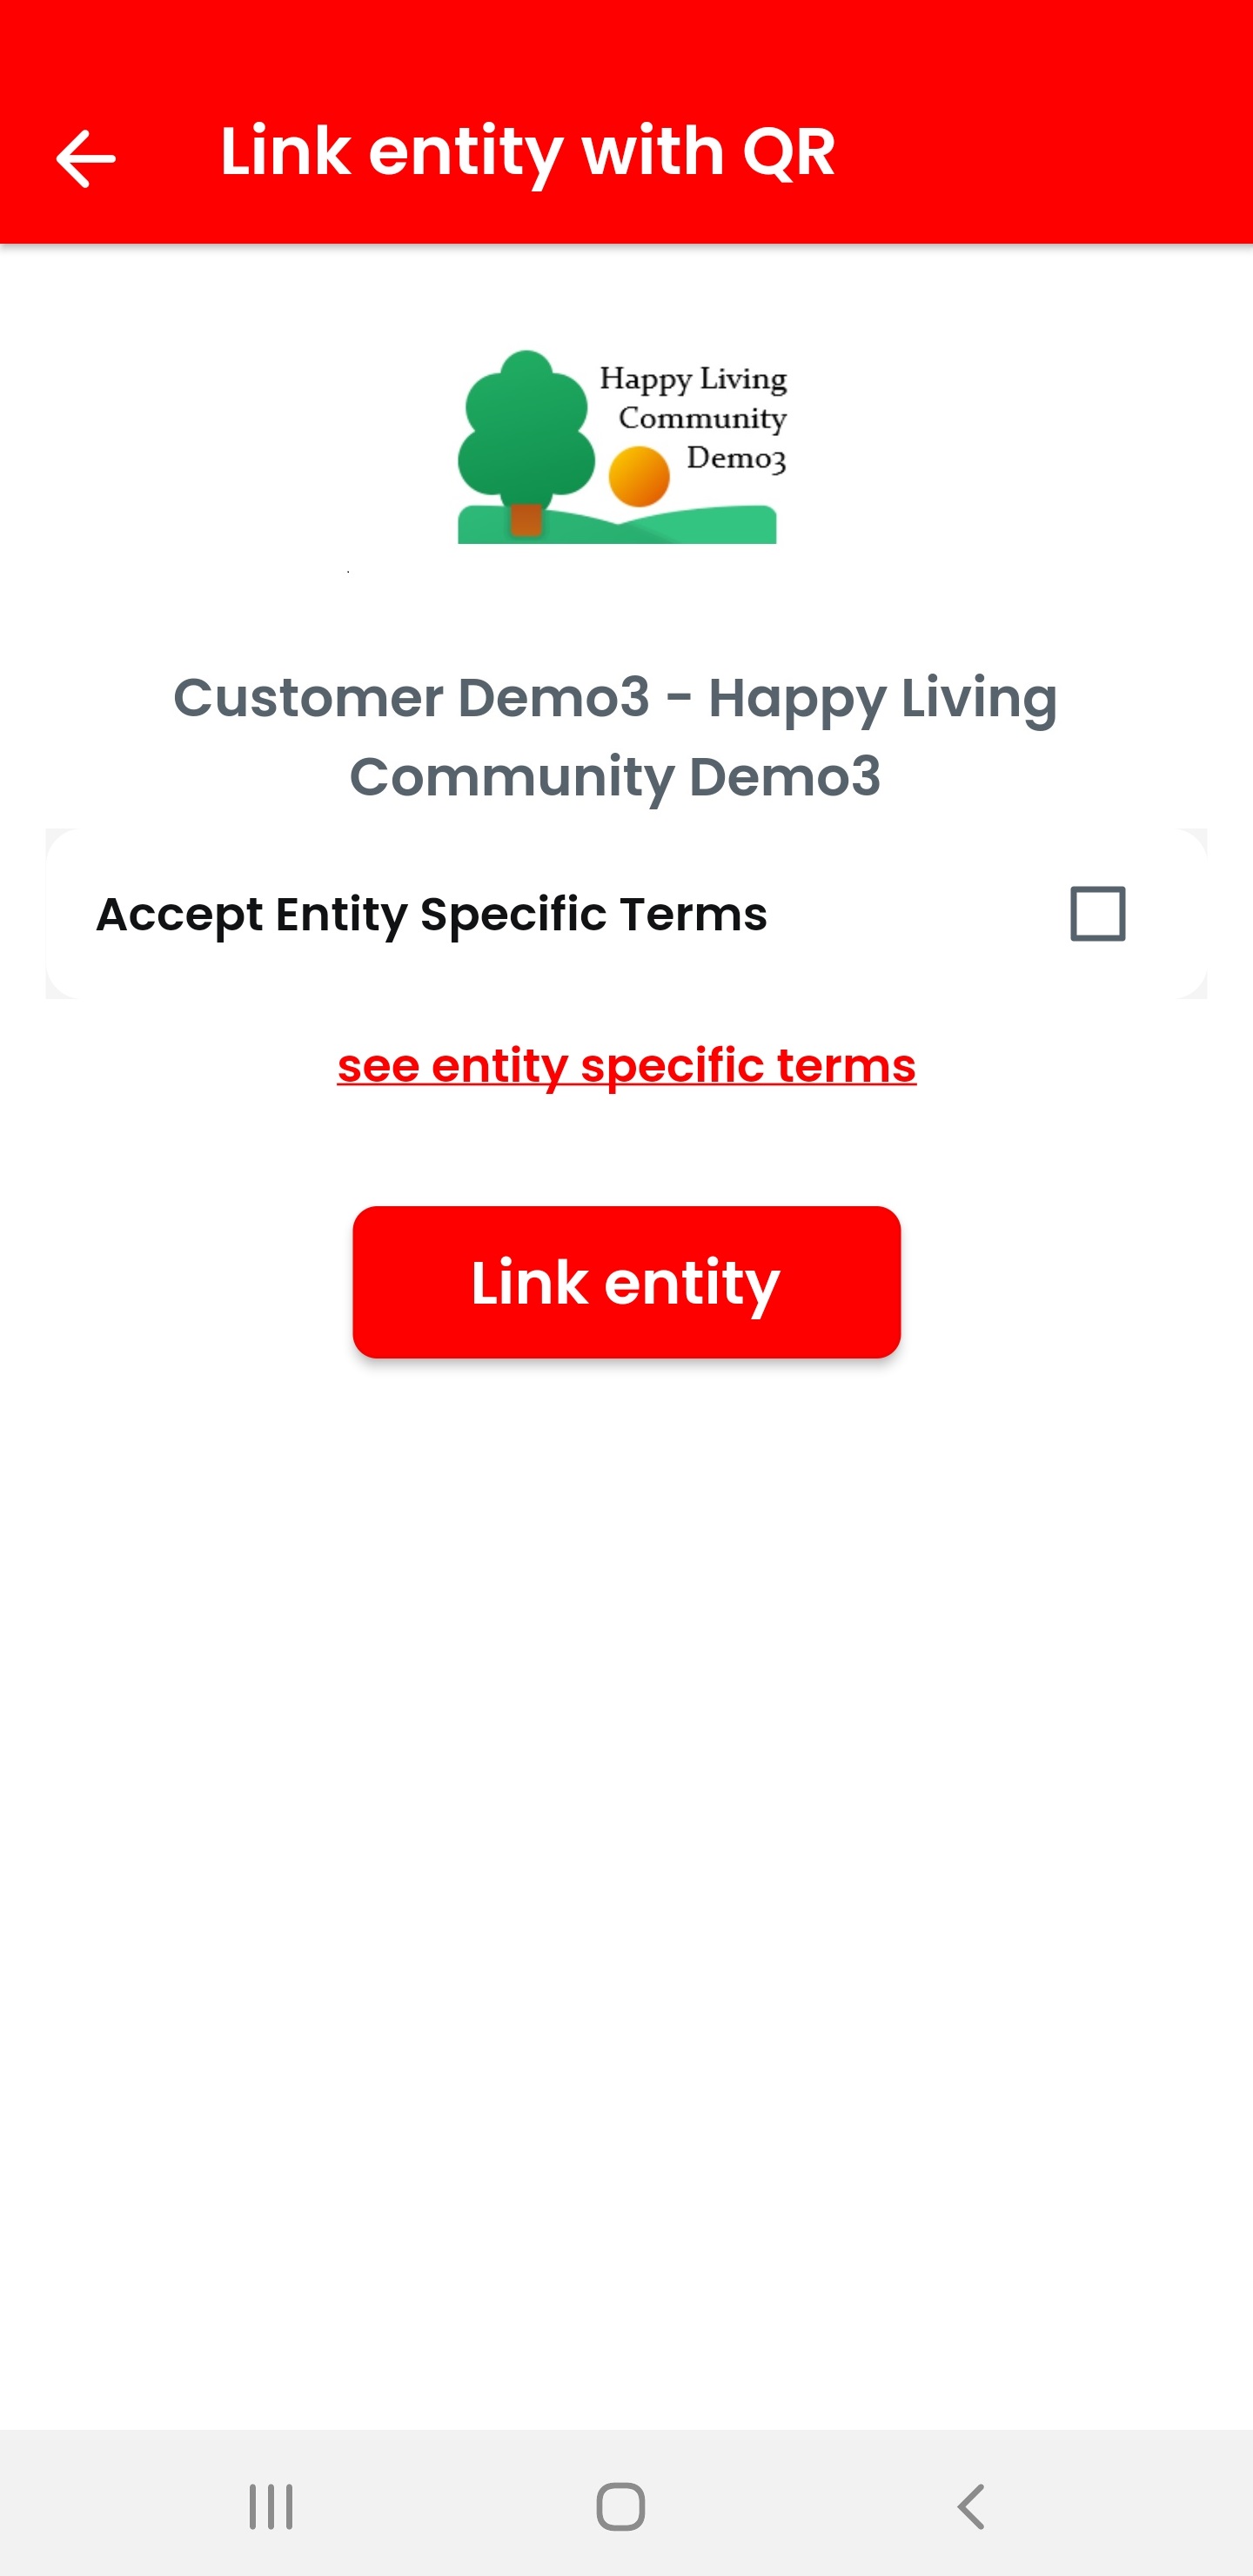
It is not unlikely that the selected community has own T&Cs with privacy rules to be accepted - and in some cases and for higher security the community / organization may ask you to enter a password, which you should get from your organization:
After clicking on "Link entity" you will be connected (you may be greeted by an optional welcome message):
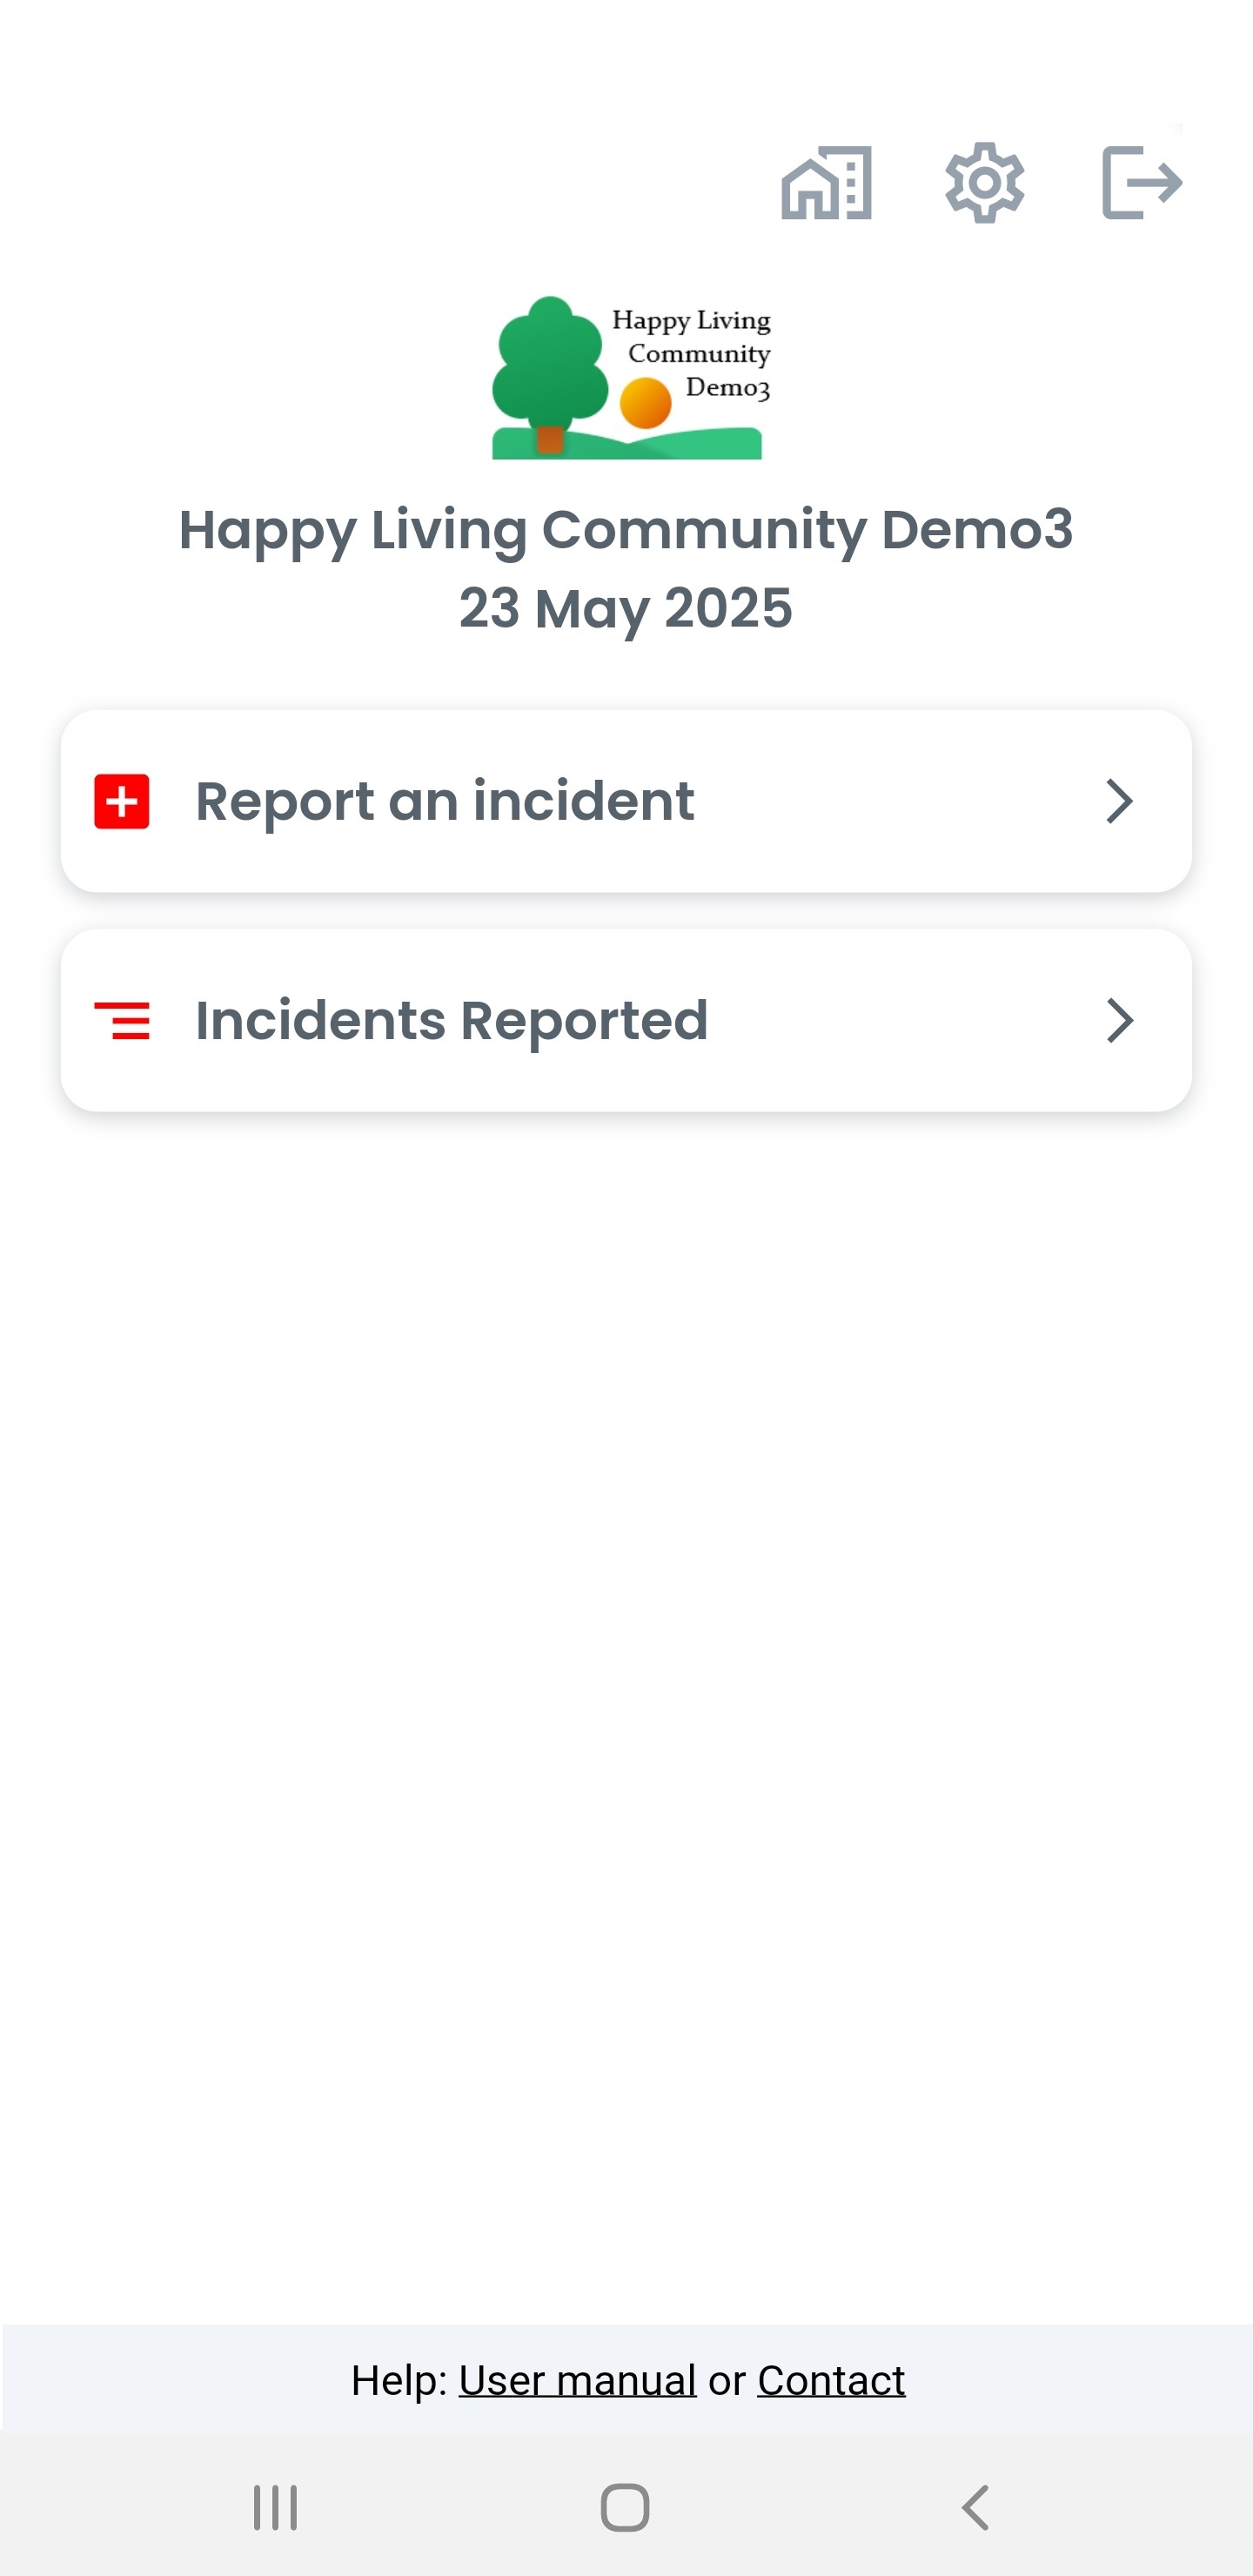
Note that at the end of the page you will, again, find a link to the user manual or to an individual page of your organization and/or a contact. Clicking on the latter will open an email in your standard email client with pre-set "to"-address and subject. Please describe your issue as good as possible.
You are ready to use Tellit! - Scan a provided QR code from a screenshot. Needed if you have the QR code on the same mobile device, e.g. received by email.
Please make sure to save the QR code as a screenhot first
Press the red button under the camera's lense for "Other choices to use the QR code".
Now click on "Scan QR code from screenshot".

Select the screenshot with the QR code from your photo library - depending on your device these screens look differently. If the scanned QR code it is known it will show the entity.
Continue as above.
- Manually enter the text of the QR code in case scanning the QR code fails.
Press the red button under the camera's lense for "Other choices to use the QR code".
Now click on "Key in QR code as text"
Enter the text of the QR code accordingly. If the text is not known but the QR code is available a QR code reader is needed to retrieve the text
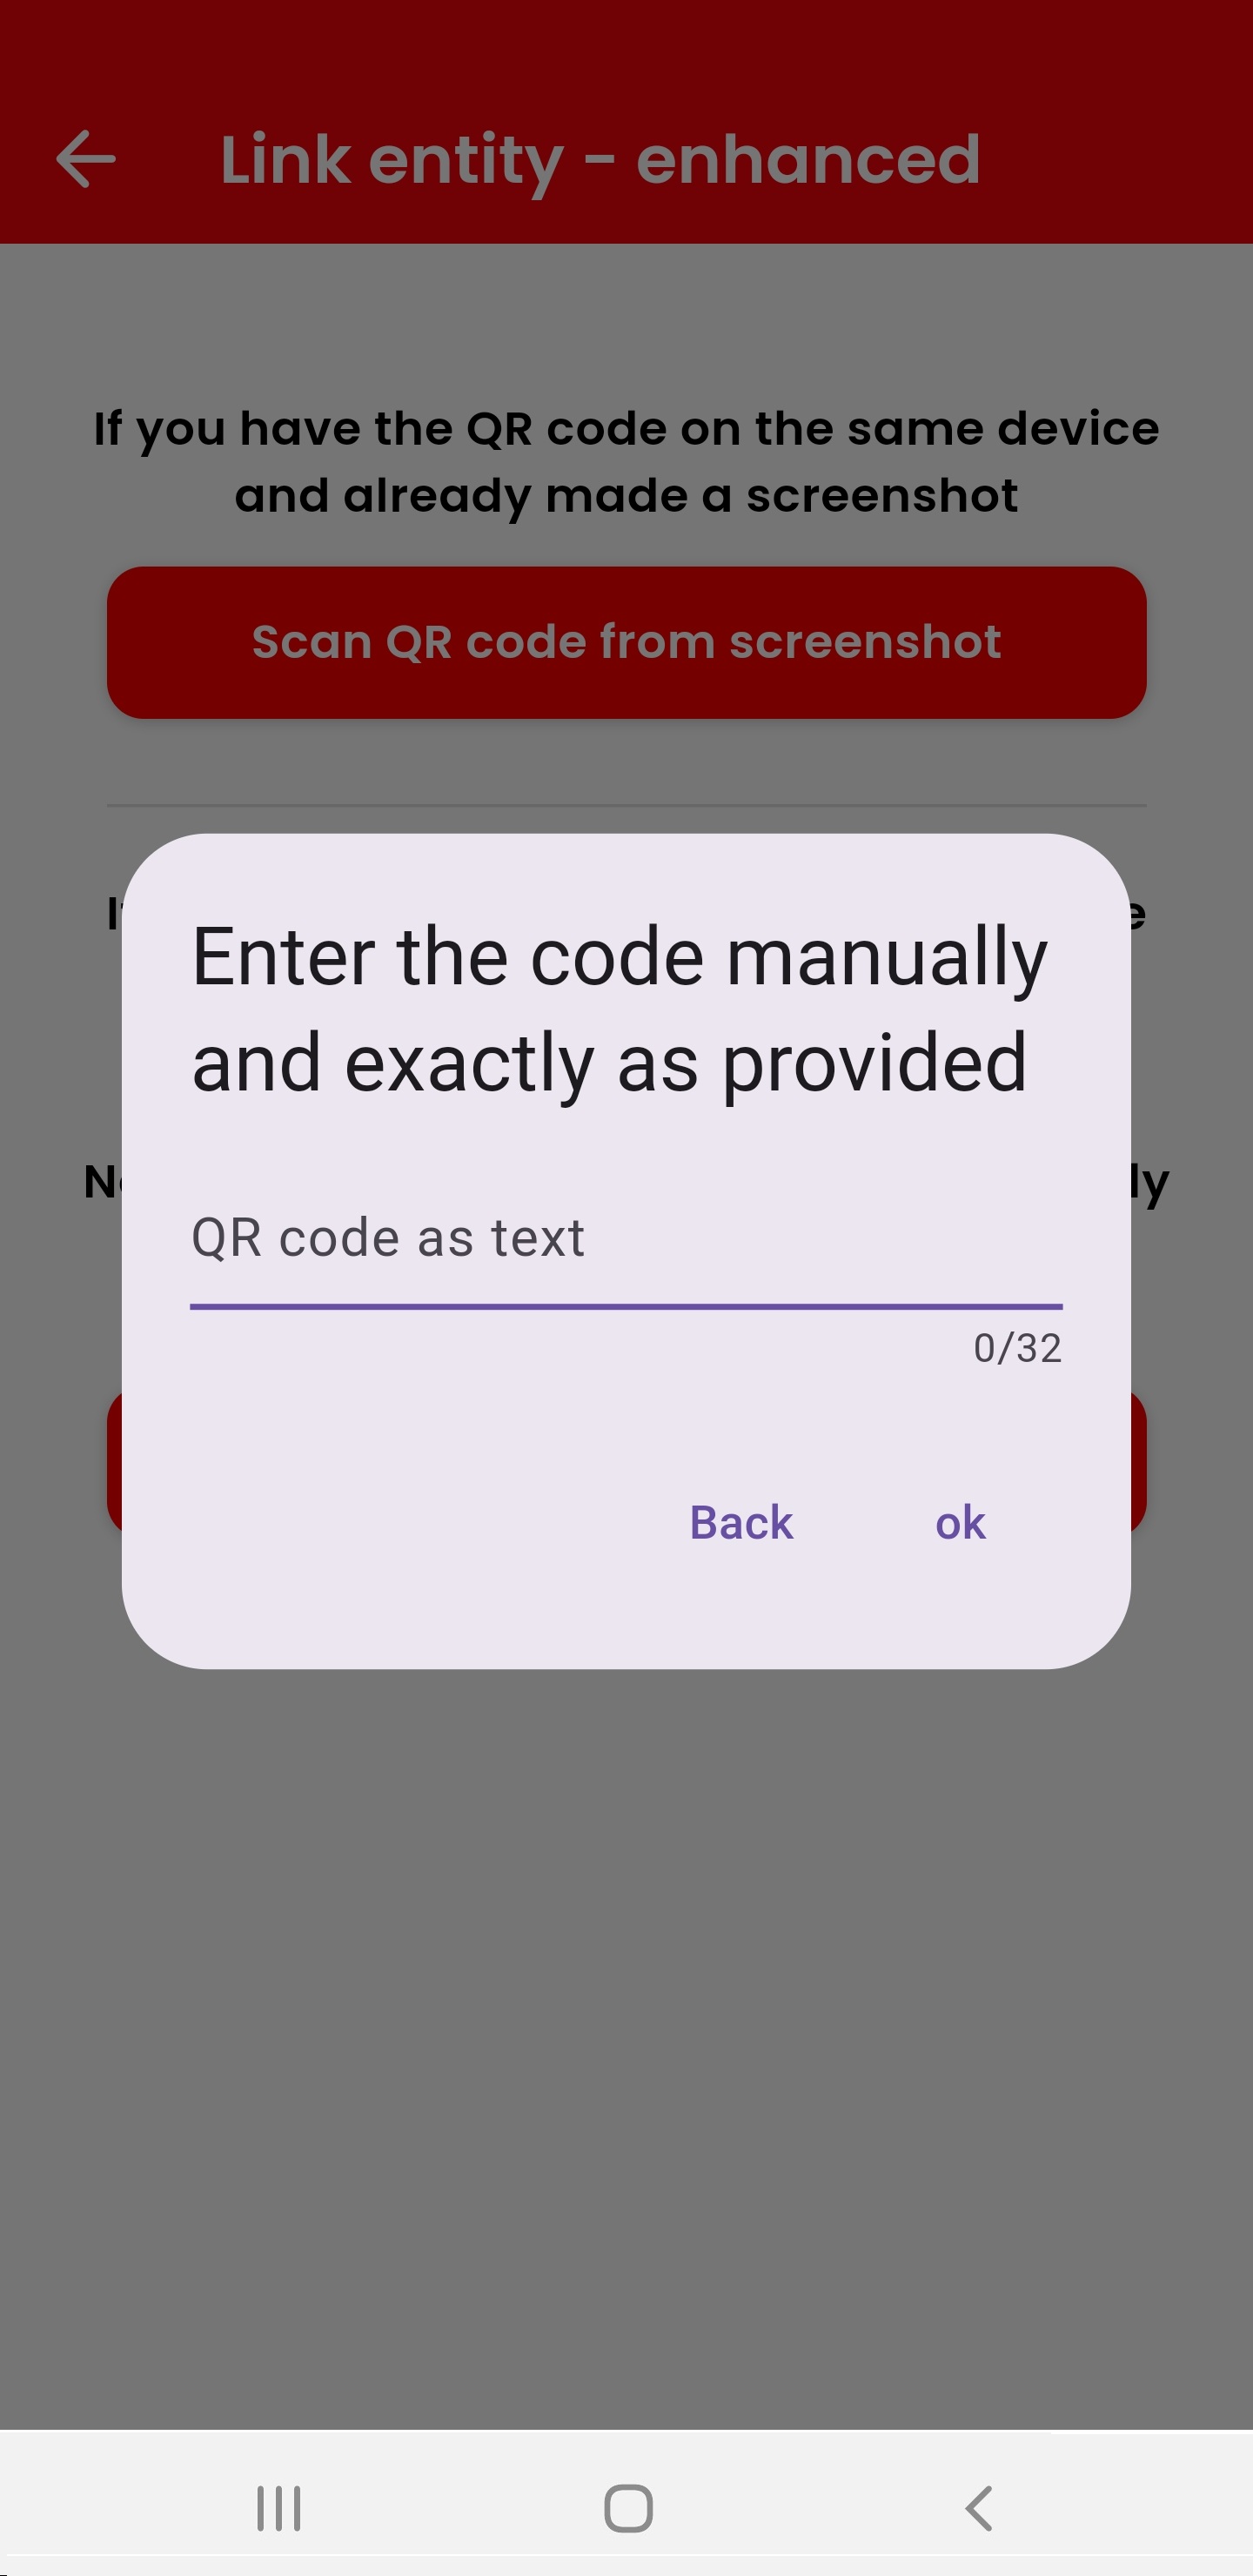
Note that the text must be keyed in exactly as retrieved! With dashes (if present), case sentivity, etc.
If the keyed in code is known it will show the entity.
Continue as above.
- If entities can be found by searching for it the "Search by name" field appears below the QR code search.
Try to find the entity by keying in the name of the entity with a minimum of 4 characters and pressing the "Search" button.
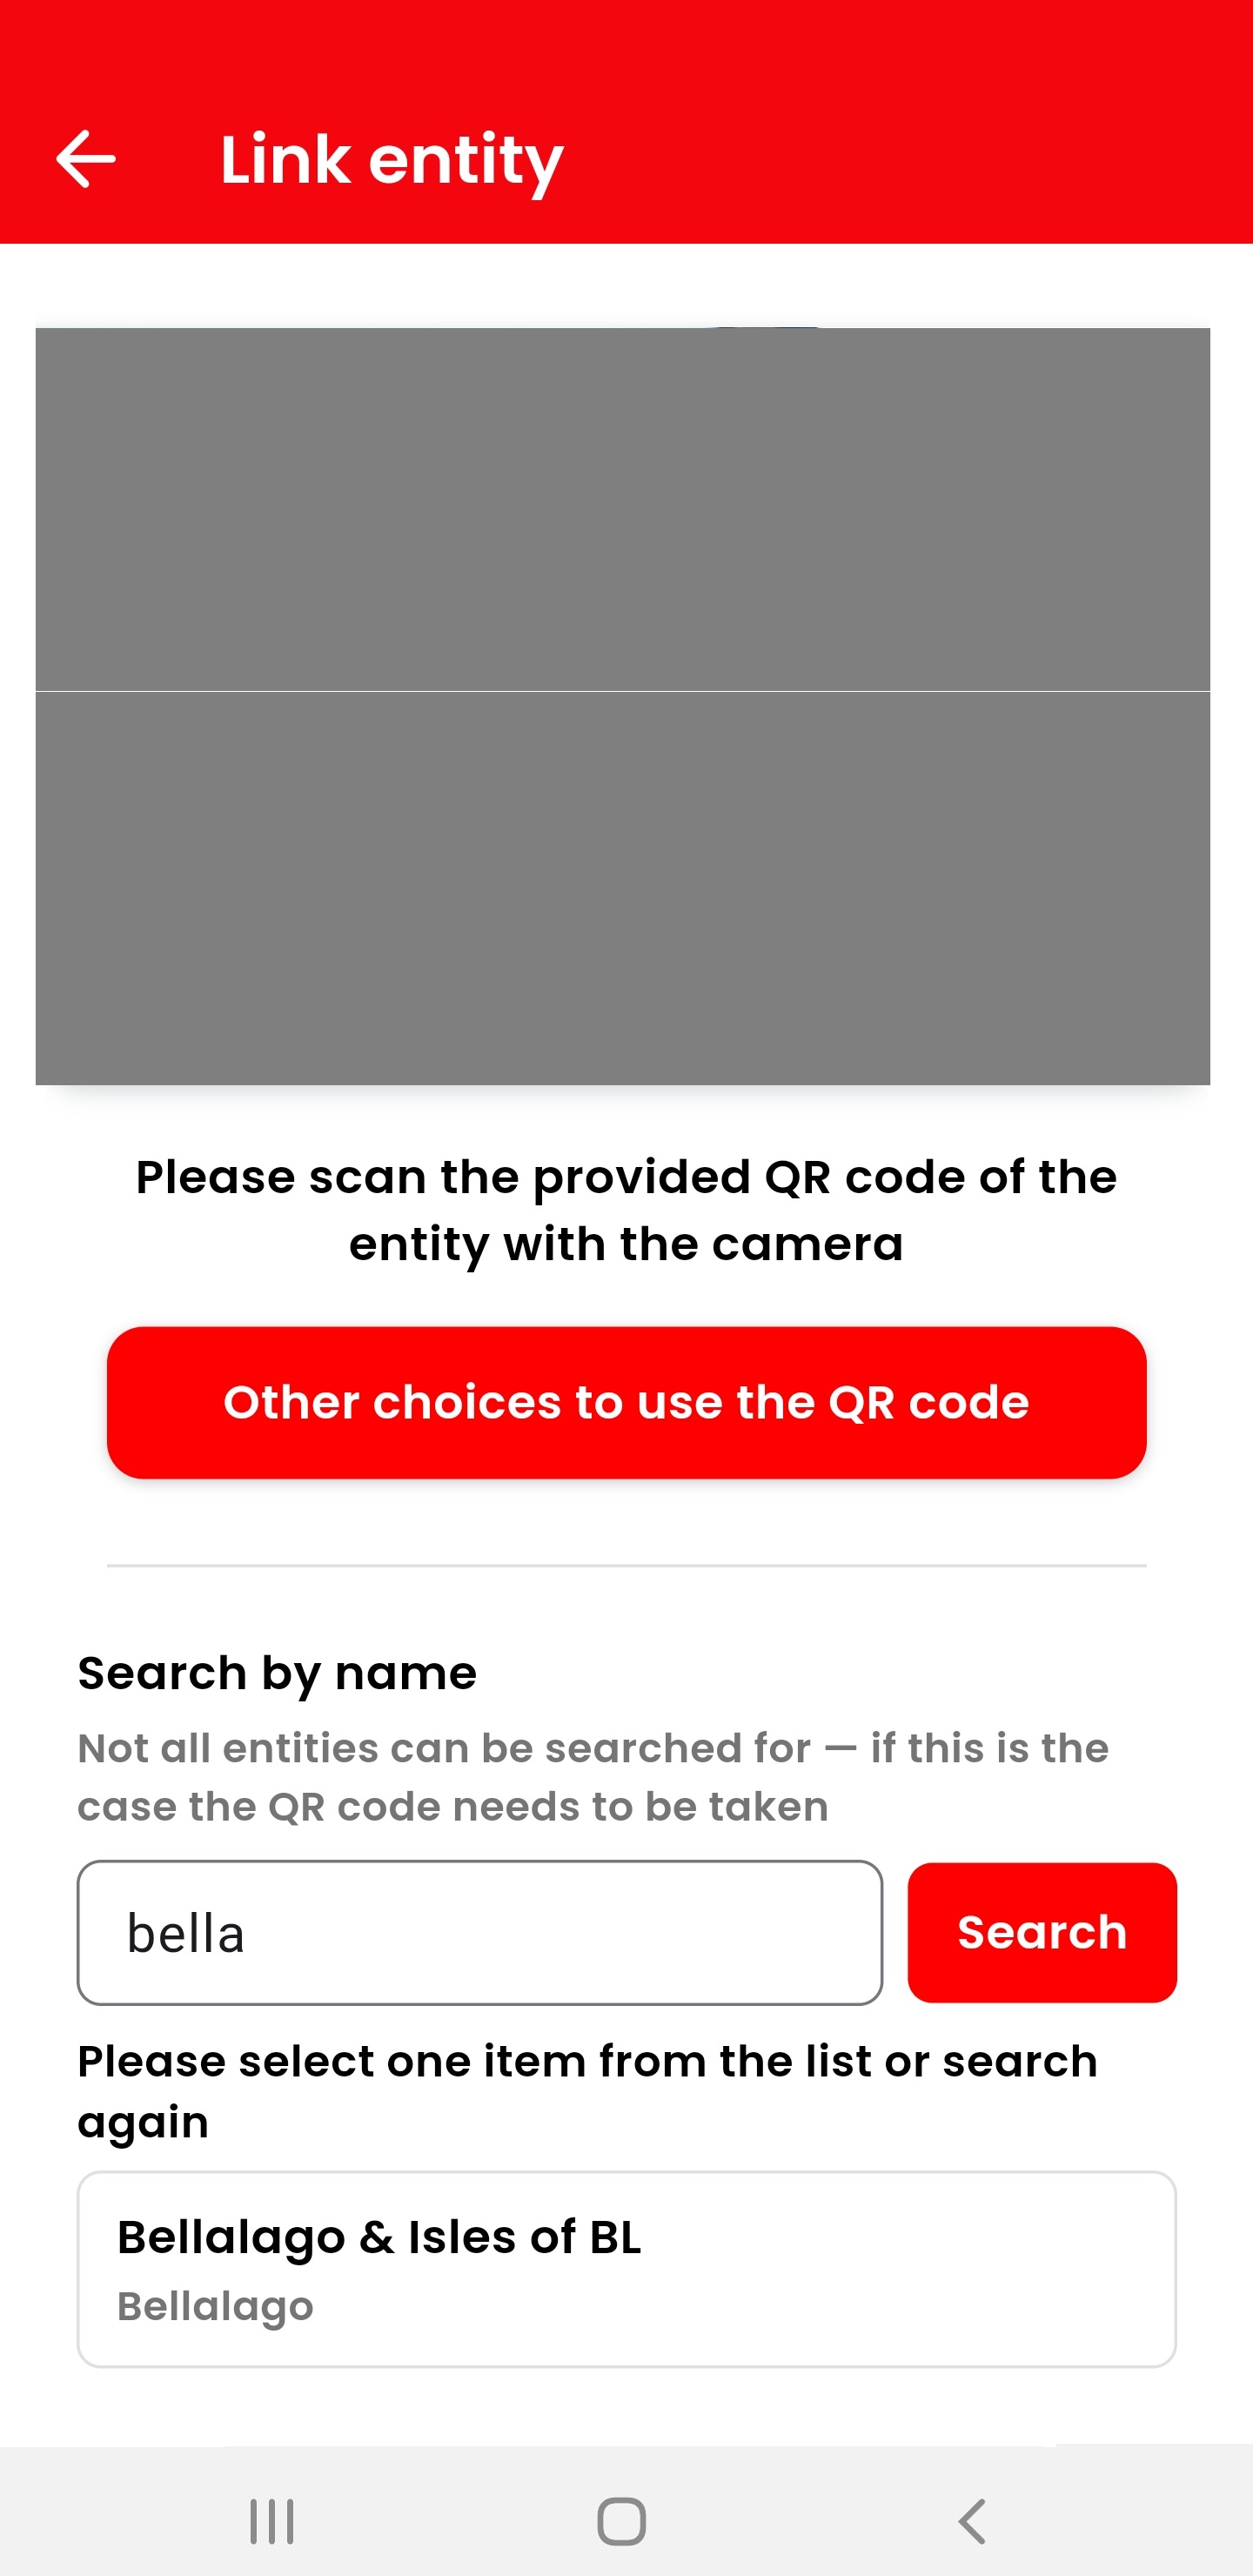
If one or more entities were found they are displayed and you can select the desired one - which displays the entity.
Continue as above.
If the expected entity does not appear you may modify the search arguments. However it is more likely that the entity cannot be found this way. You may need to use the QR code instead.

4. Use Tellit
To use Tellit is as easy as to switch on a light!
Note that the following screens are examples only. Some of them may not appear because they are not needed for a specific incident. Some may show a questionaire type of selection - it depends on the individual situation which information will be asked for.
4.1 Send an incident
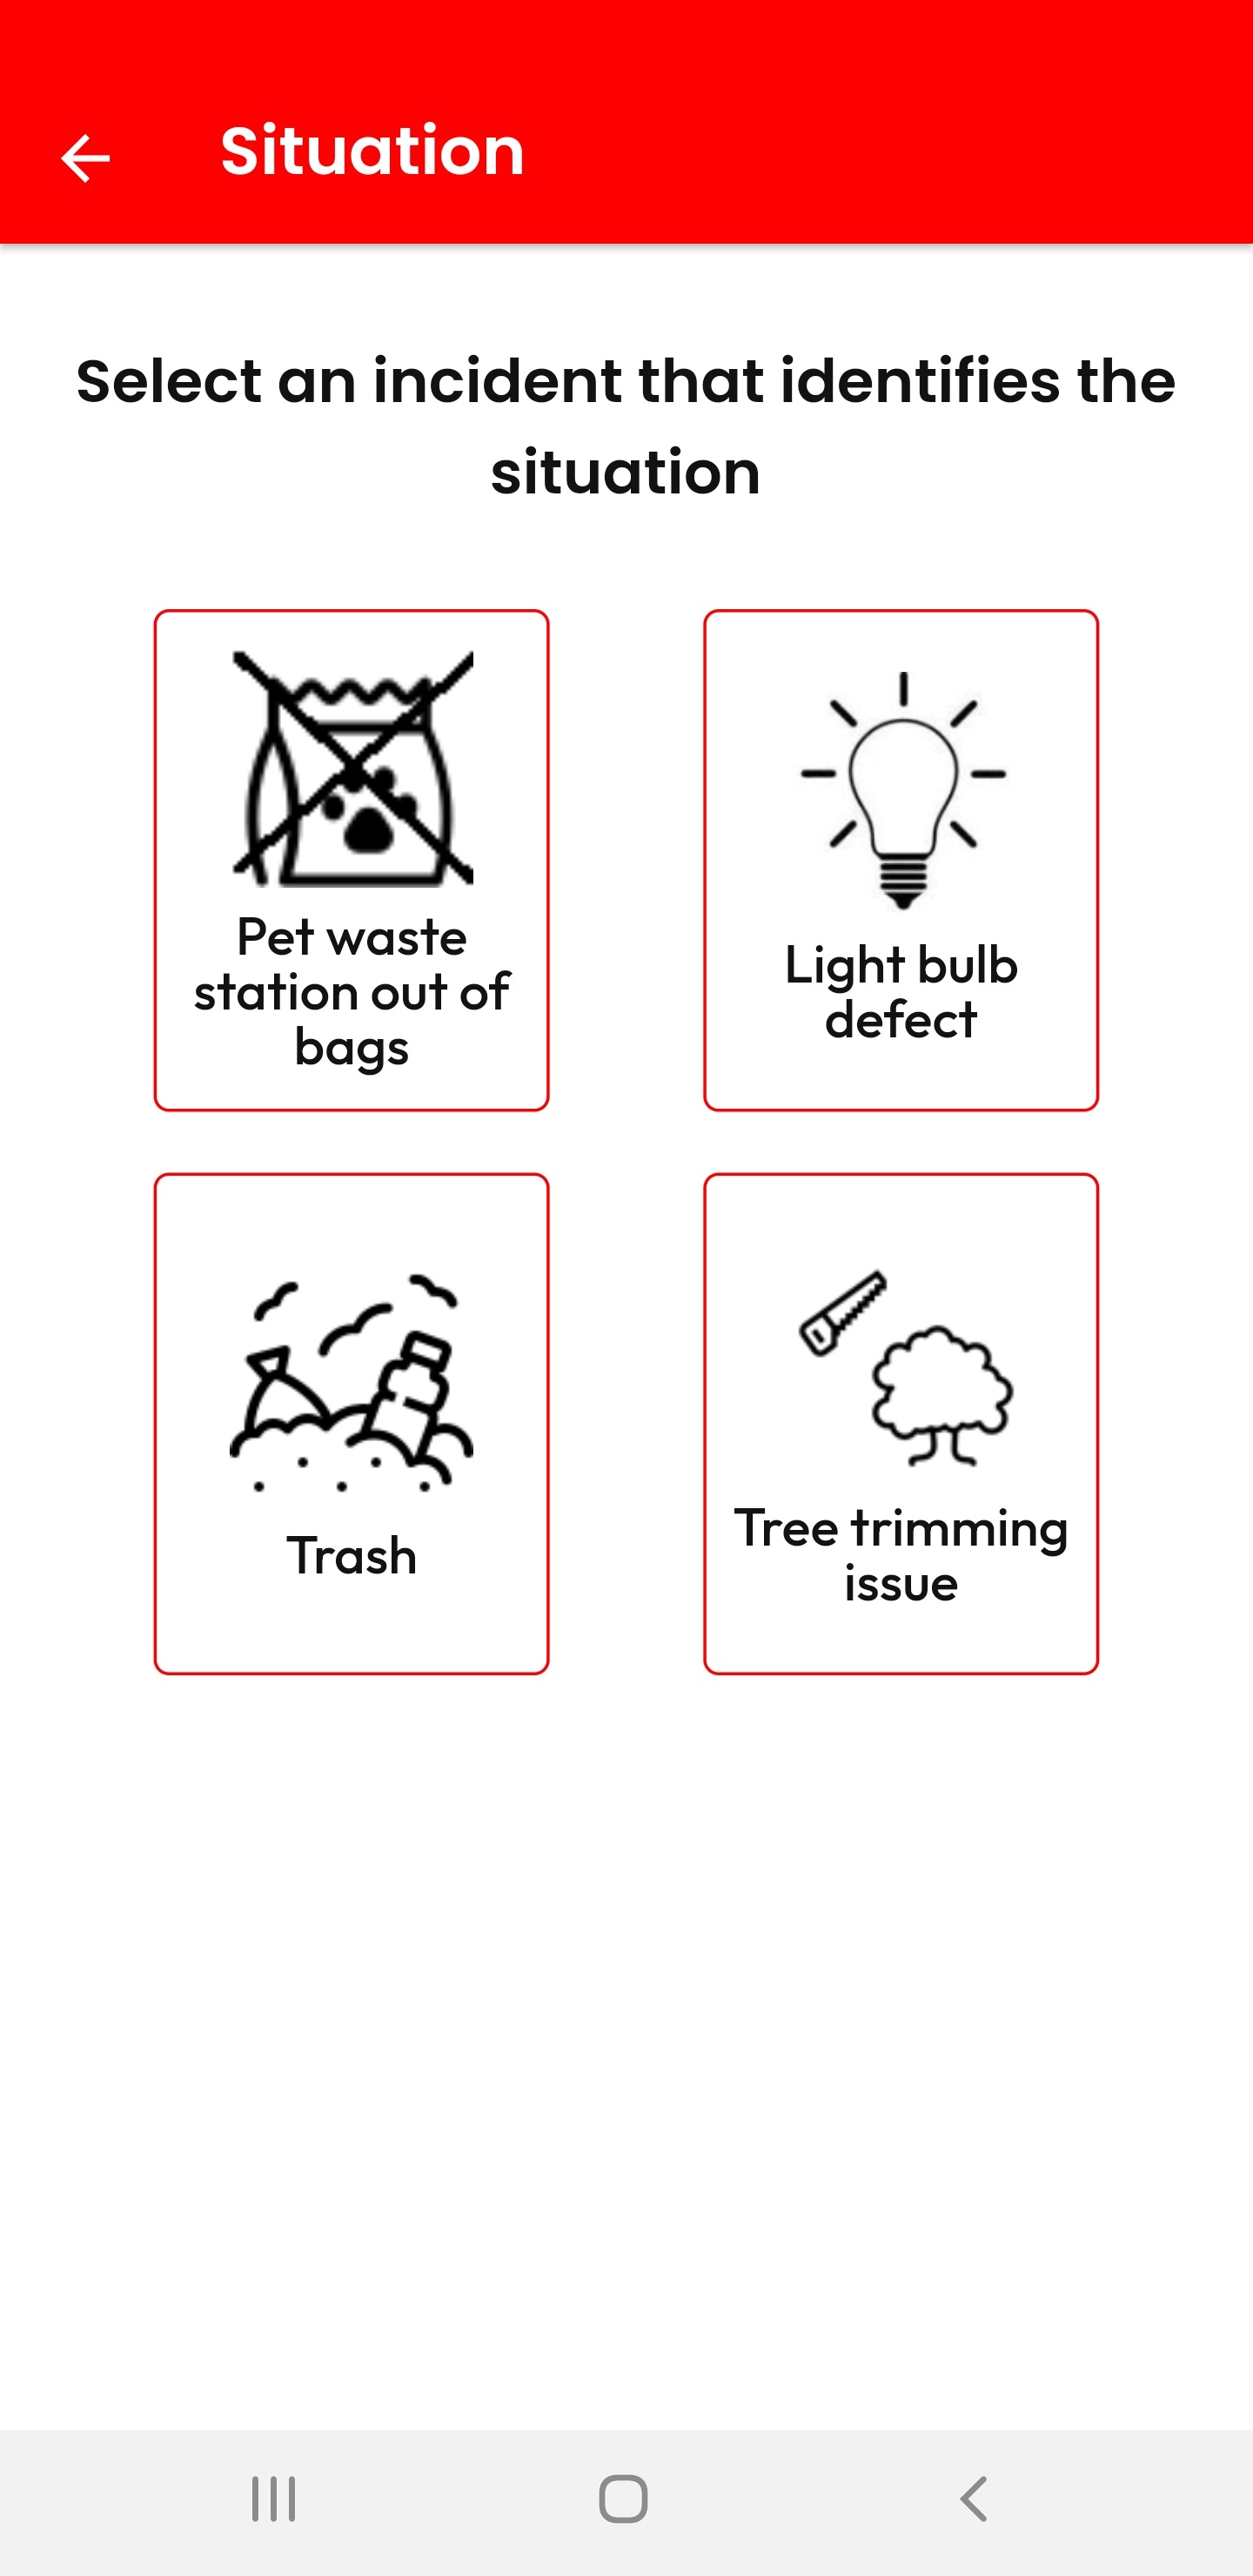
If you spotted an incident you want to send click on "Report an incident" and select the appropriate menu item:
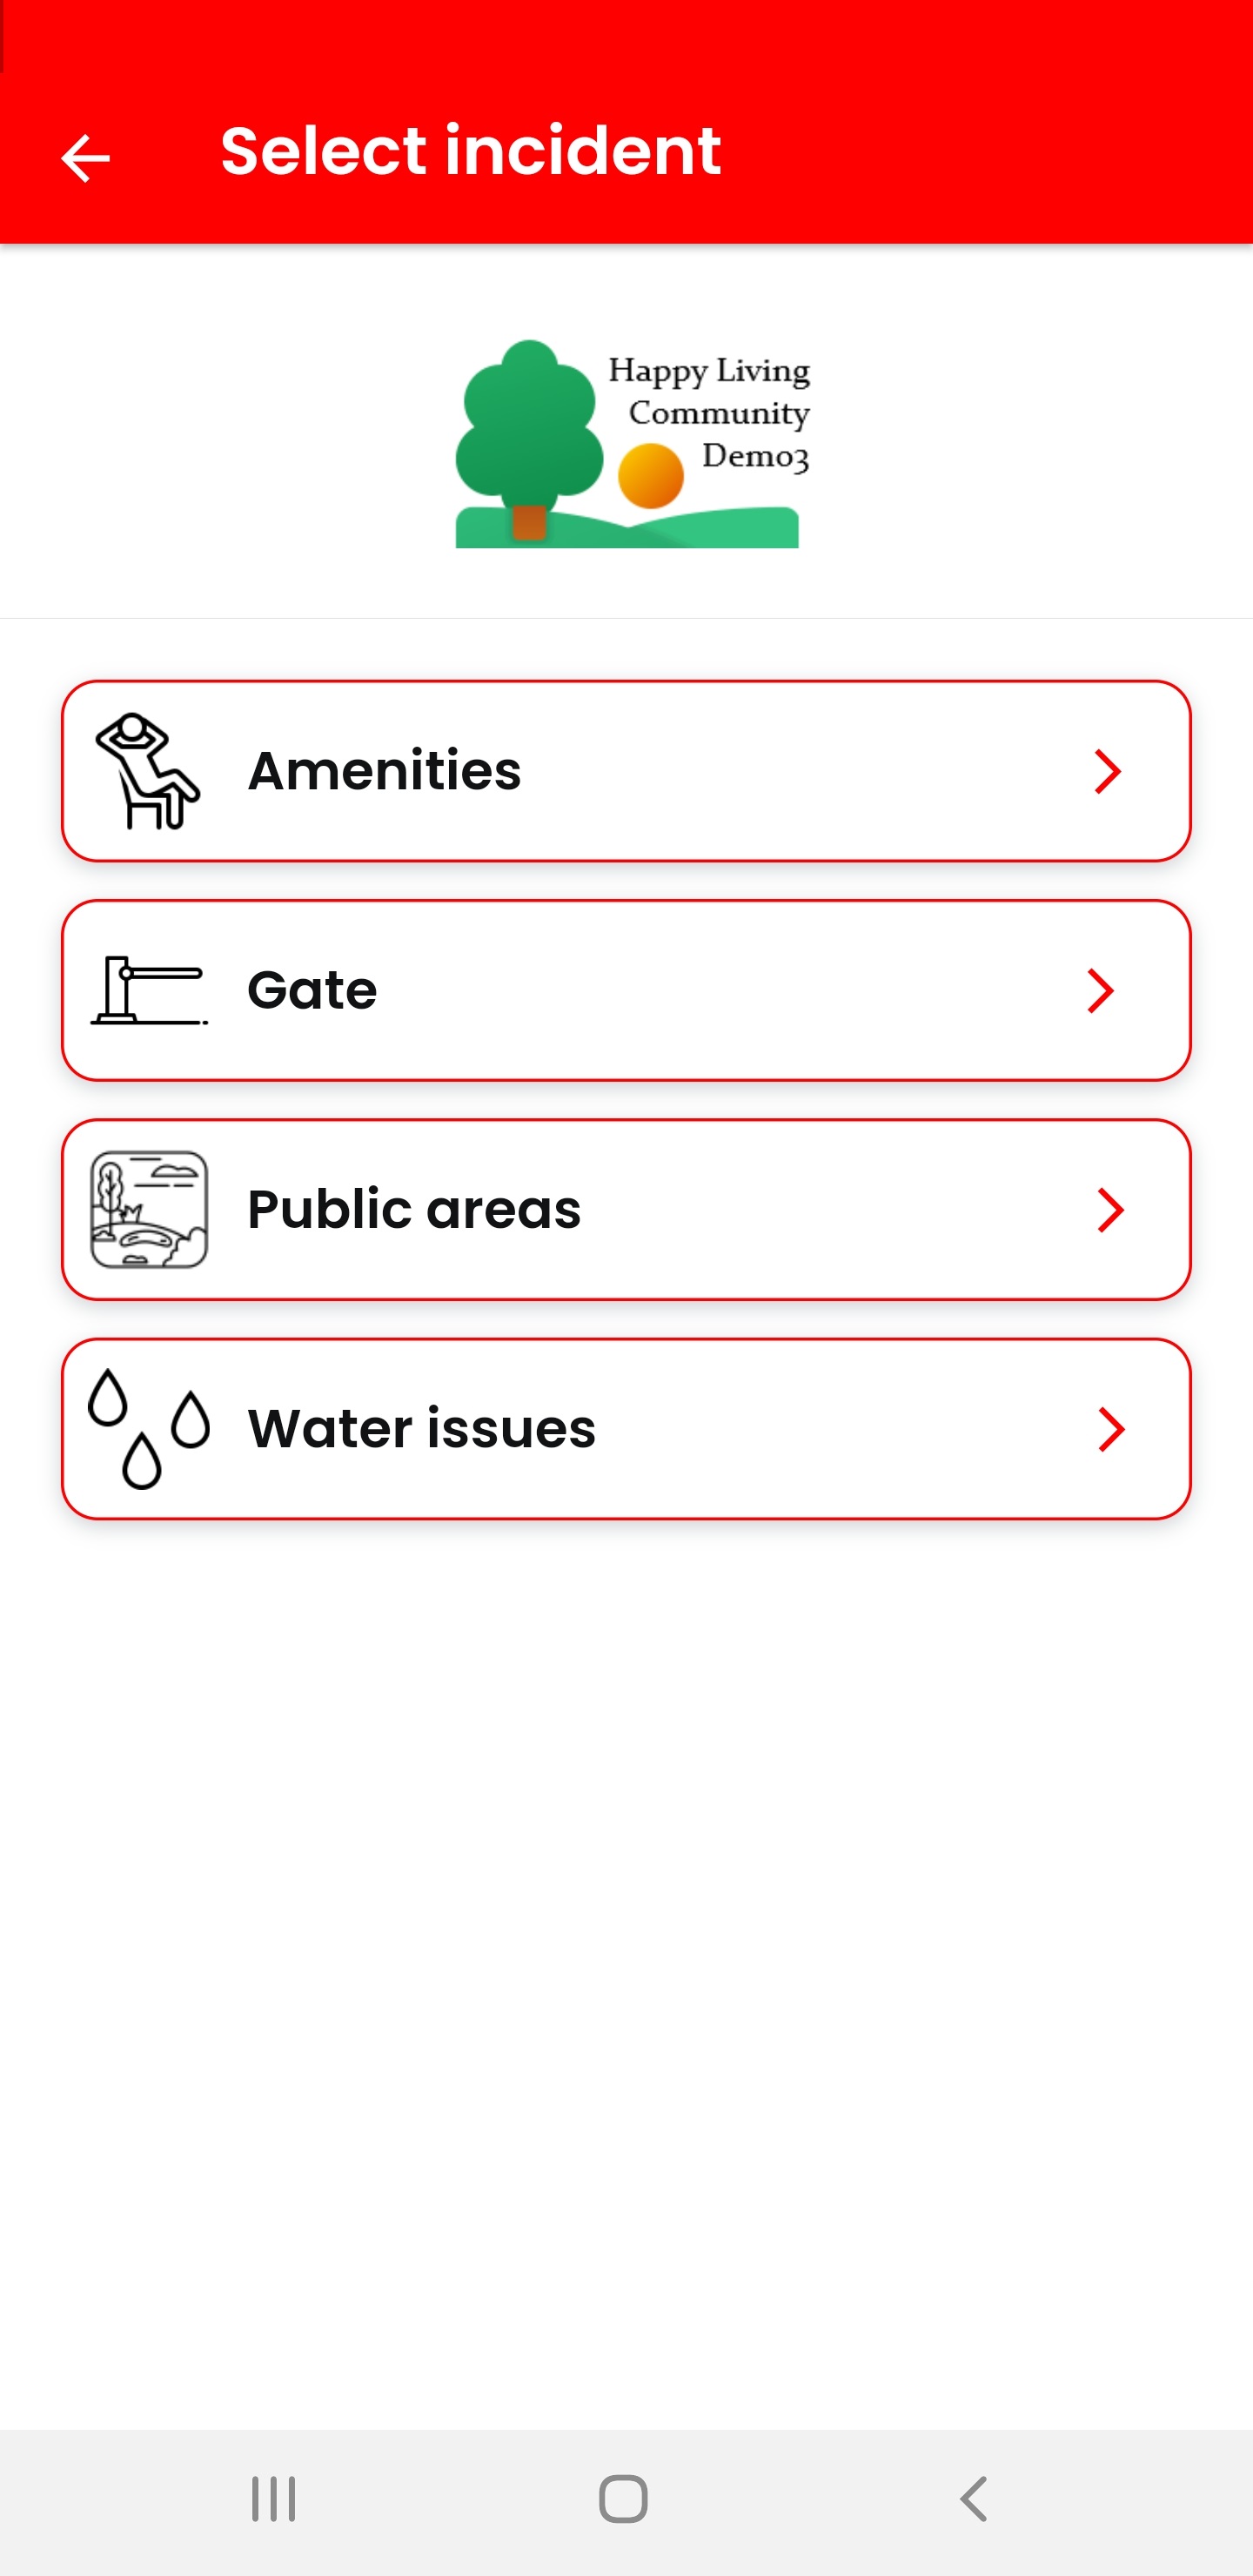
Now select the (sub-)item that matches best to your concern. If you feel you are not at the right place press the back button and select another menu item from the above shown menu.
"Public areas" may for instance contain:
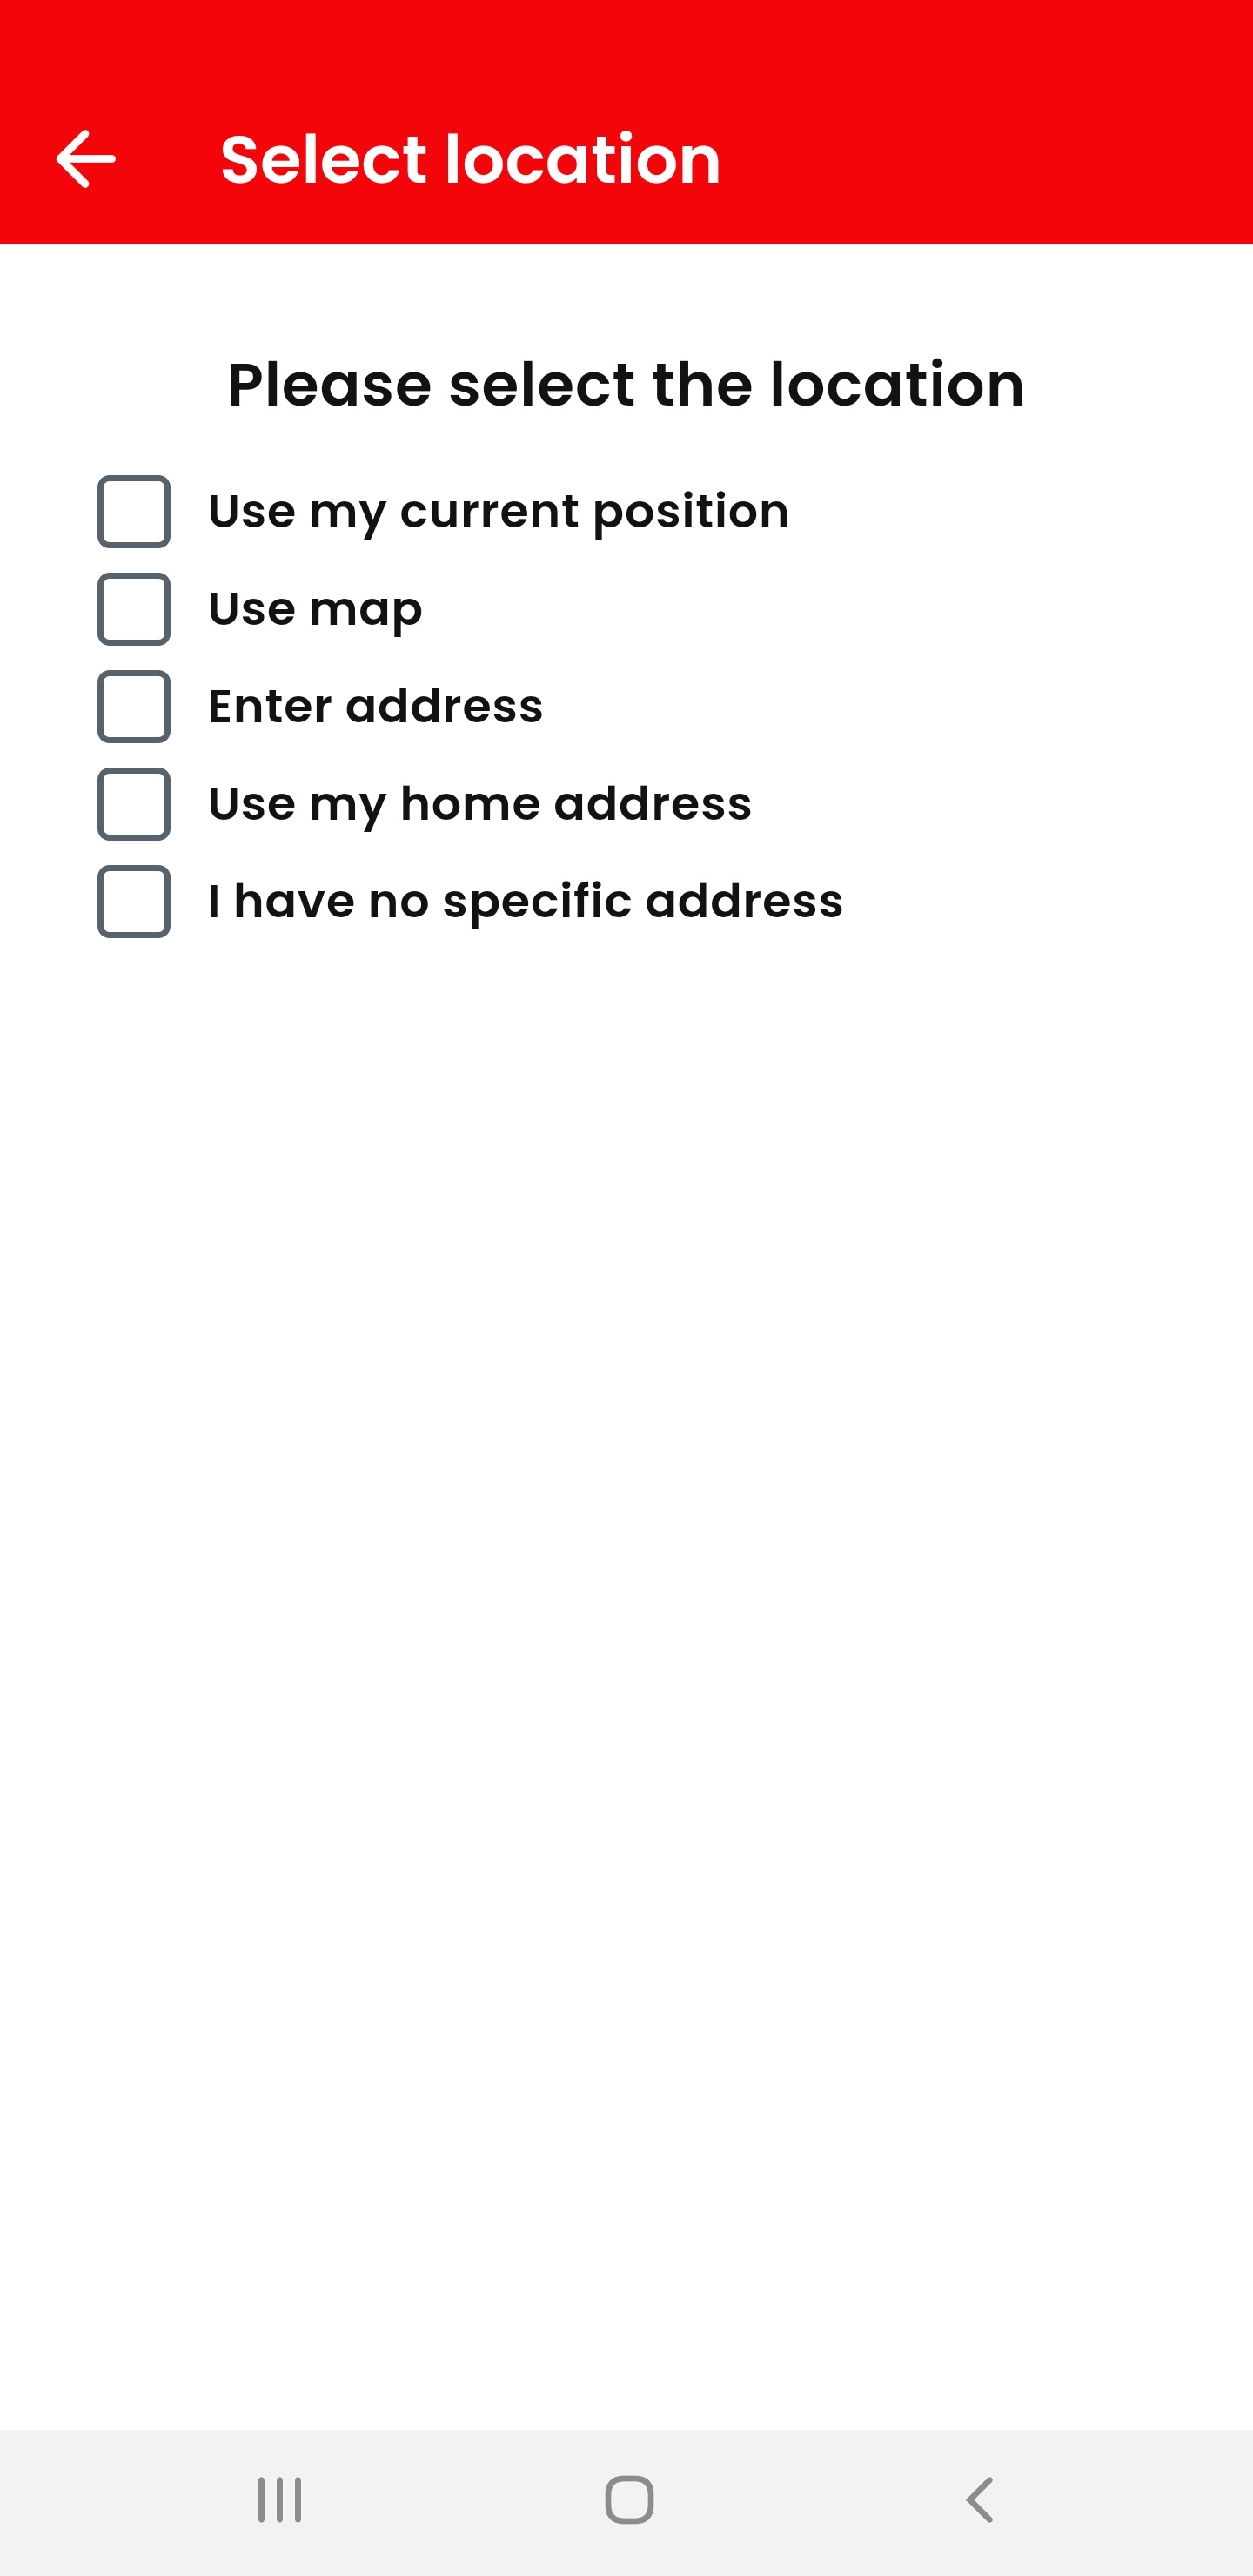
It may be that you are asked to make a selection for defining a location like the following screenshot with the choices:
- Use my current position => this will use the GPS coordinates of your current position.
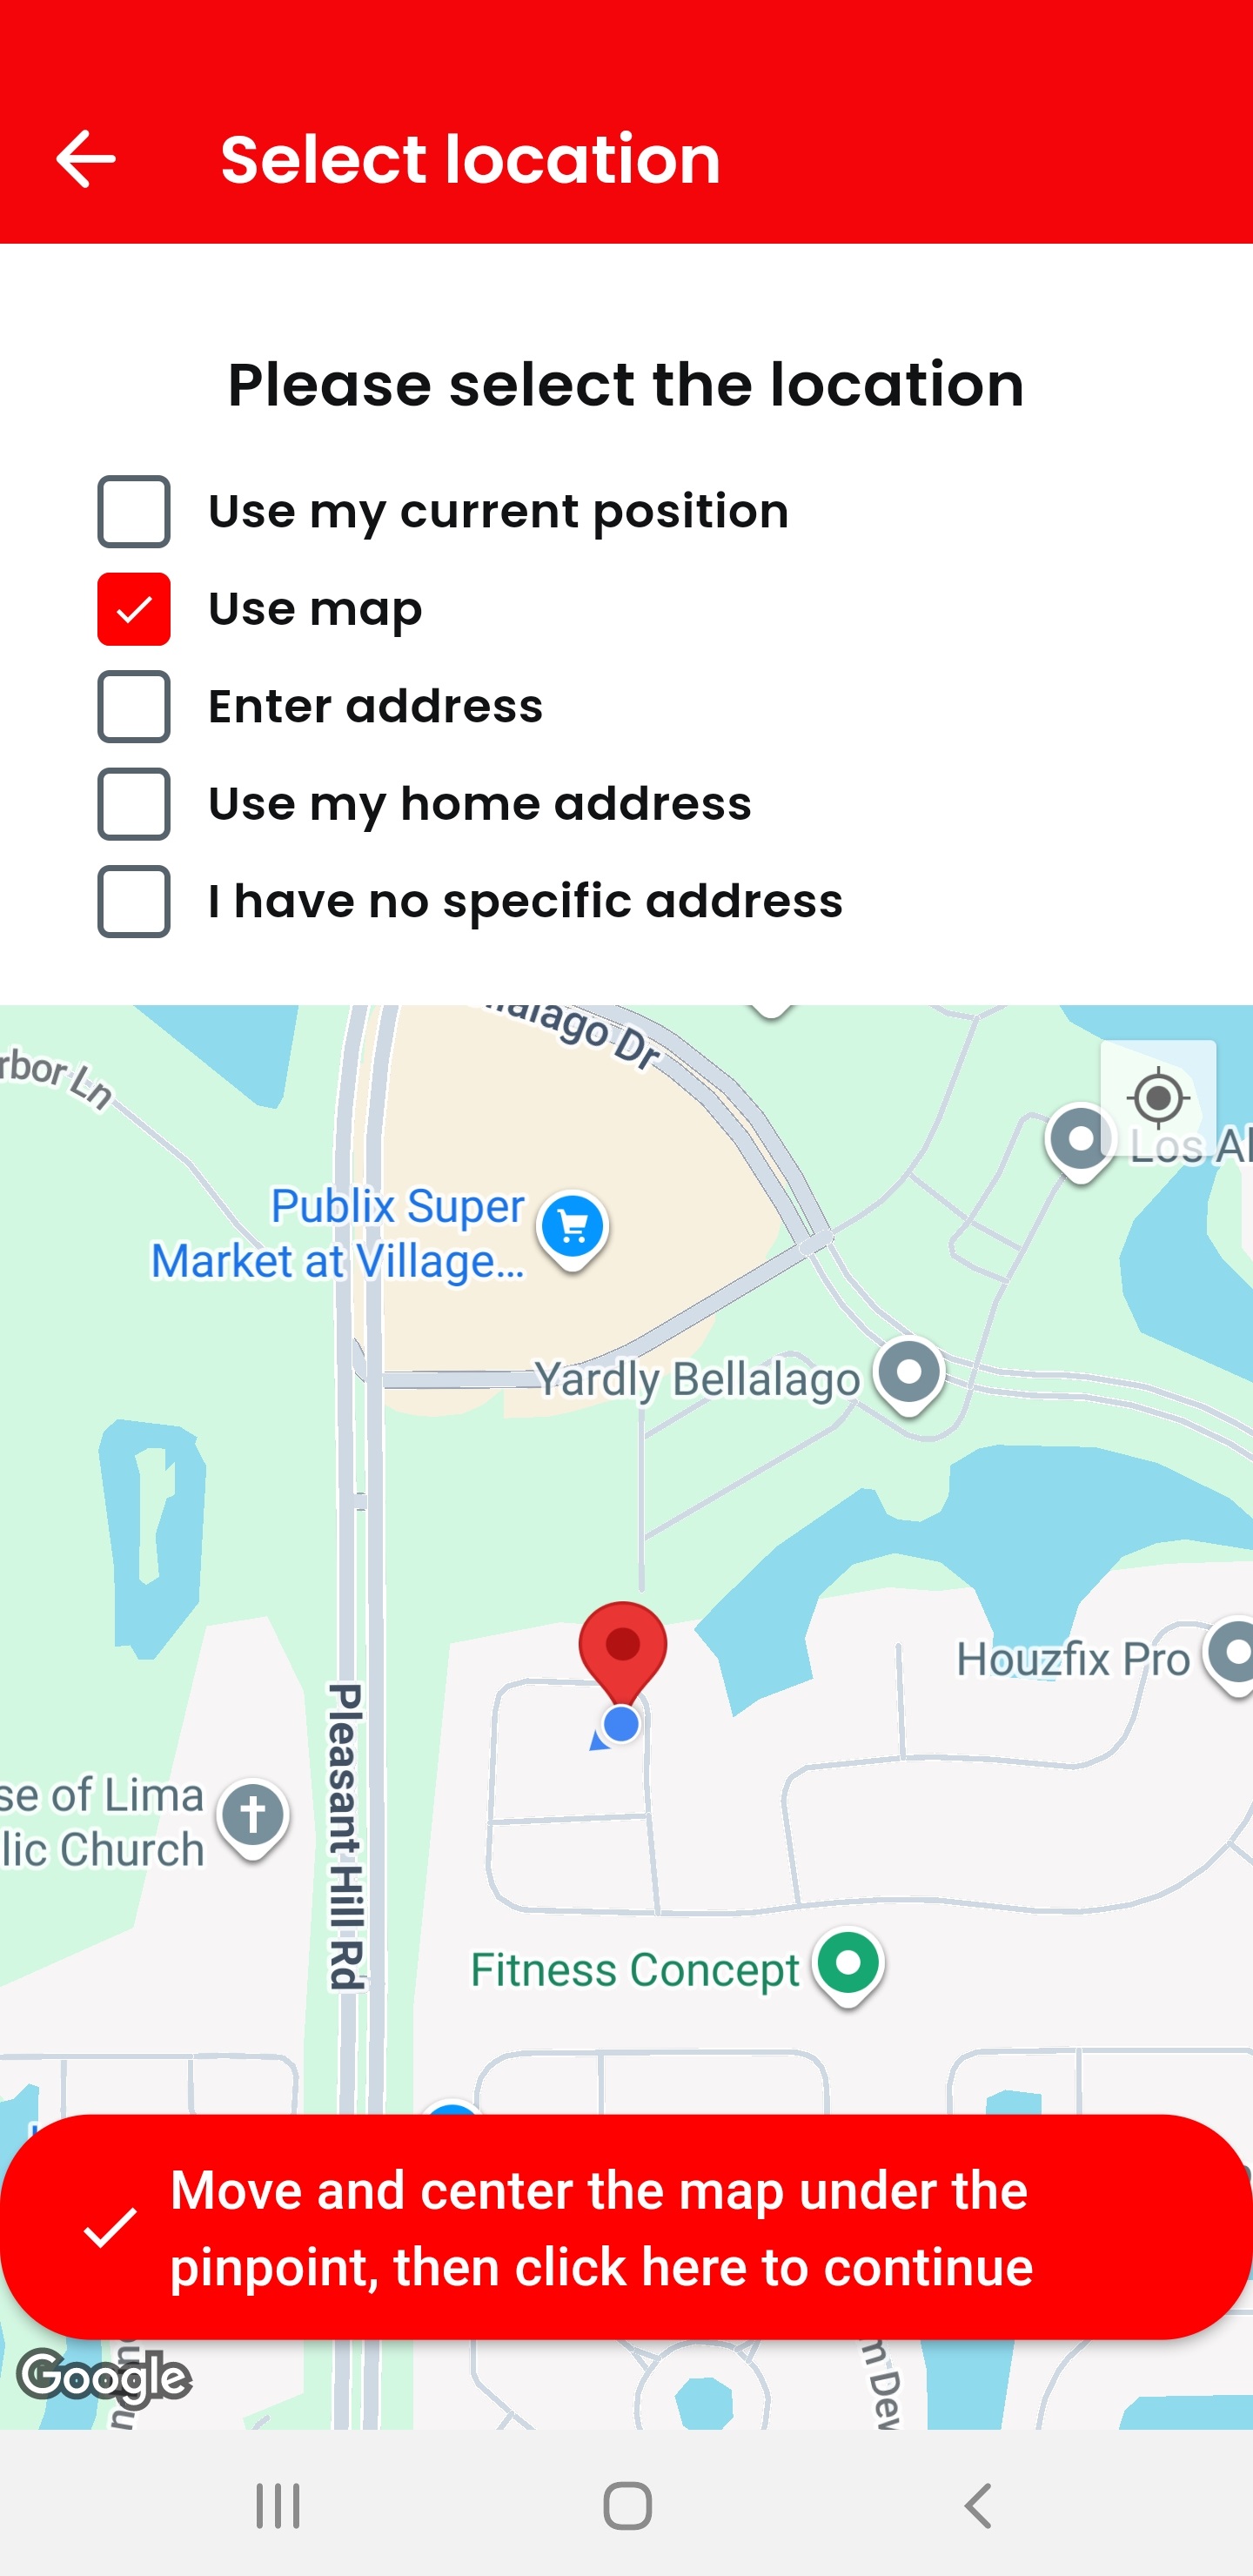
- Use map => this will show you a map, see below.
- Enter address => this allows you to enter any address.
- Use my homw address => this uses your home address (if keyed in before)
- I have no specific address => may be used if there is no need to enter an address.
If you receive a screen with a map please indicate the position where the incident is or was taking place:
You may now add one or more photos or videos, newly taken with your camera or already existing on your mobile device.
Also you can add the reason for the incident and/or some details you think are important to know. In some cases you may be asked a specific question which will help the receiver to more specifically react to the sent report.
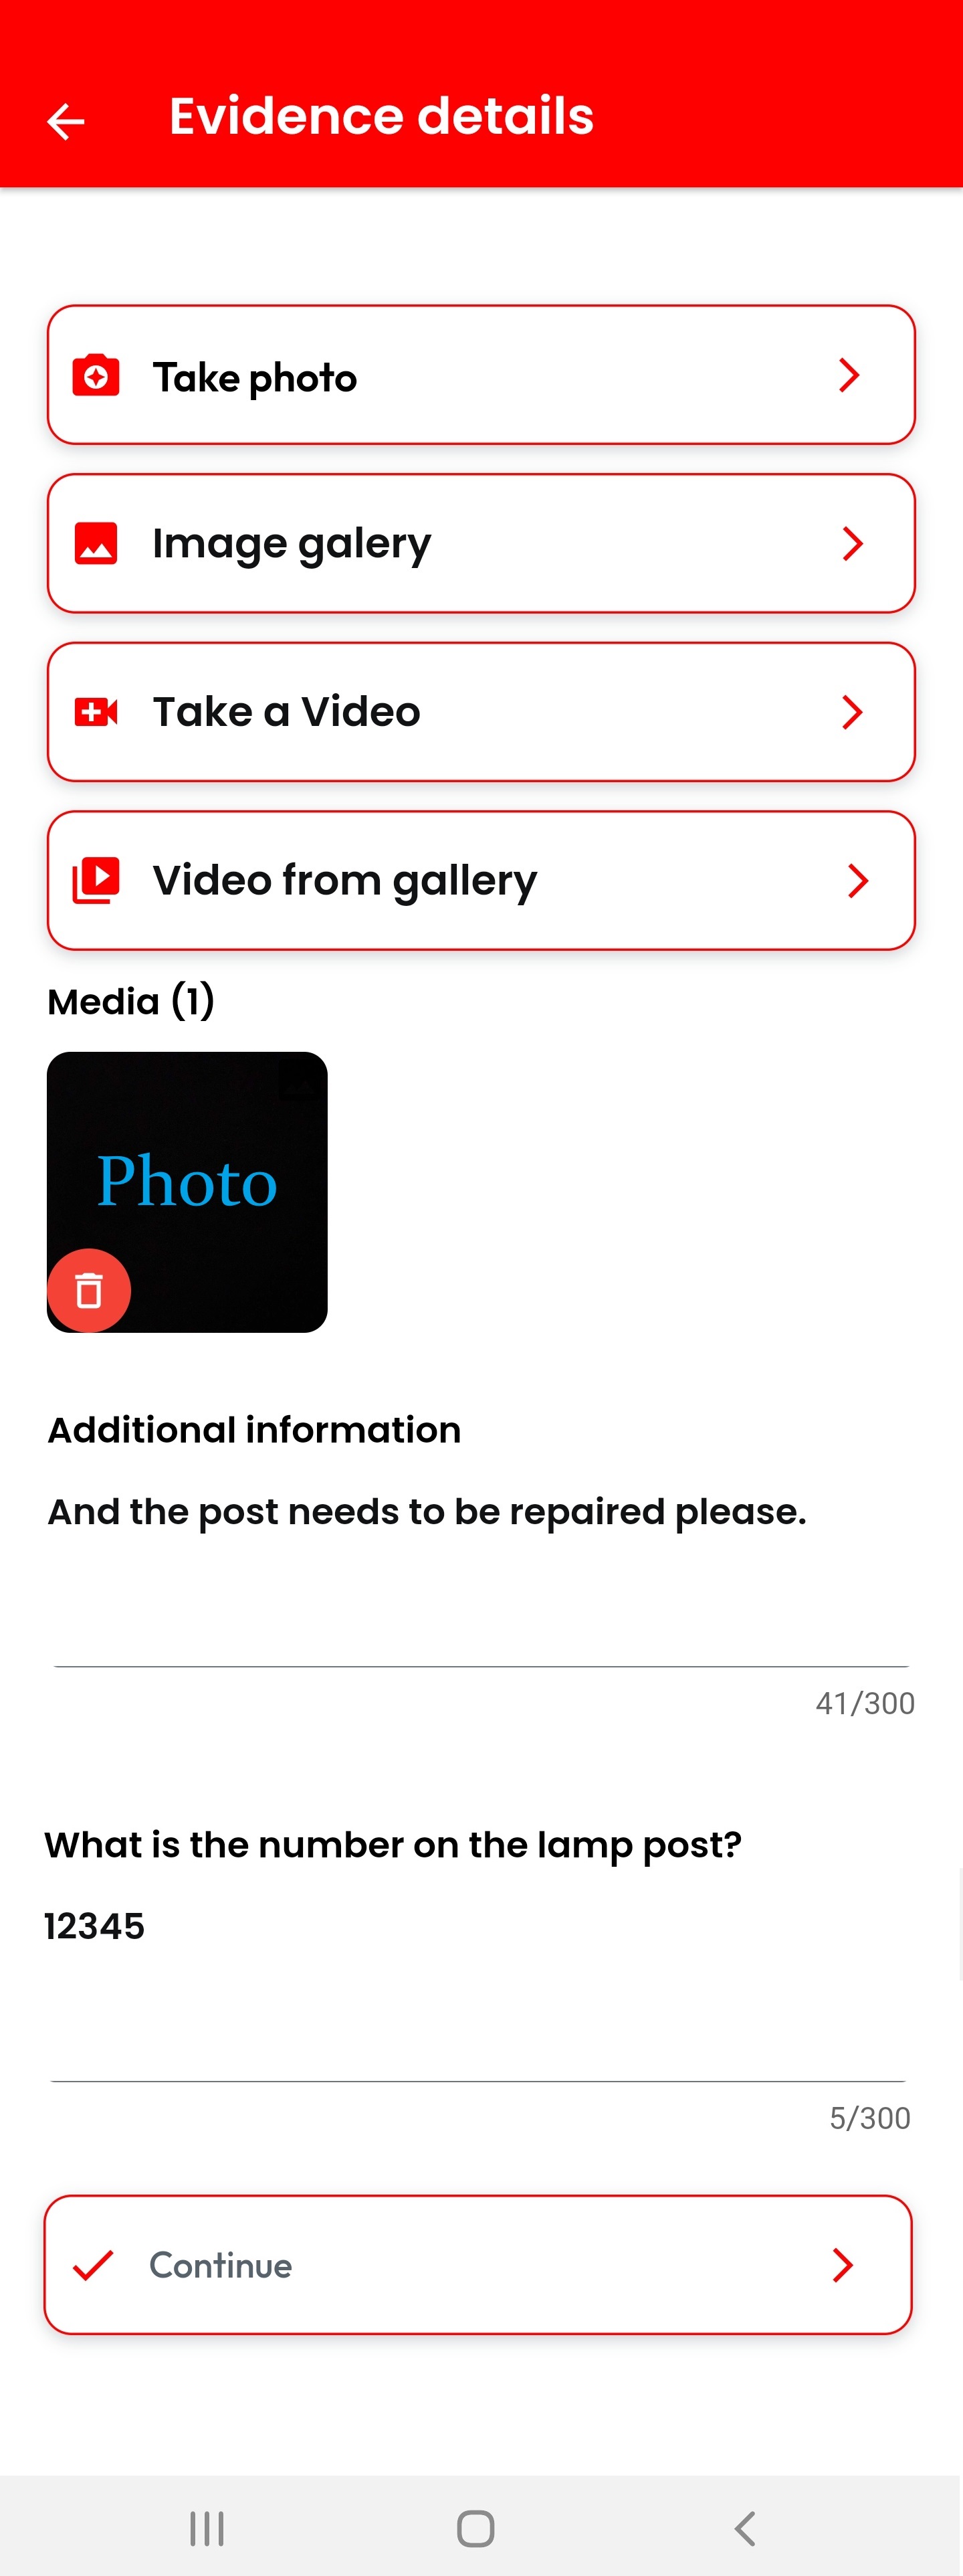
Clicking on "Continue" will send the report and show you a confirmation:
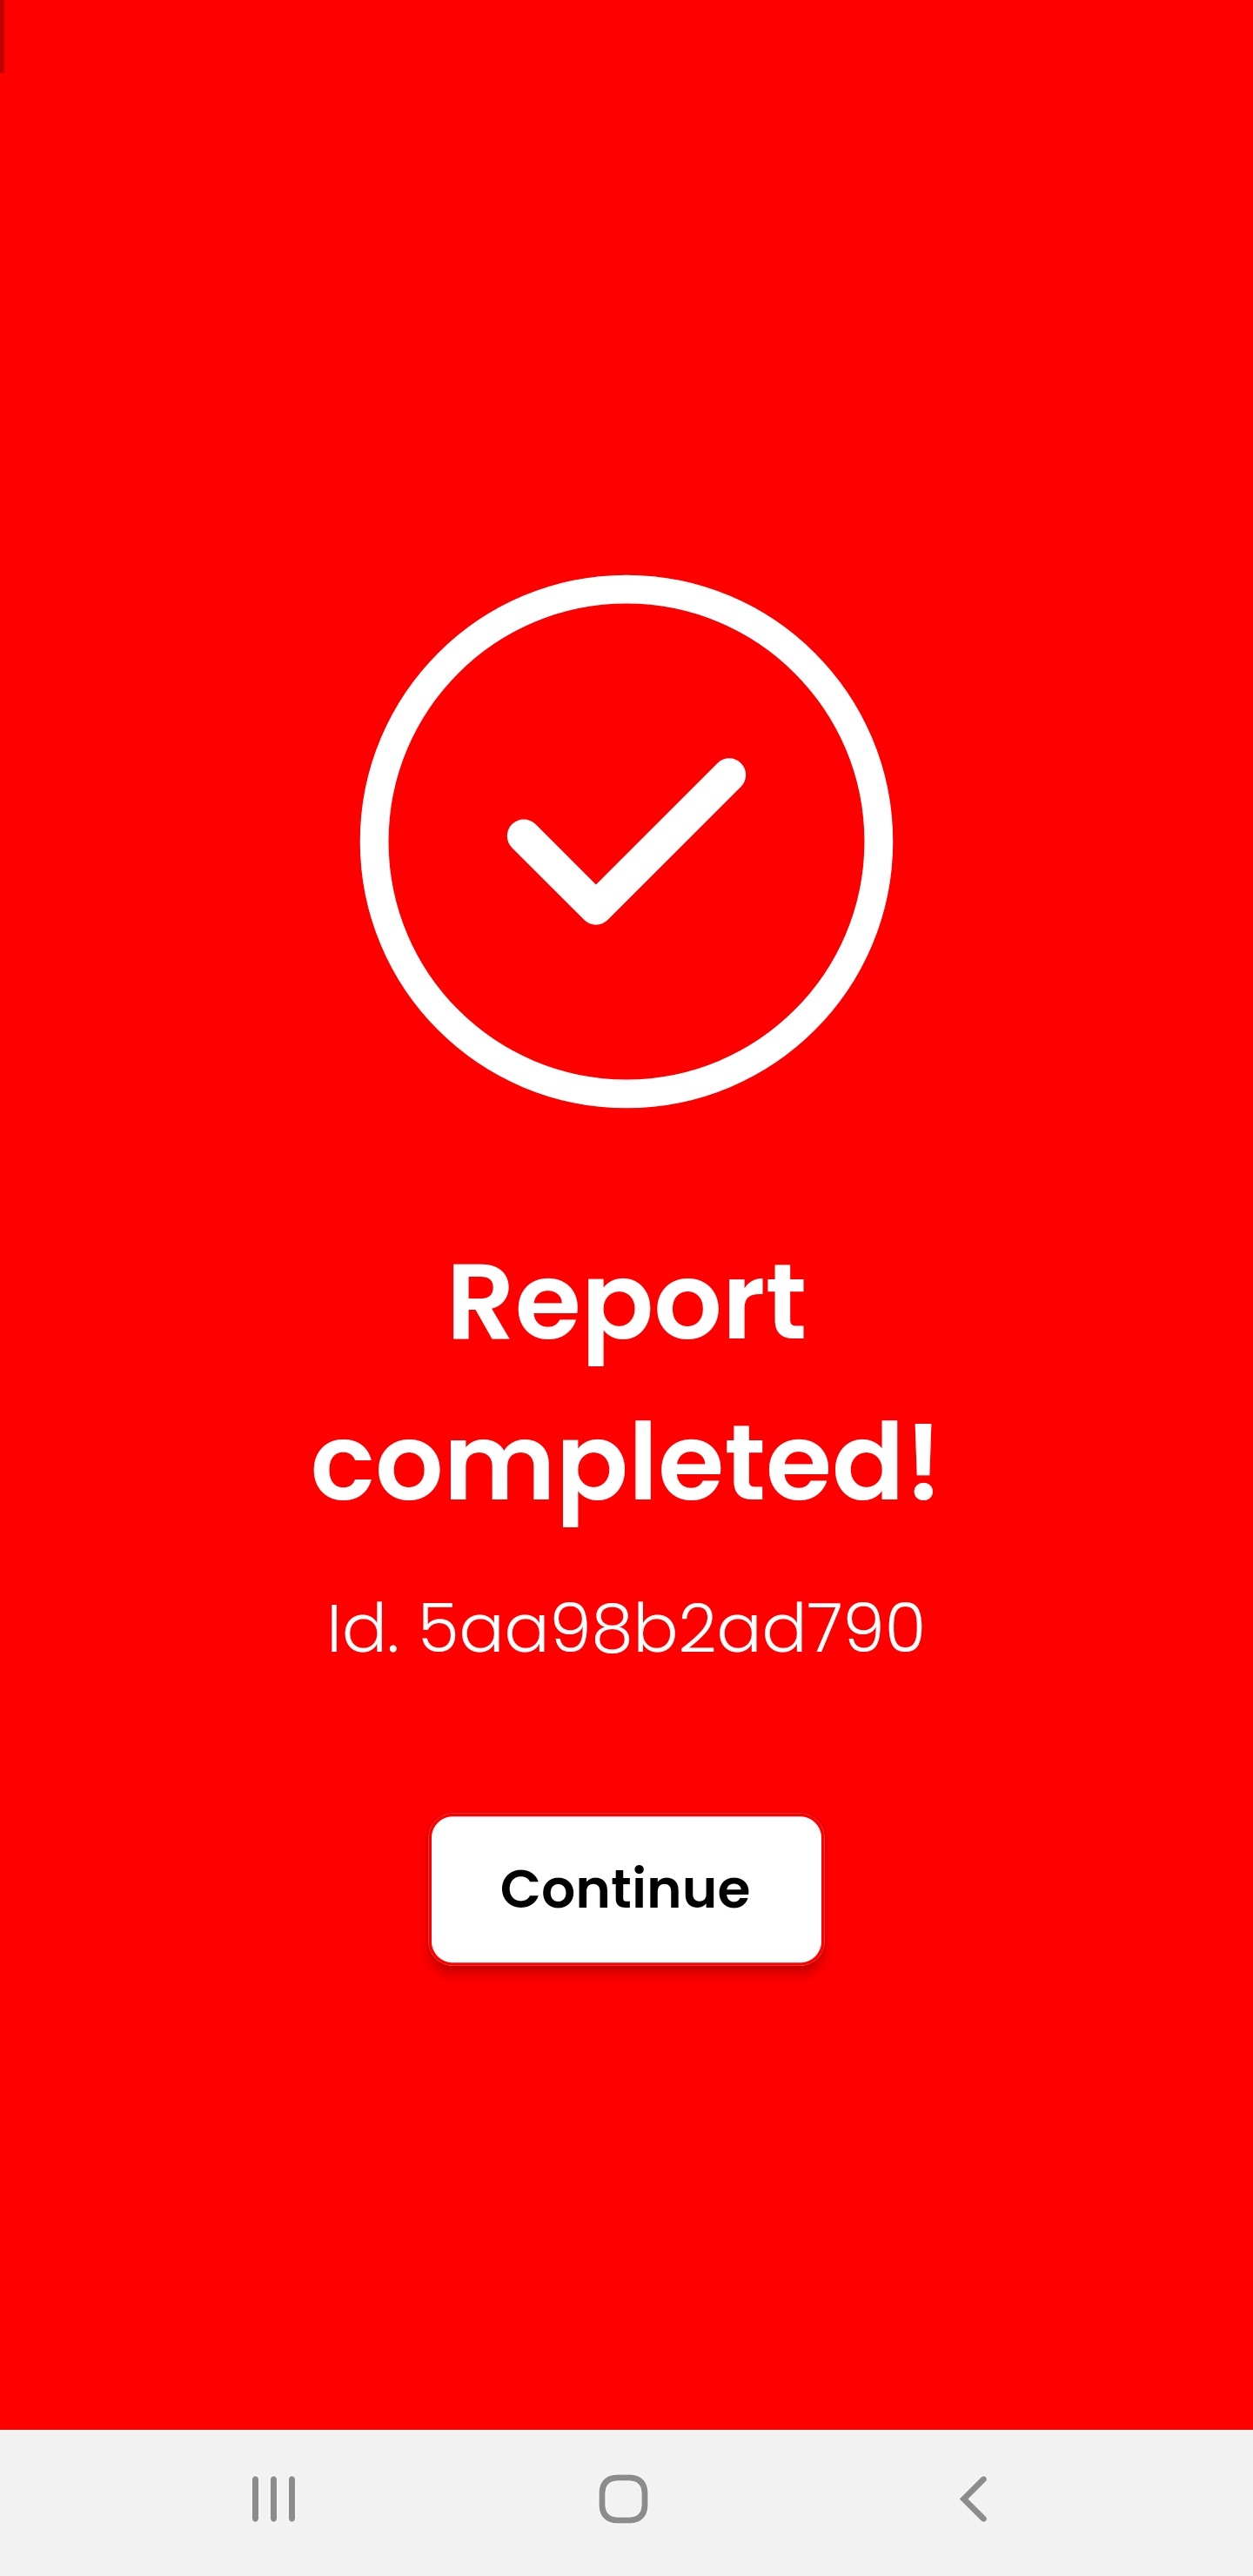
Important: You do not need to worry about whom to send the issue! The system knows that and sends it to the respective person.
4.2 Look up your sent incidents
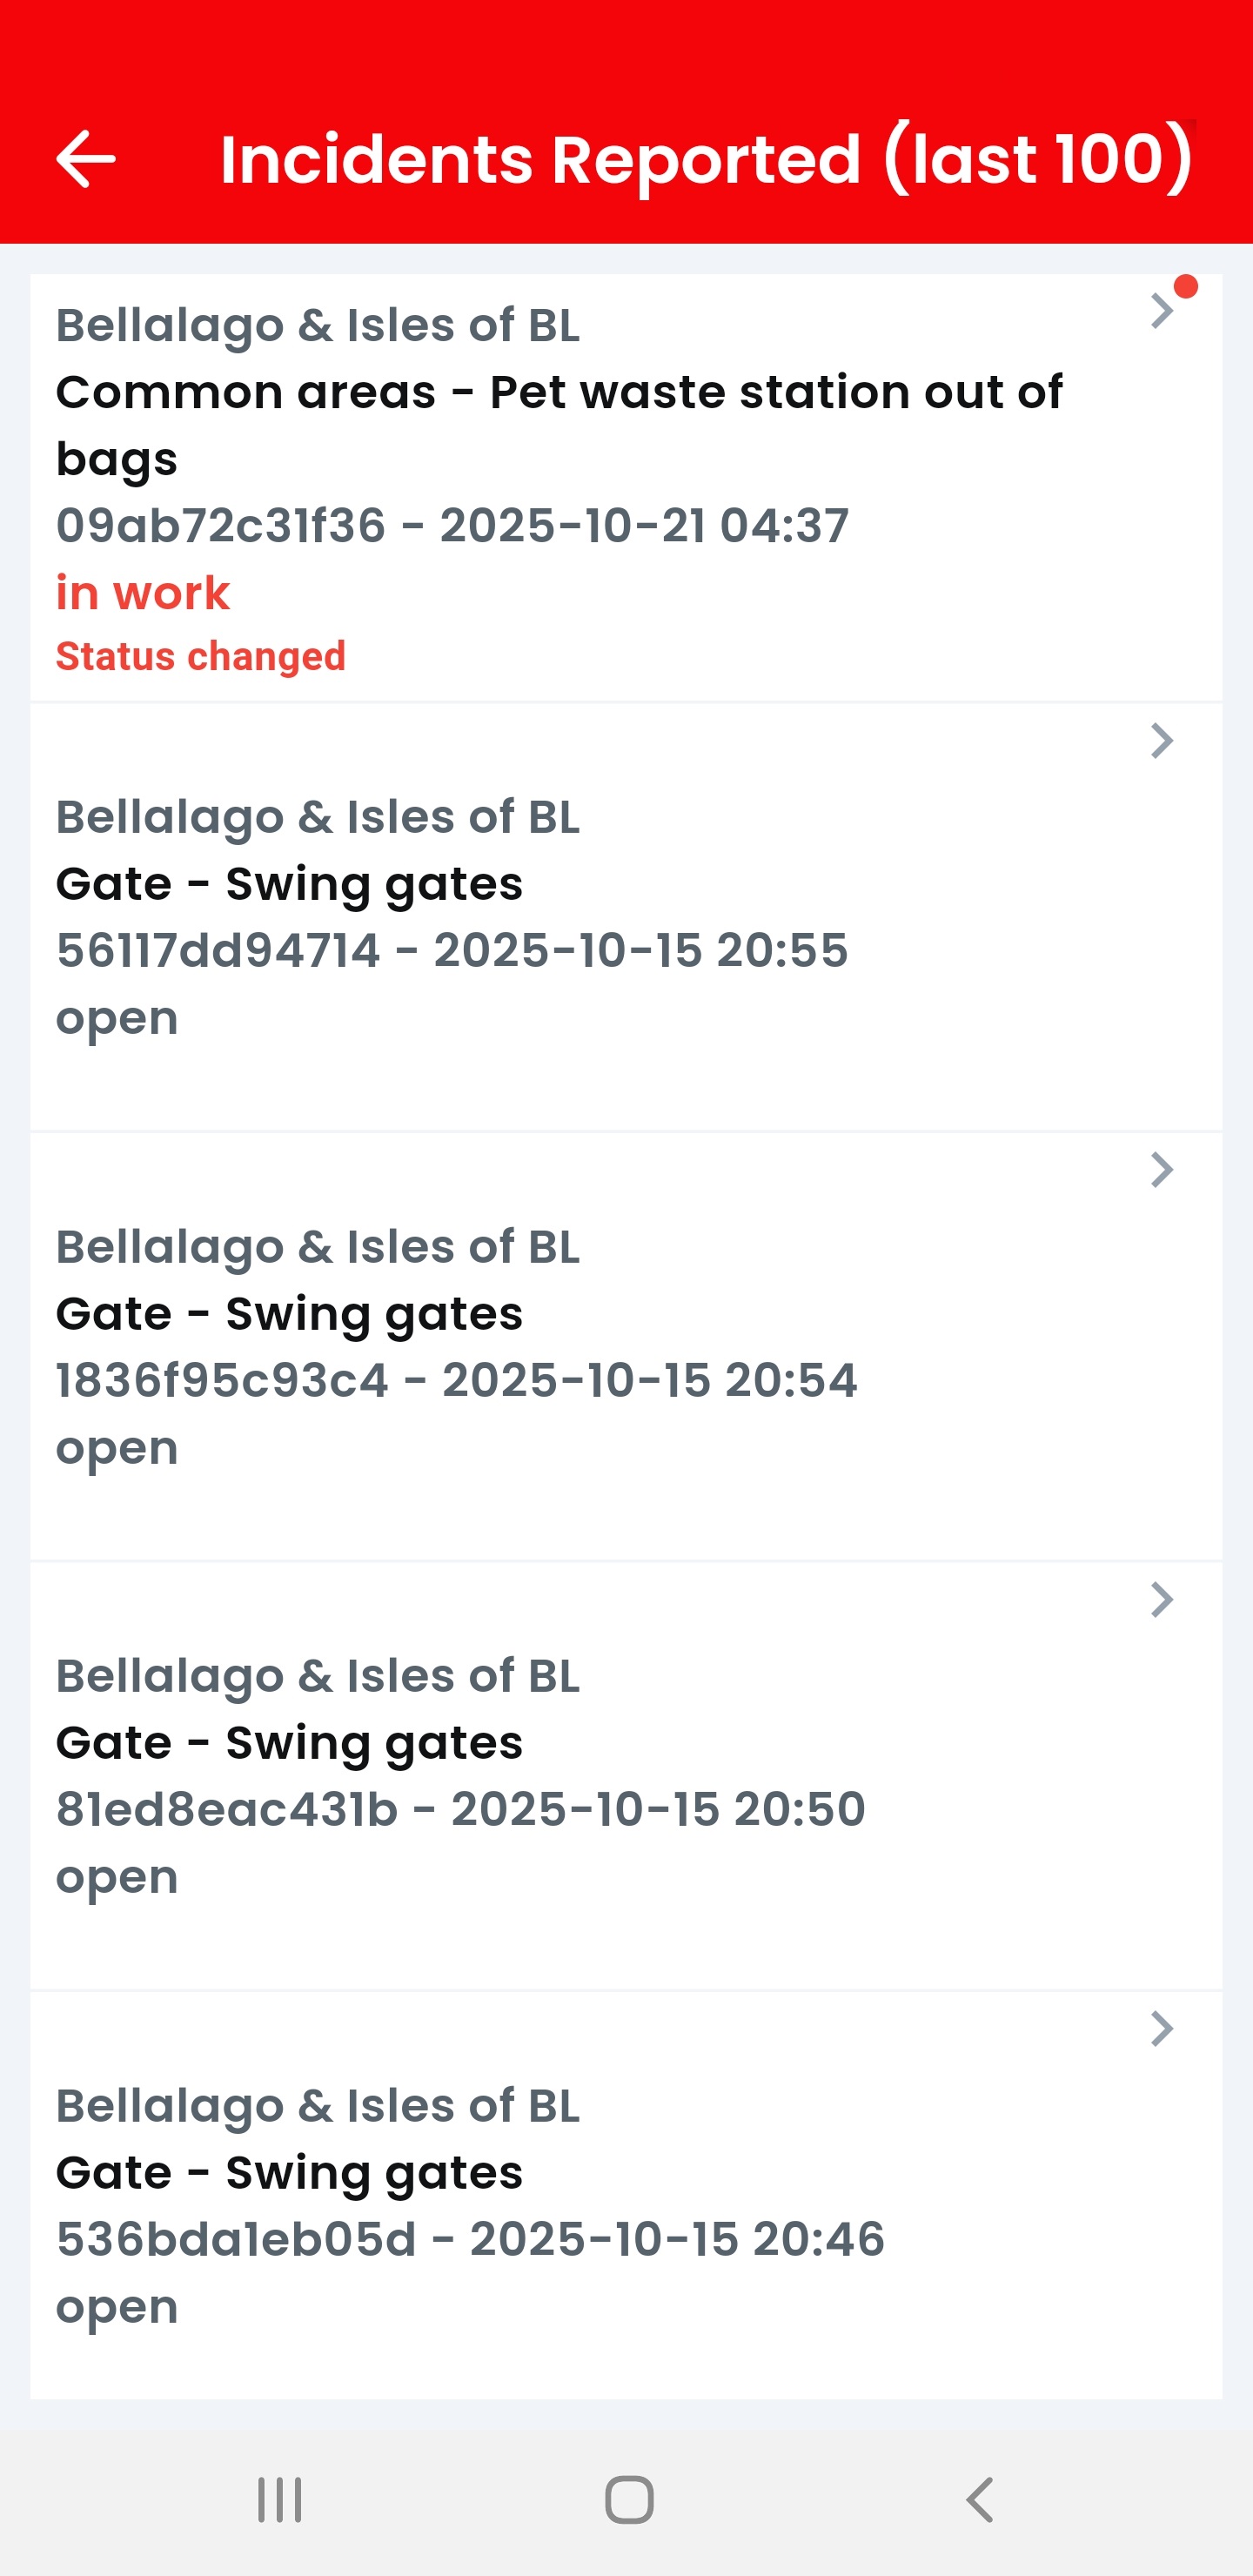
Clicking on "Incidents reported" from the Tellit main screen shows the reports you have sent with the following choices / funktionality - depending on the organization's choices:
- Note that the "incidents reported" button itself indicates with the red dot if there is any news.
- After clicking on the button the list of reported incidents will be shown with the status of each incident and, in red, if there is any news.
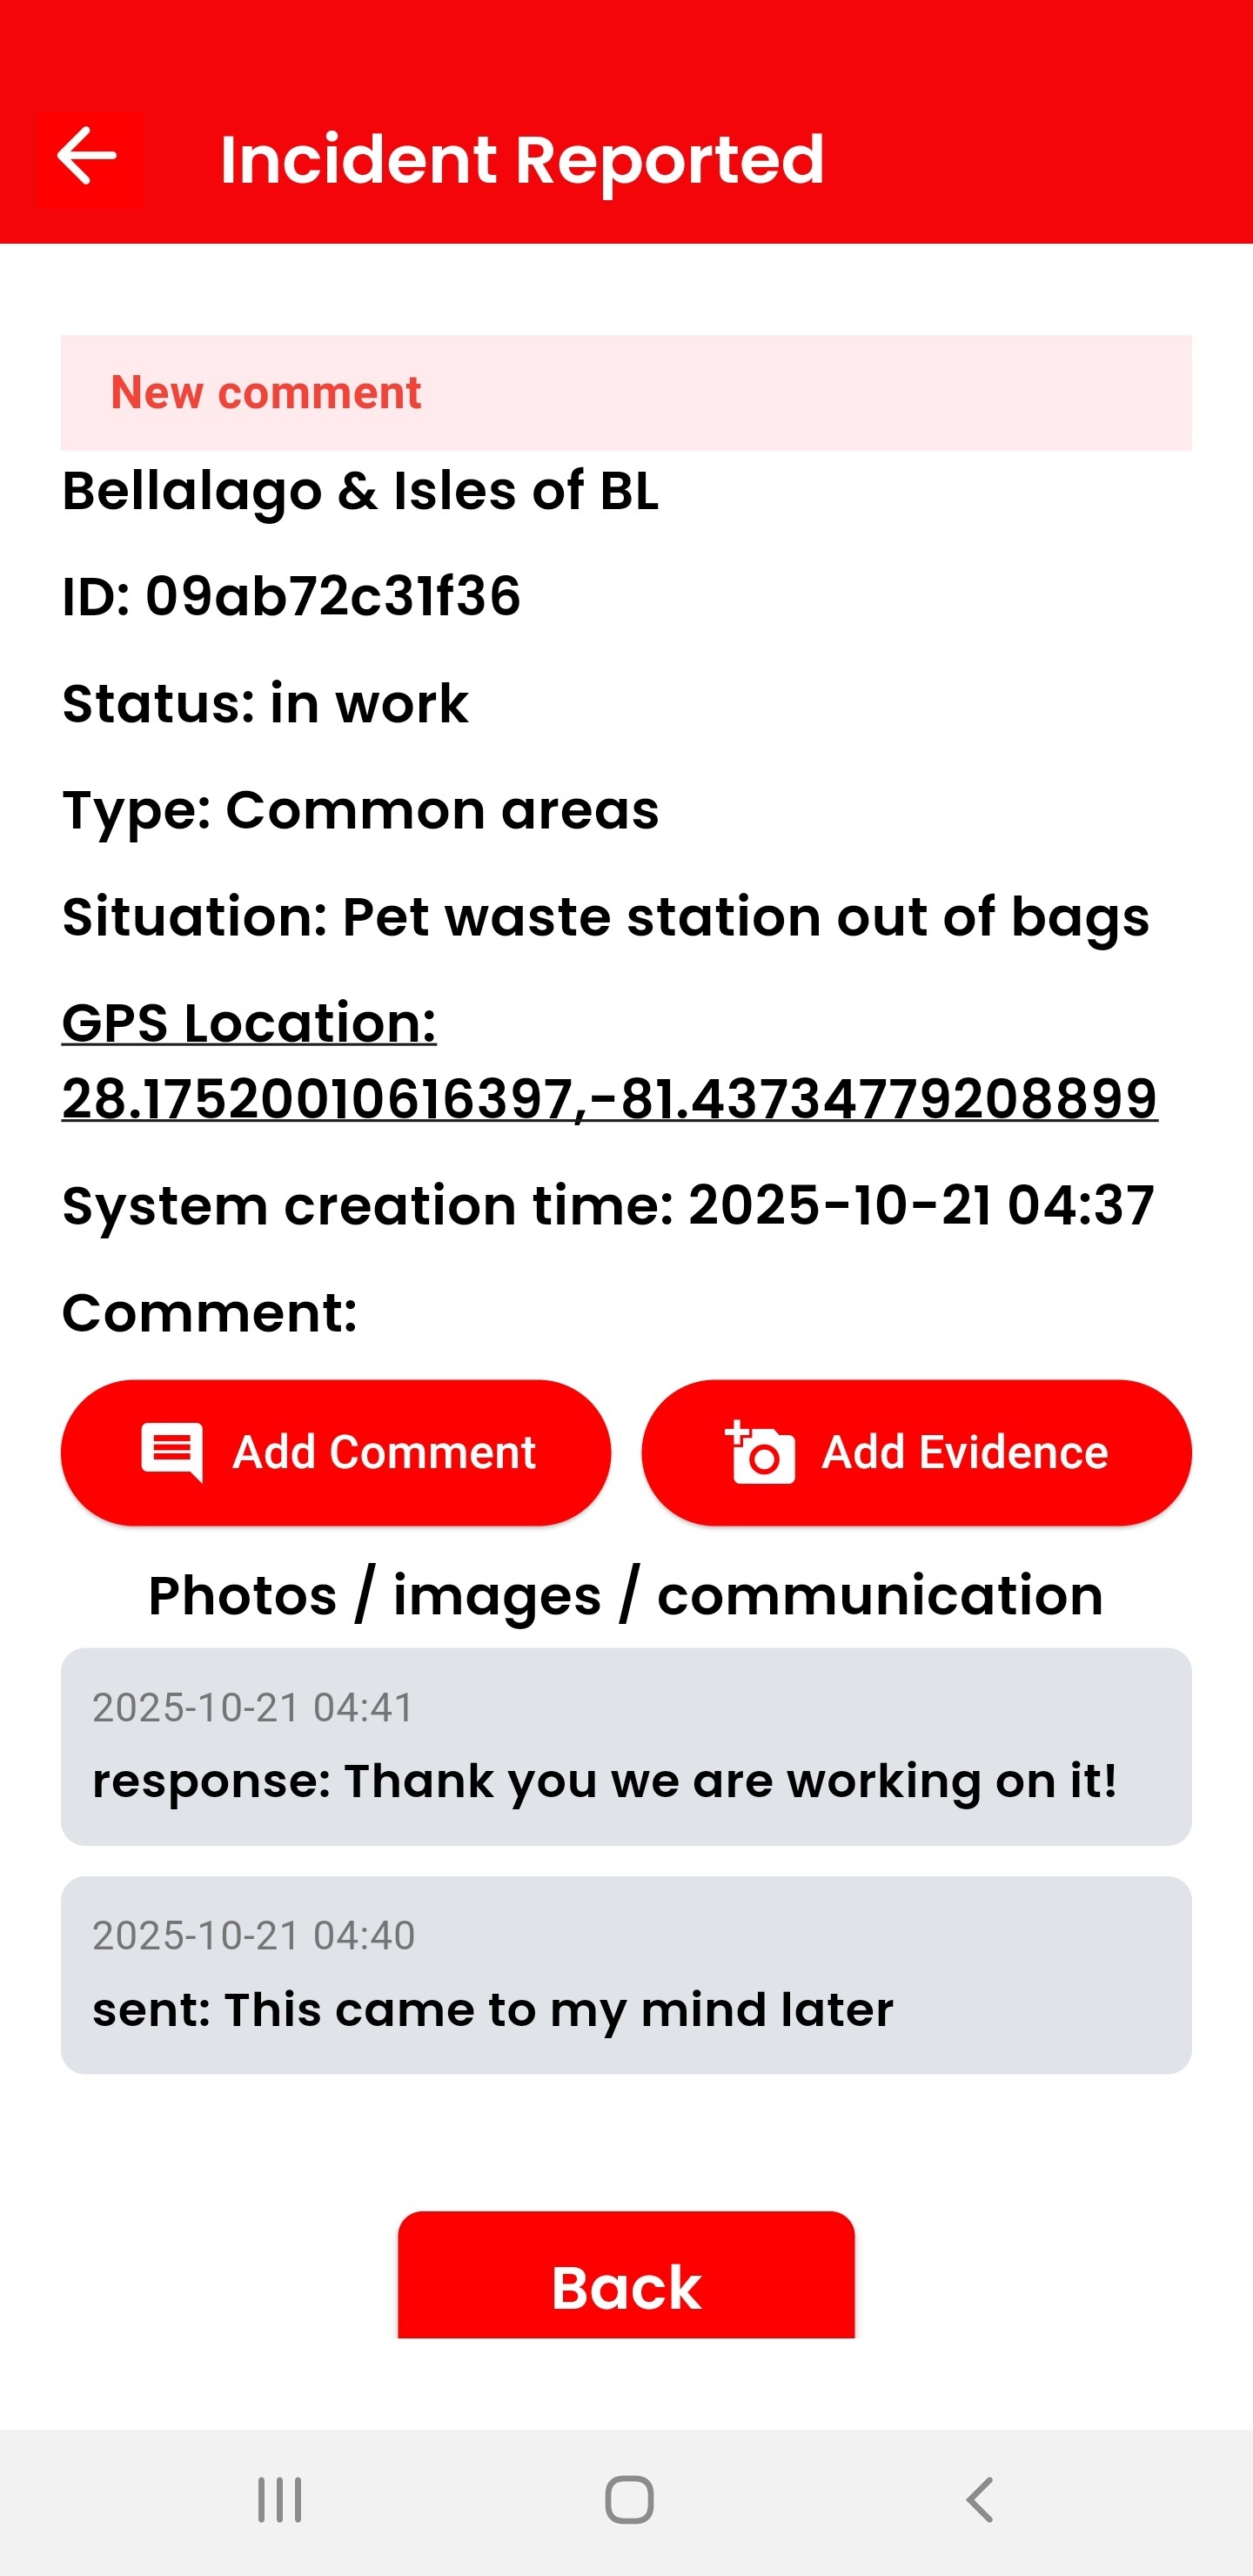
- The detailed page mirrors the sent information and any information which was added later on by the end user or the team working on the incident.
- On the detailed page another comment or photo / video can be added for an incident as long as it is in the status "open".
This gives an ongoing overview about what happens or happened to your sent incidents

5. Reset your password / password forgotten
In case you do no longer know your chosen password press the button "Reset Password" from the login screen.
The system will then inform you that it will send you a PIN verification code and to which email address it will be sent.
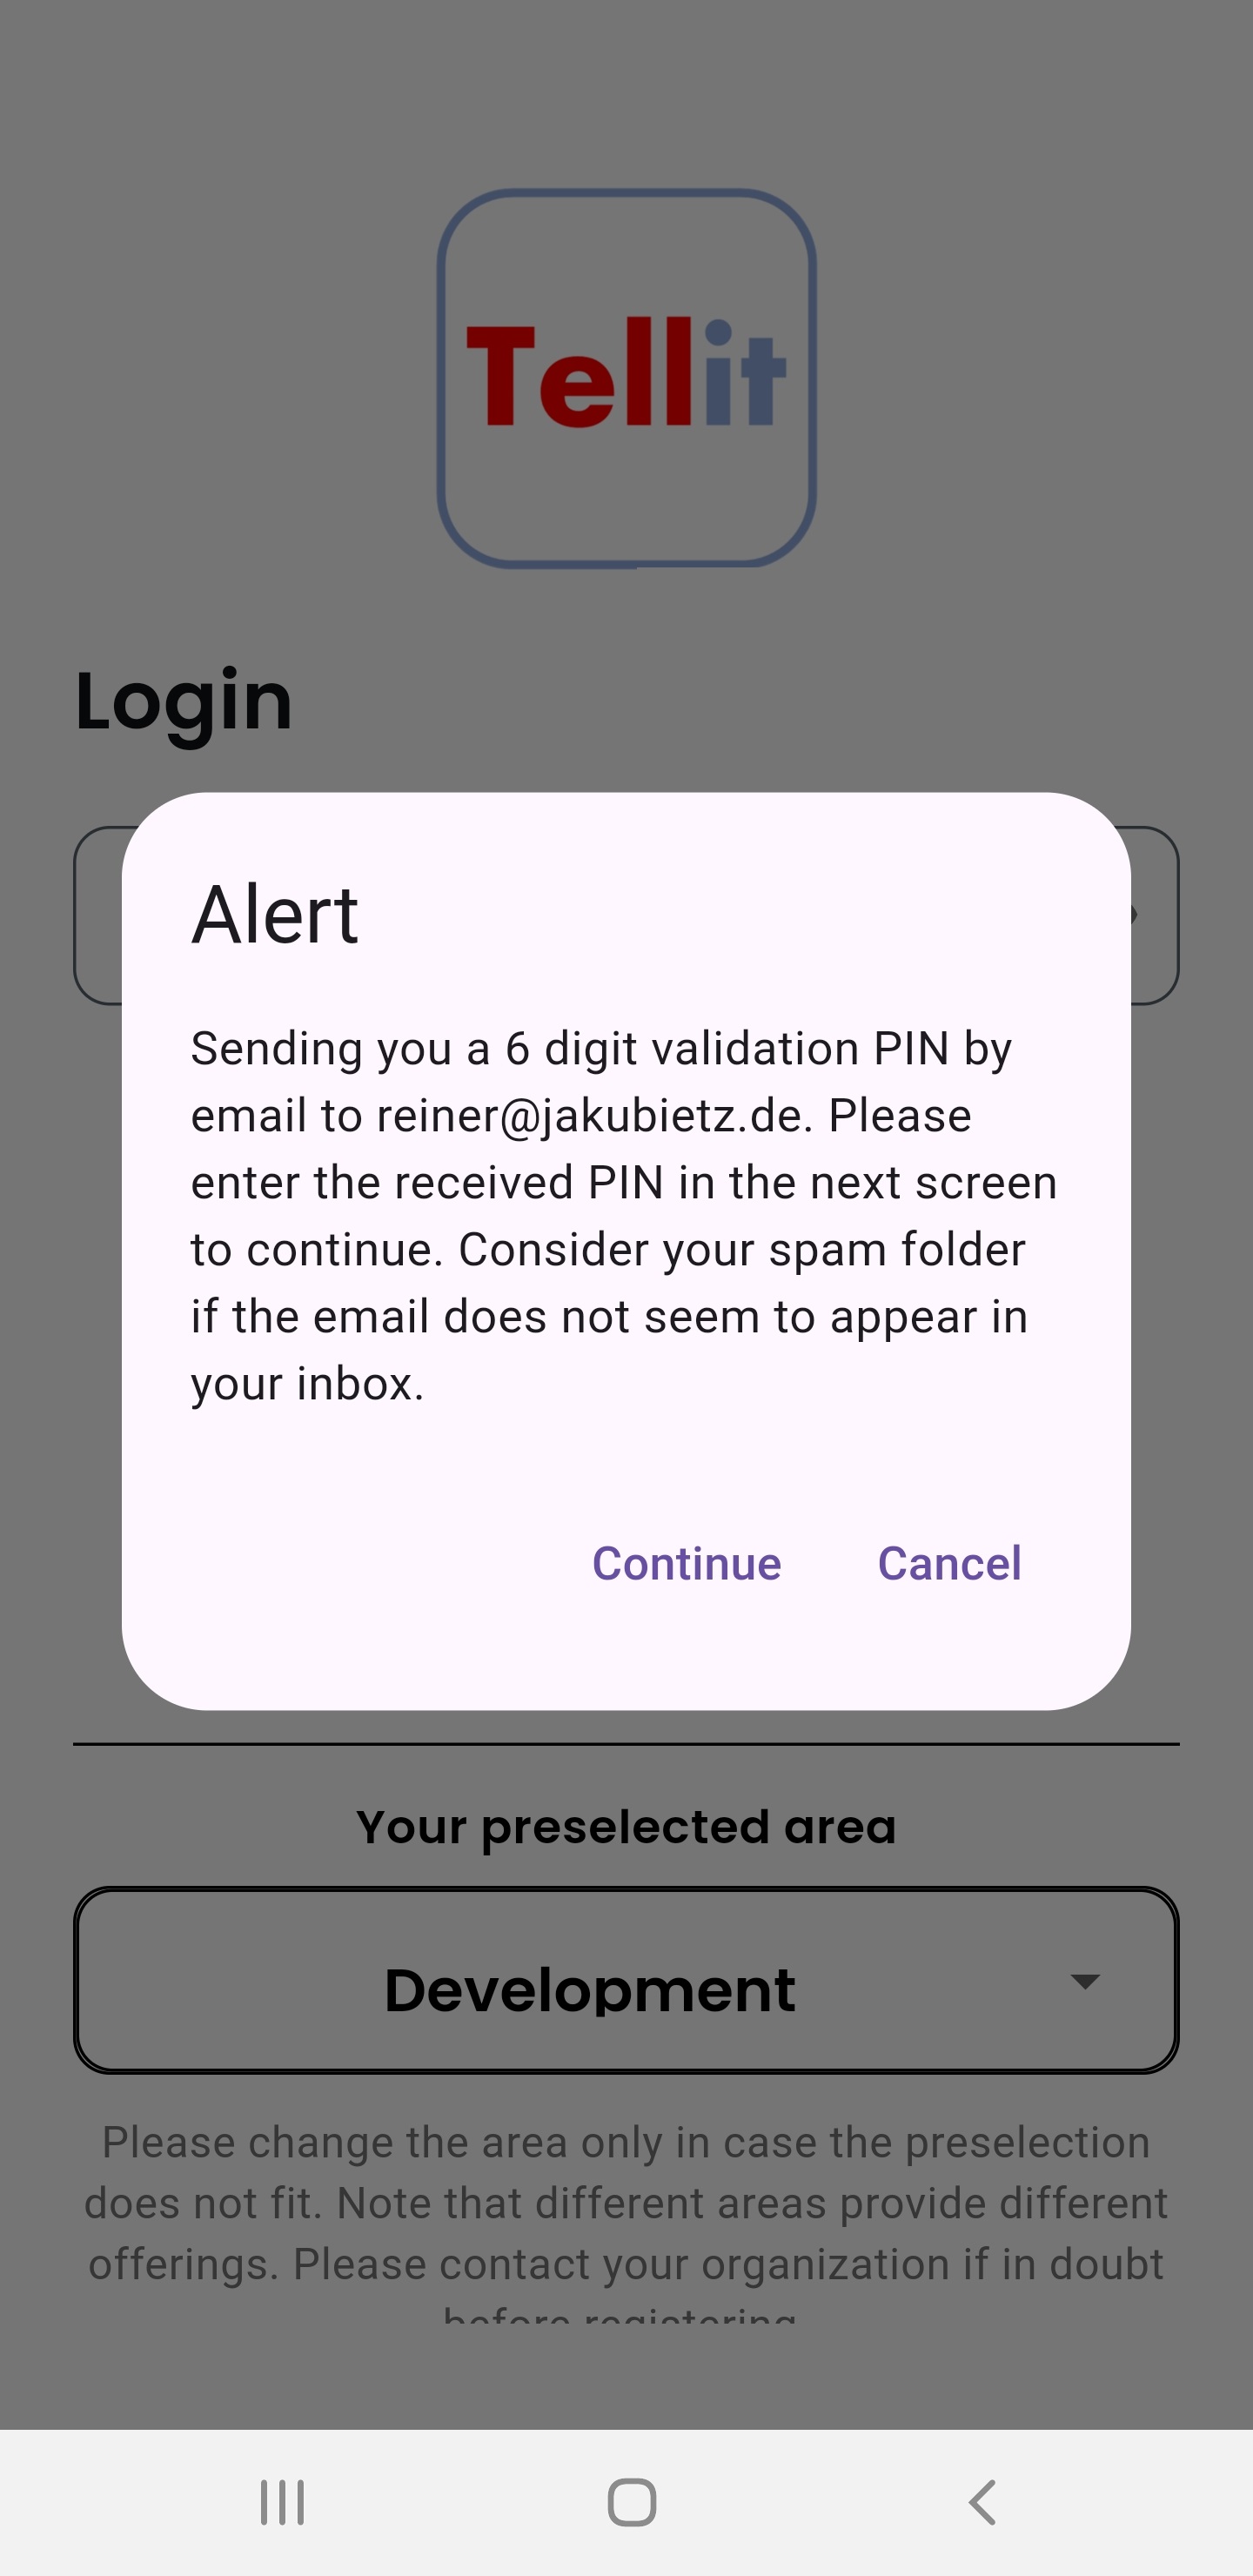
Click "Continue" and look out for an email sent to you with a verification code. Check the spam folder please in case the email cannot be found:
Enter the sent PIN code into the verification screen:
After clicking on "Verify" you can now enter your new password and re-enter it a second time.:
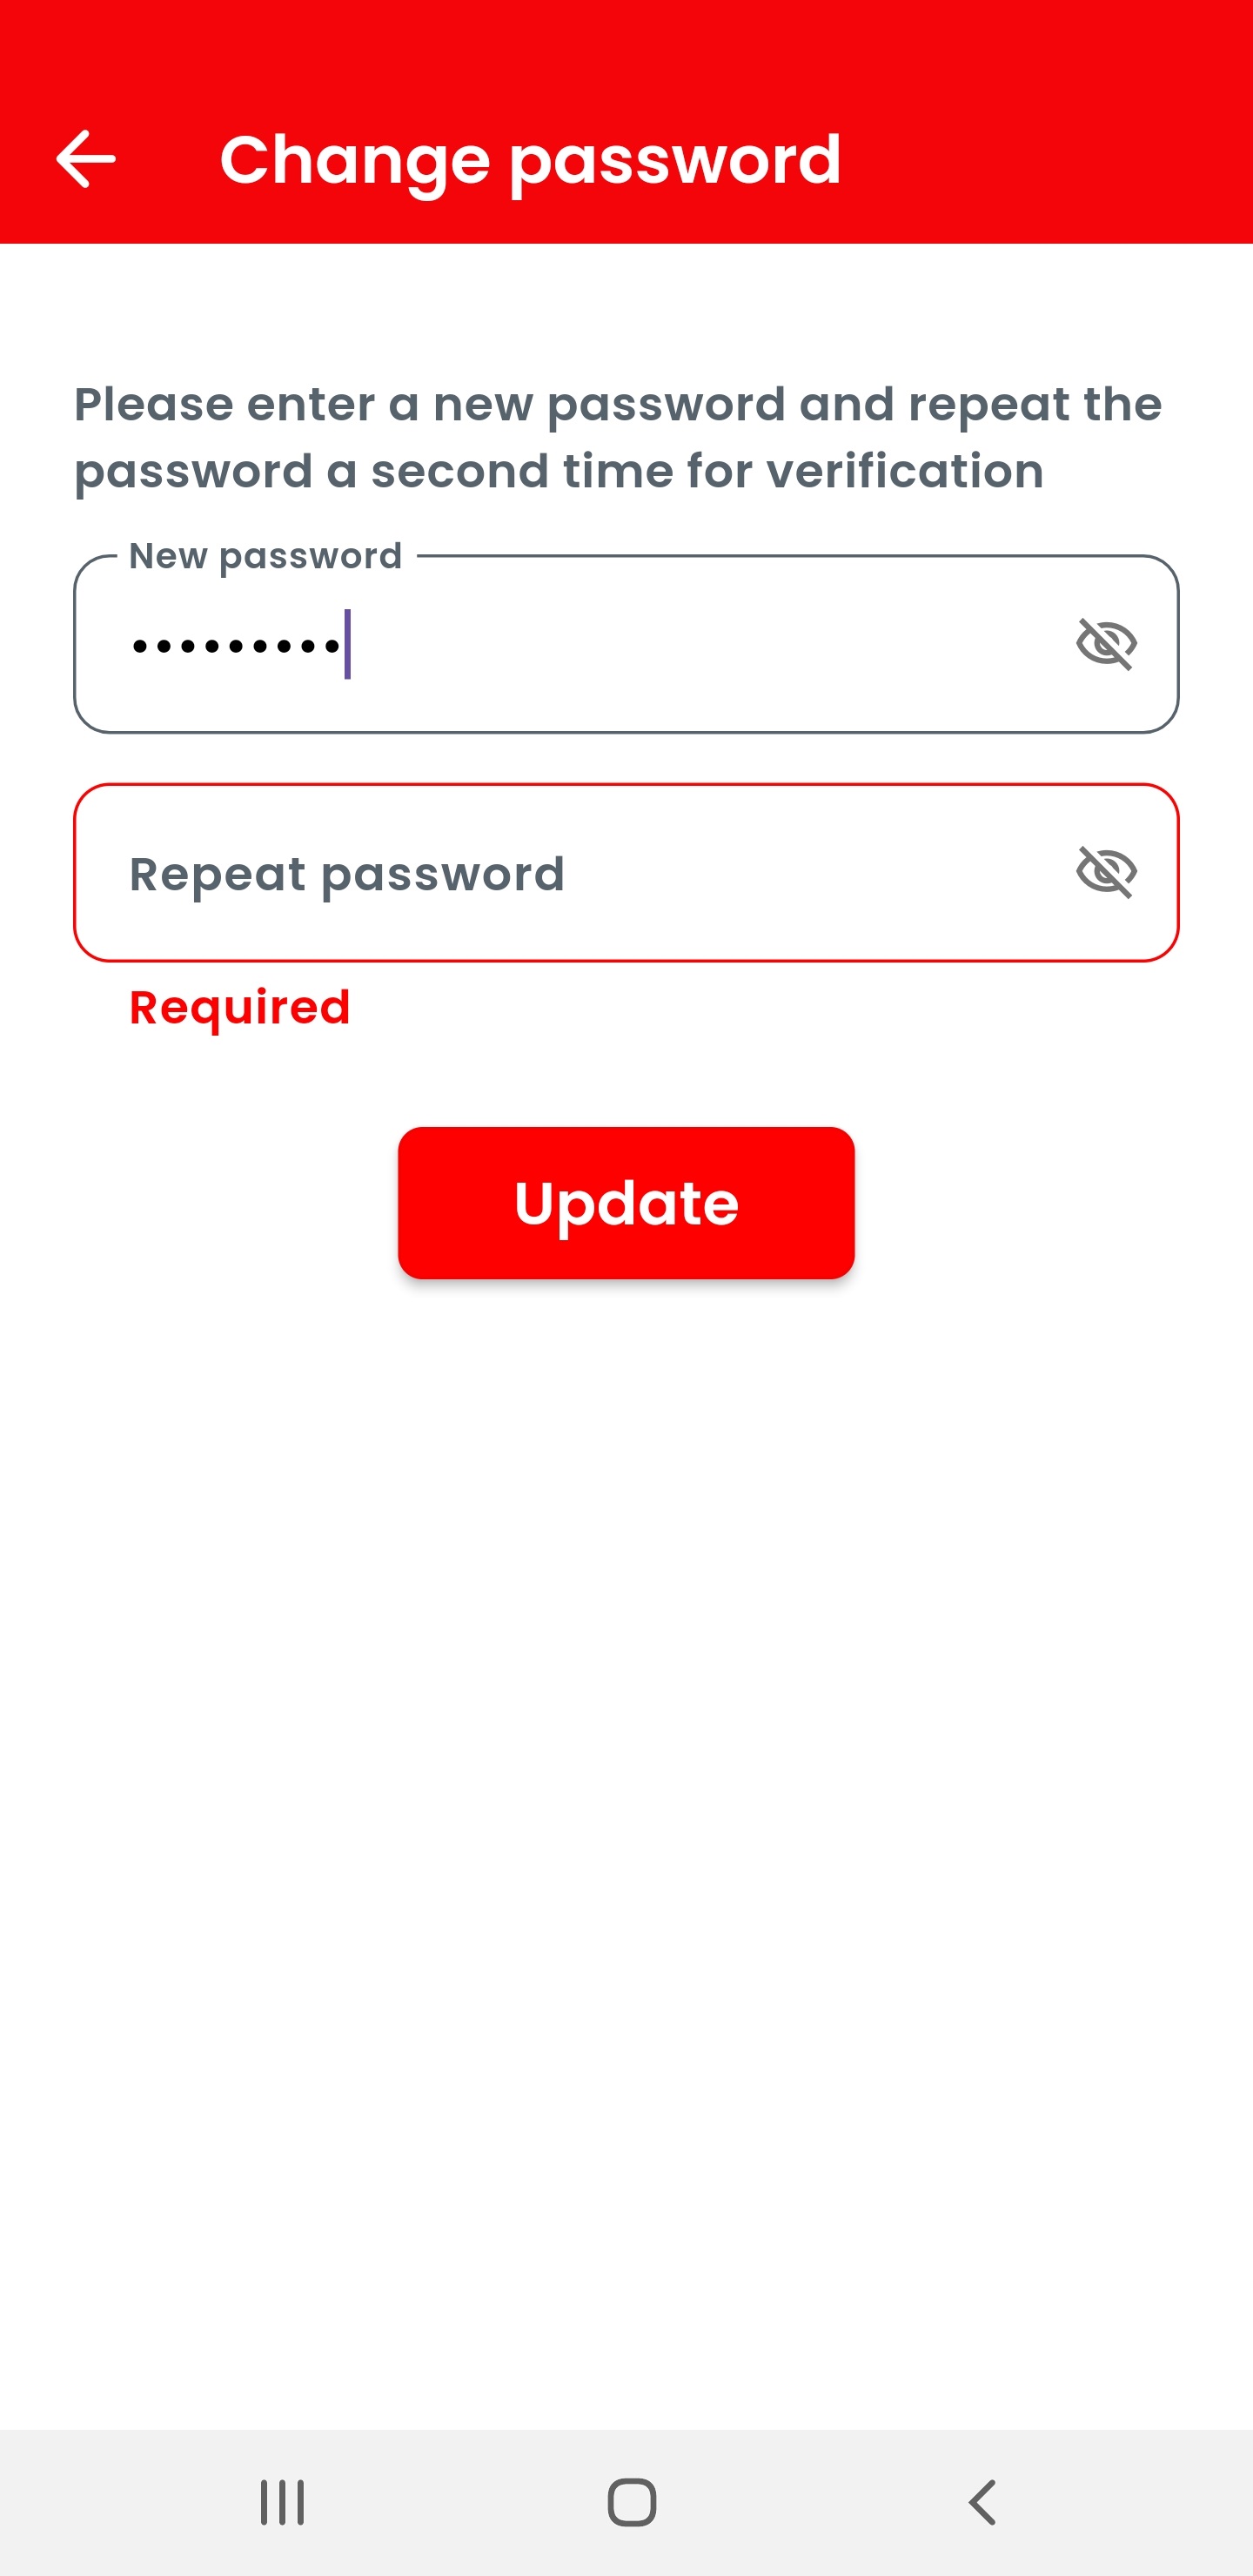
After pressing "Update" the password change is saved.:

By confirming the hint with "ok" you will be returned to the login screen and can enter your new password:
6. I have a new mobile phone - how to move my Tellit account?
In case you have a new phone and like to use your existing Tellit account please download the Tellit app on the new phone. The system will automatically show the registration page. Simply click on the button below the question "New mobile phone?":
The system will then ask you to enter your phone number and email address.
Important: Please use the same data as with your existing Tellit registration so that the system can find your credentials.

Once found and in order to verify you, you will receive a 6 digit verification code by email same way as with the original registration. Please look up your email and enter the code into the form. If the email does not appear look in the spam folder please.
After a successful verification you will have access to your account as on the previous device.
Note that the previous device can no longer be used accessing your Tellit account. However you are free to move back to your previous phone with exactly the same mechanism.
7. Settings
The settings menu allows some more specific functions not needed for the "normal" use of Tellit.
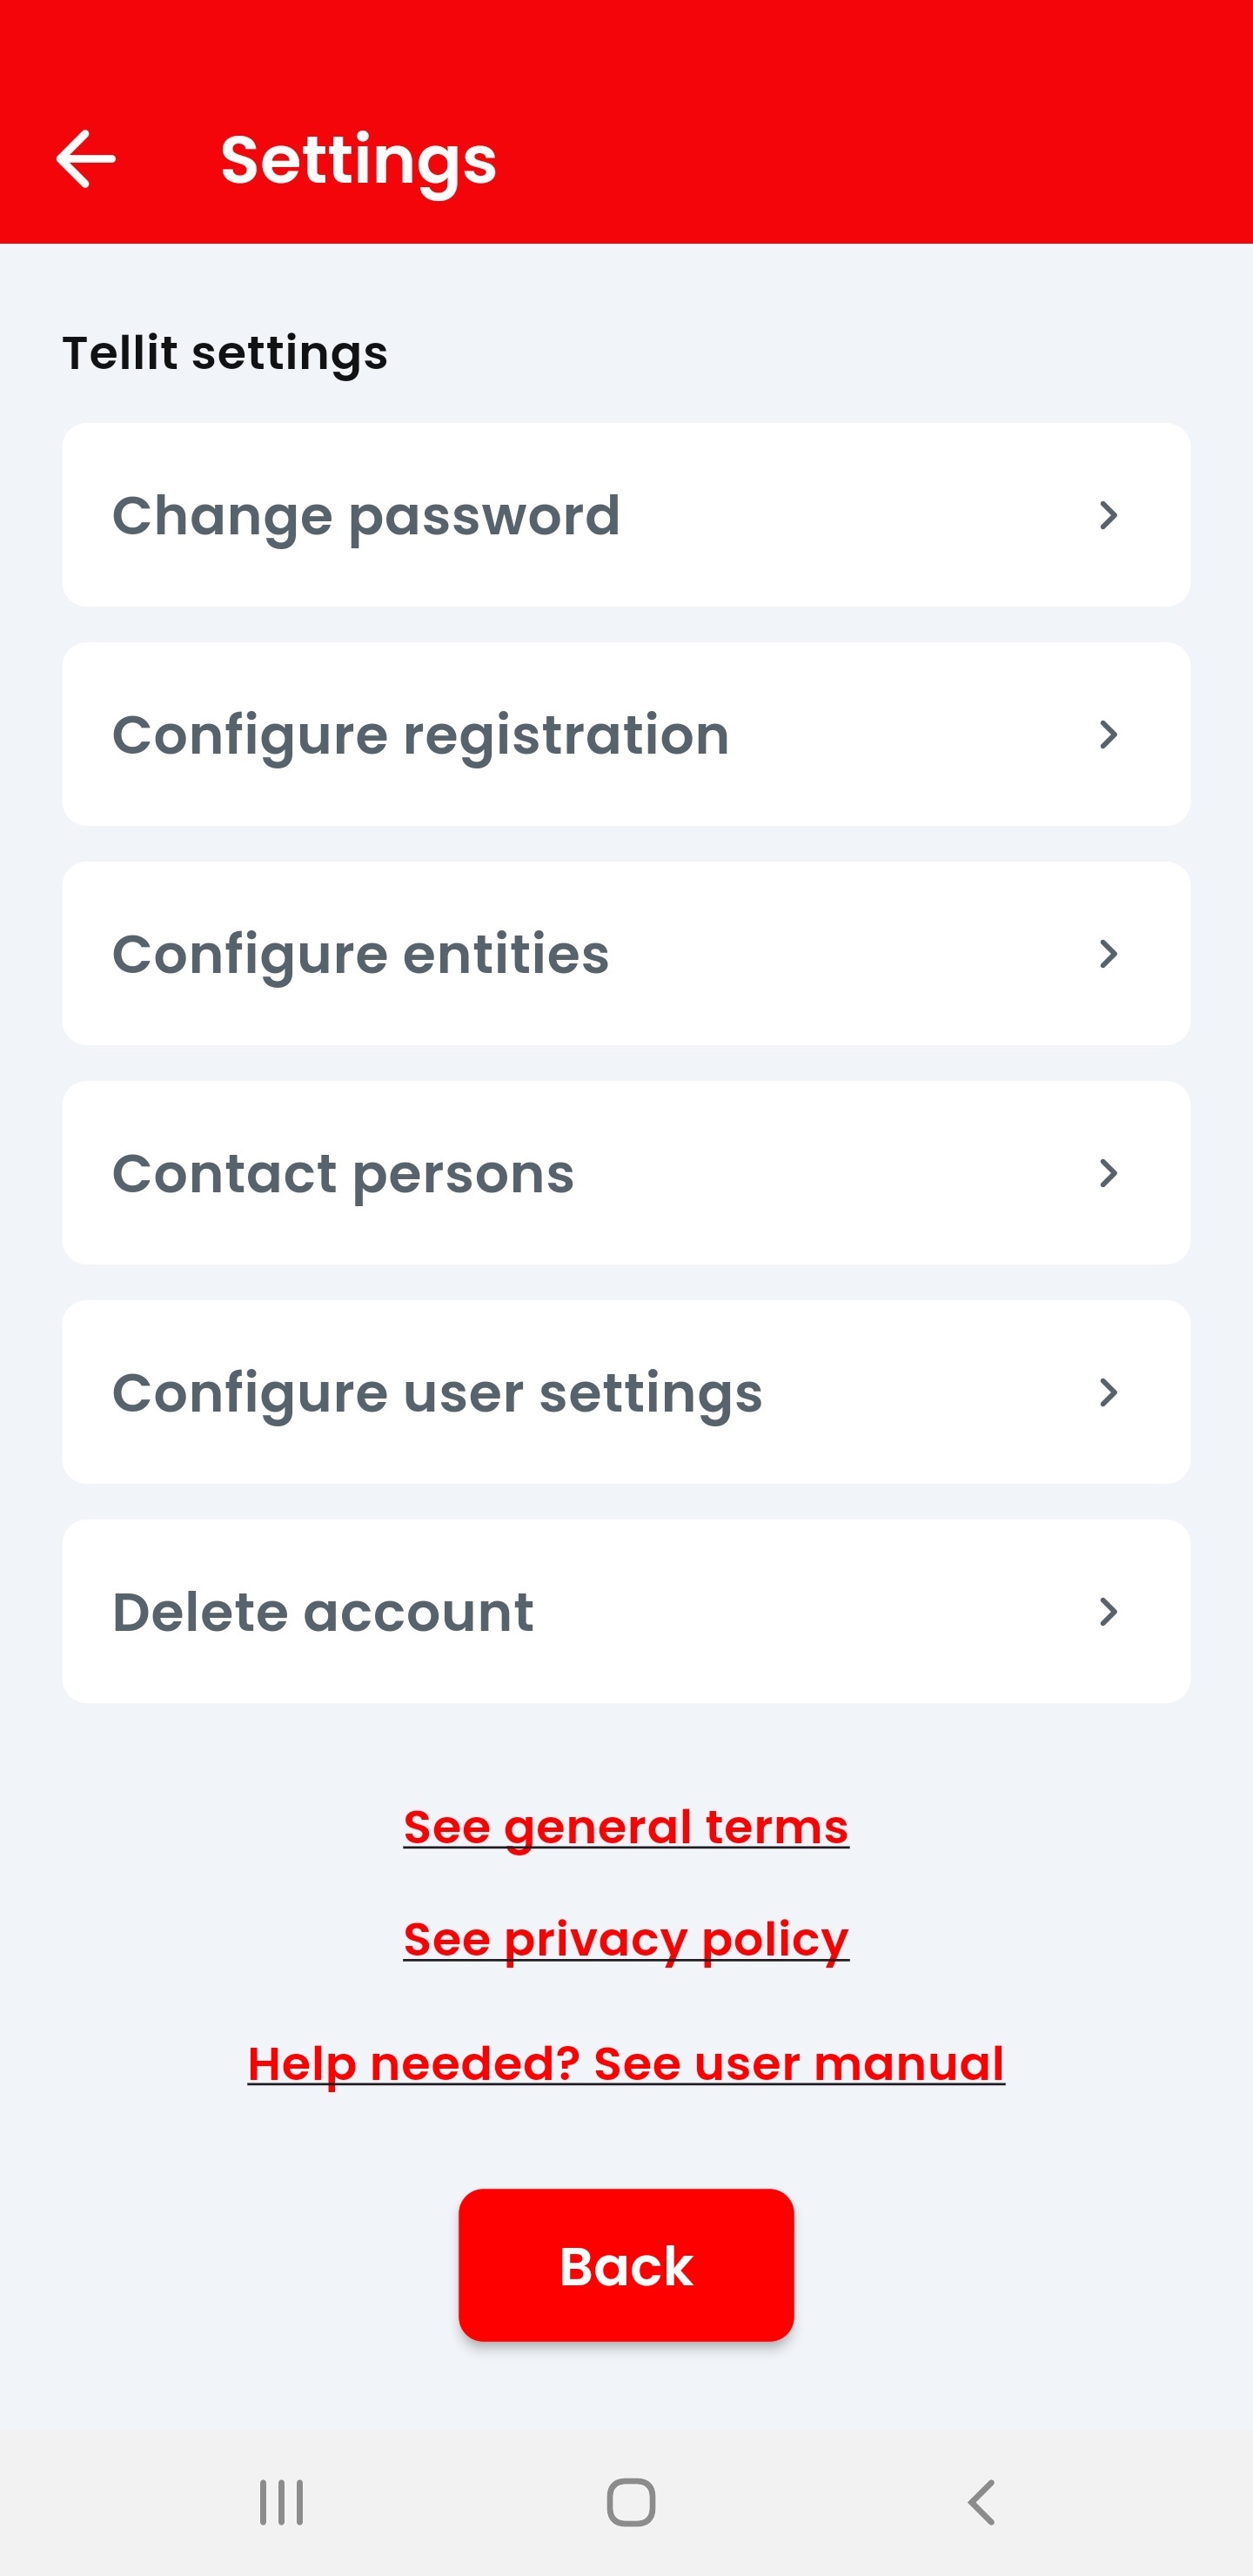
7.1 Change your password
Clicking on "Change password" from the settings menu allows to change your password. Please specifiy the new password, repeat it one time and confirm the change by entering your current password. Fianlly press "Update" to save the new password.
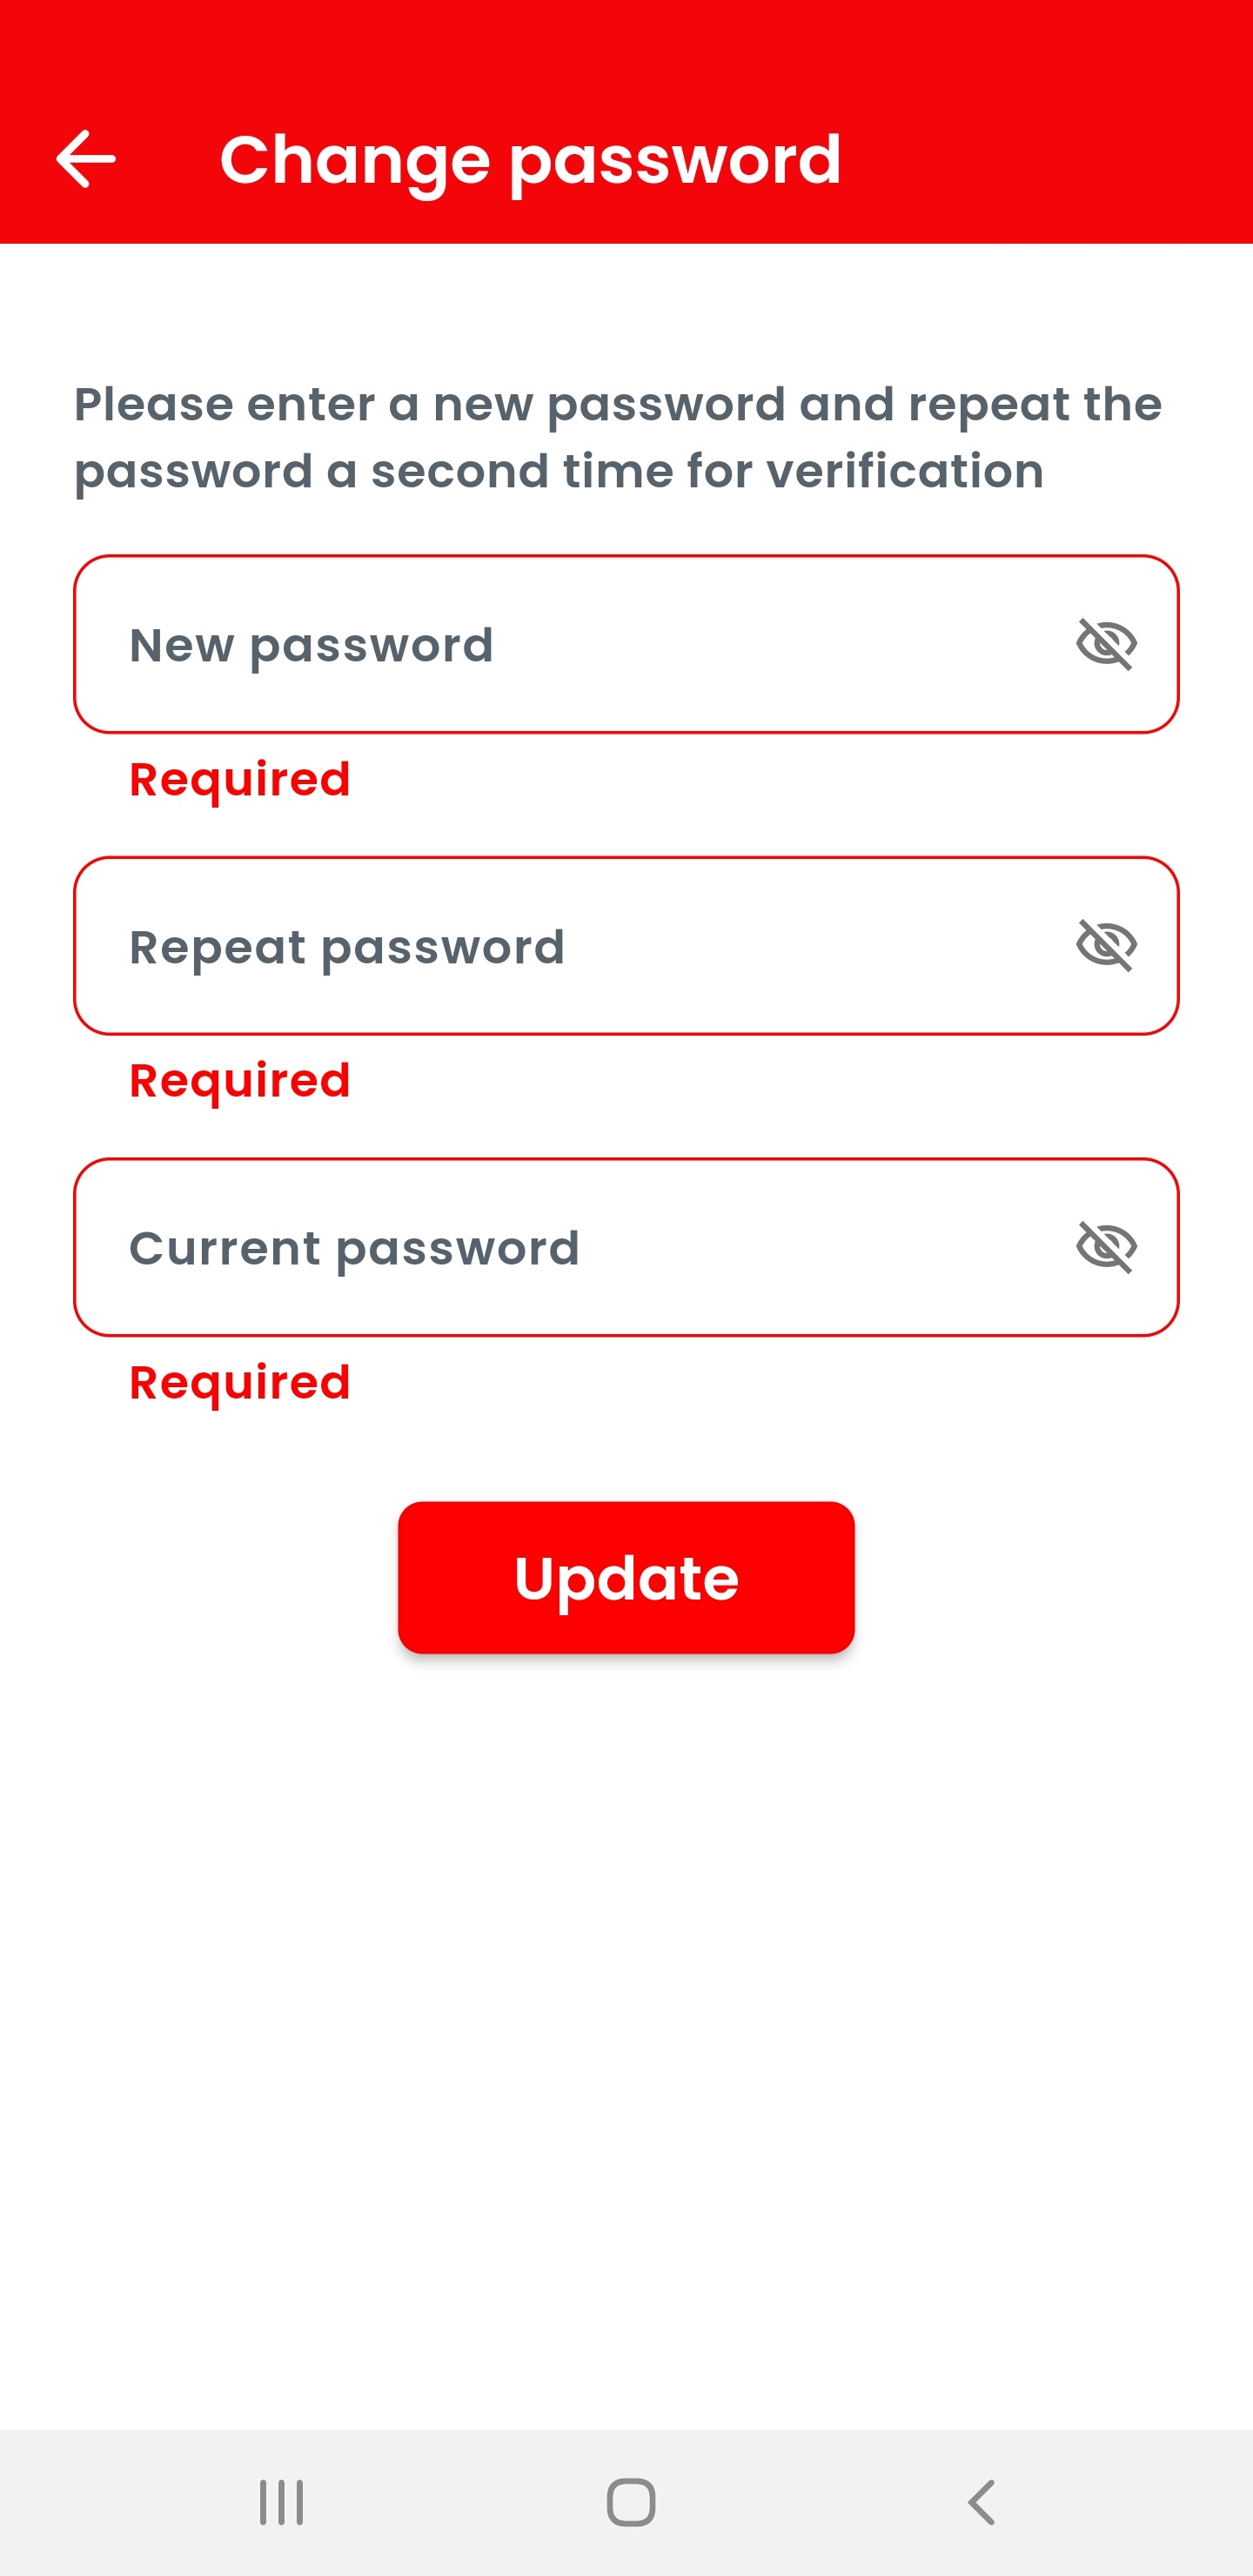
Any changes need to be confirmed with your current password.
7.2 Change your registration settings
Clicking on "Configure registration" from the settings menu allows to change your settings chosen with the registration. Confirm the changes by pressing "Update" at the end of the page.
Note that changing parts of the telephone number or the email address will result in a PIN code verification to nake sure the new data is correect.
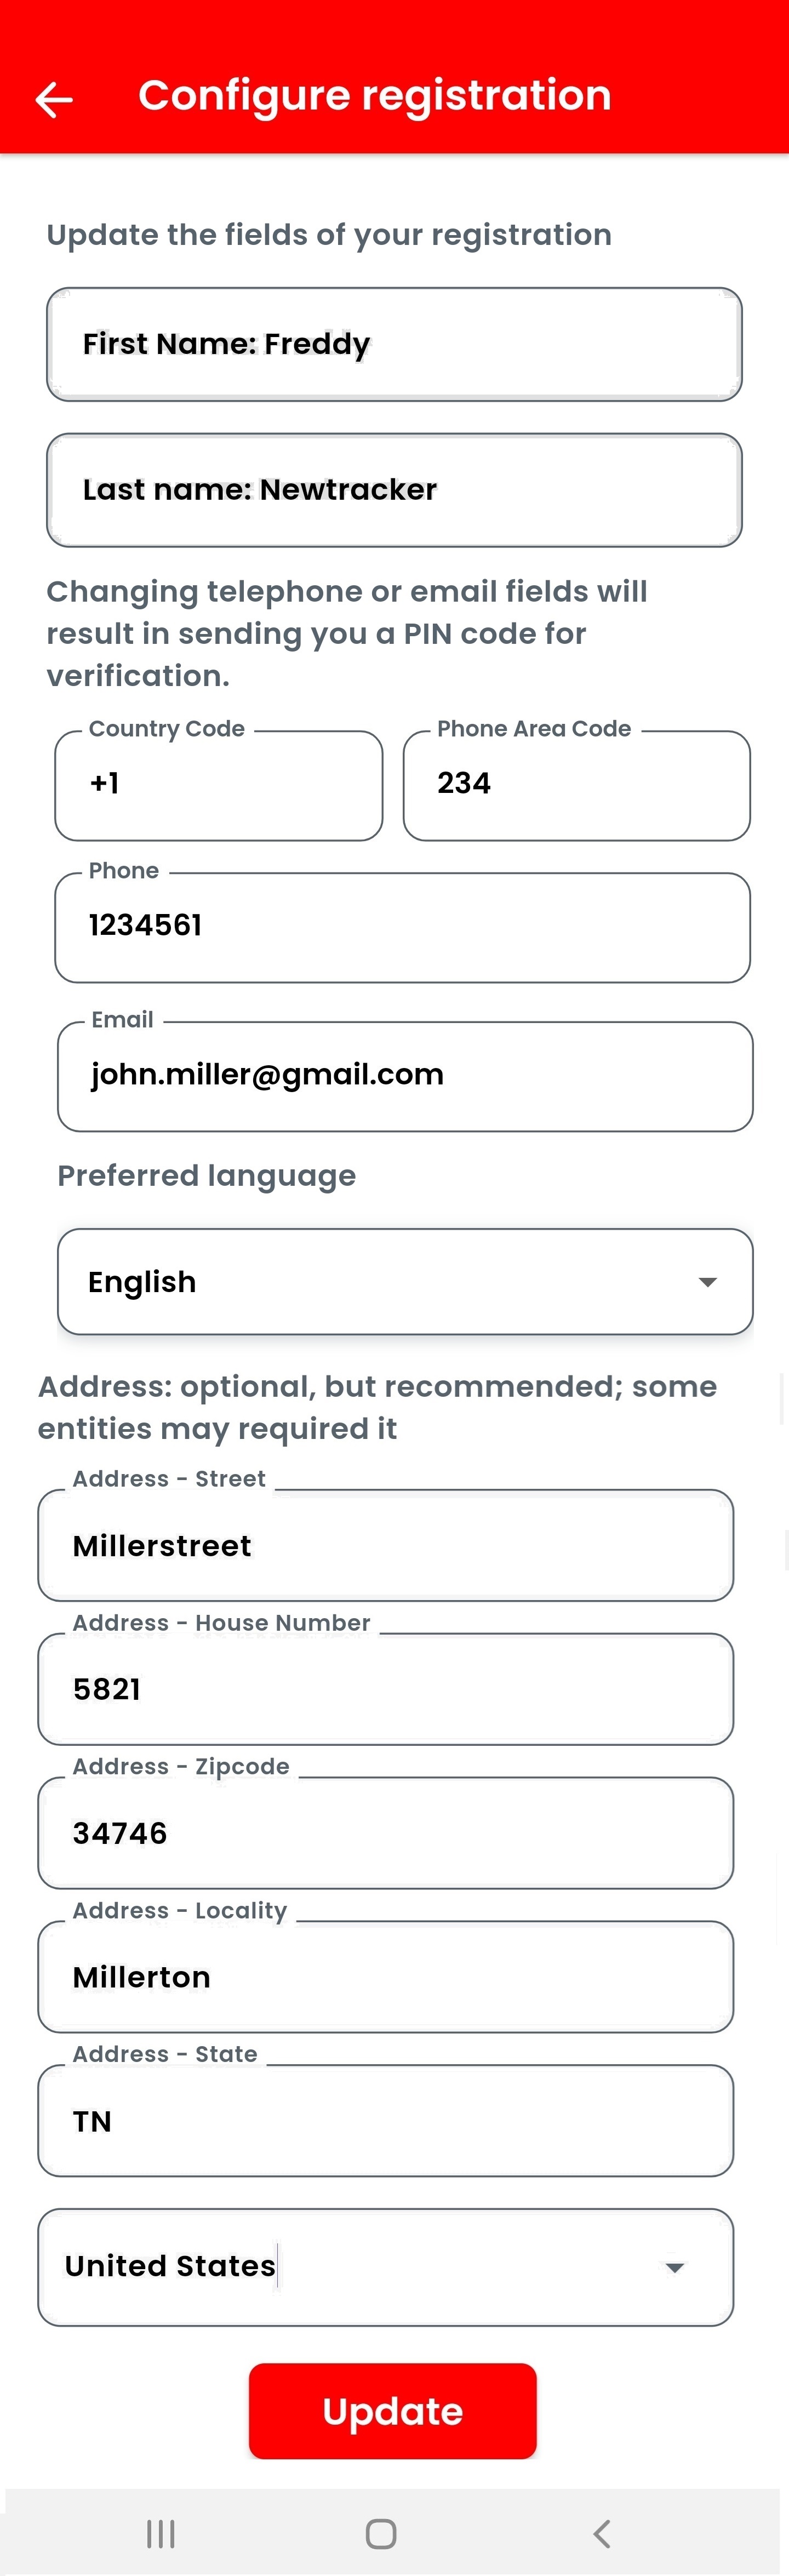
Any changes need to be confirmed with your current password.
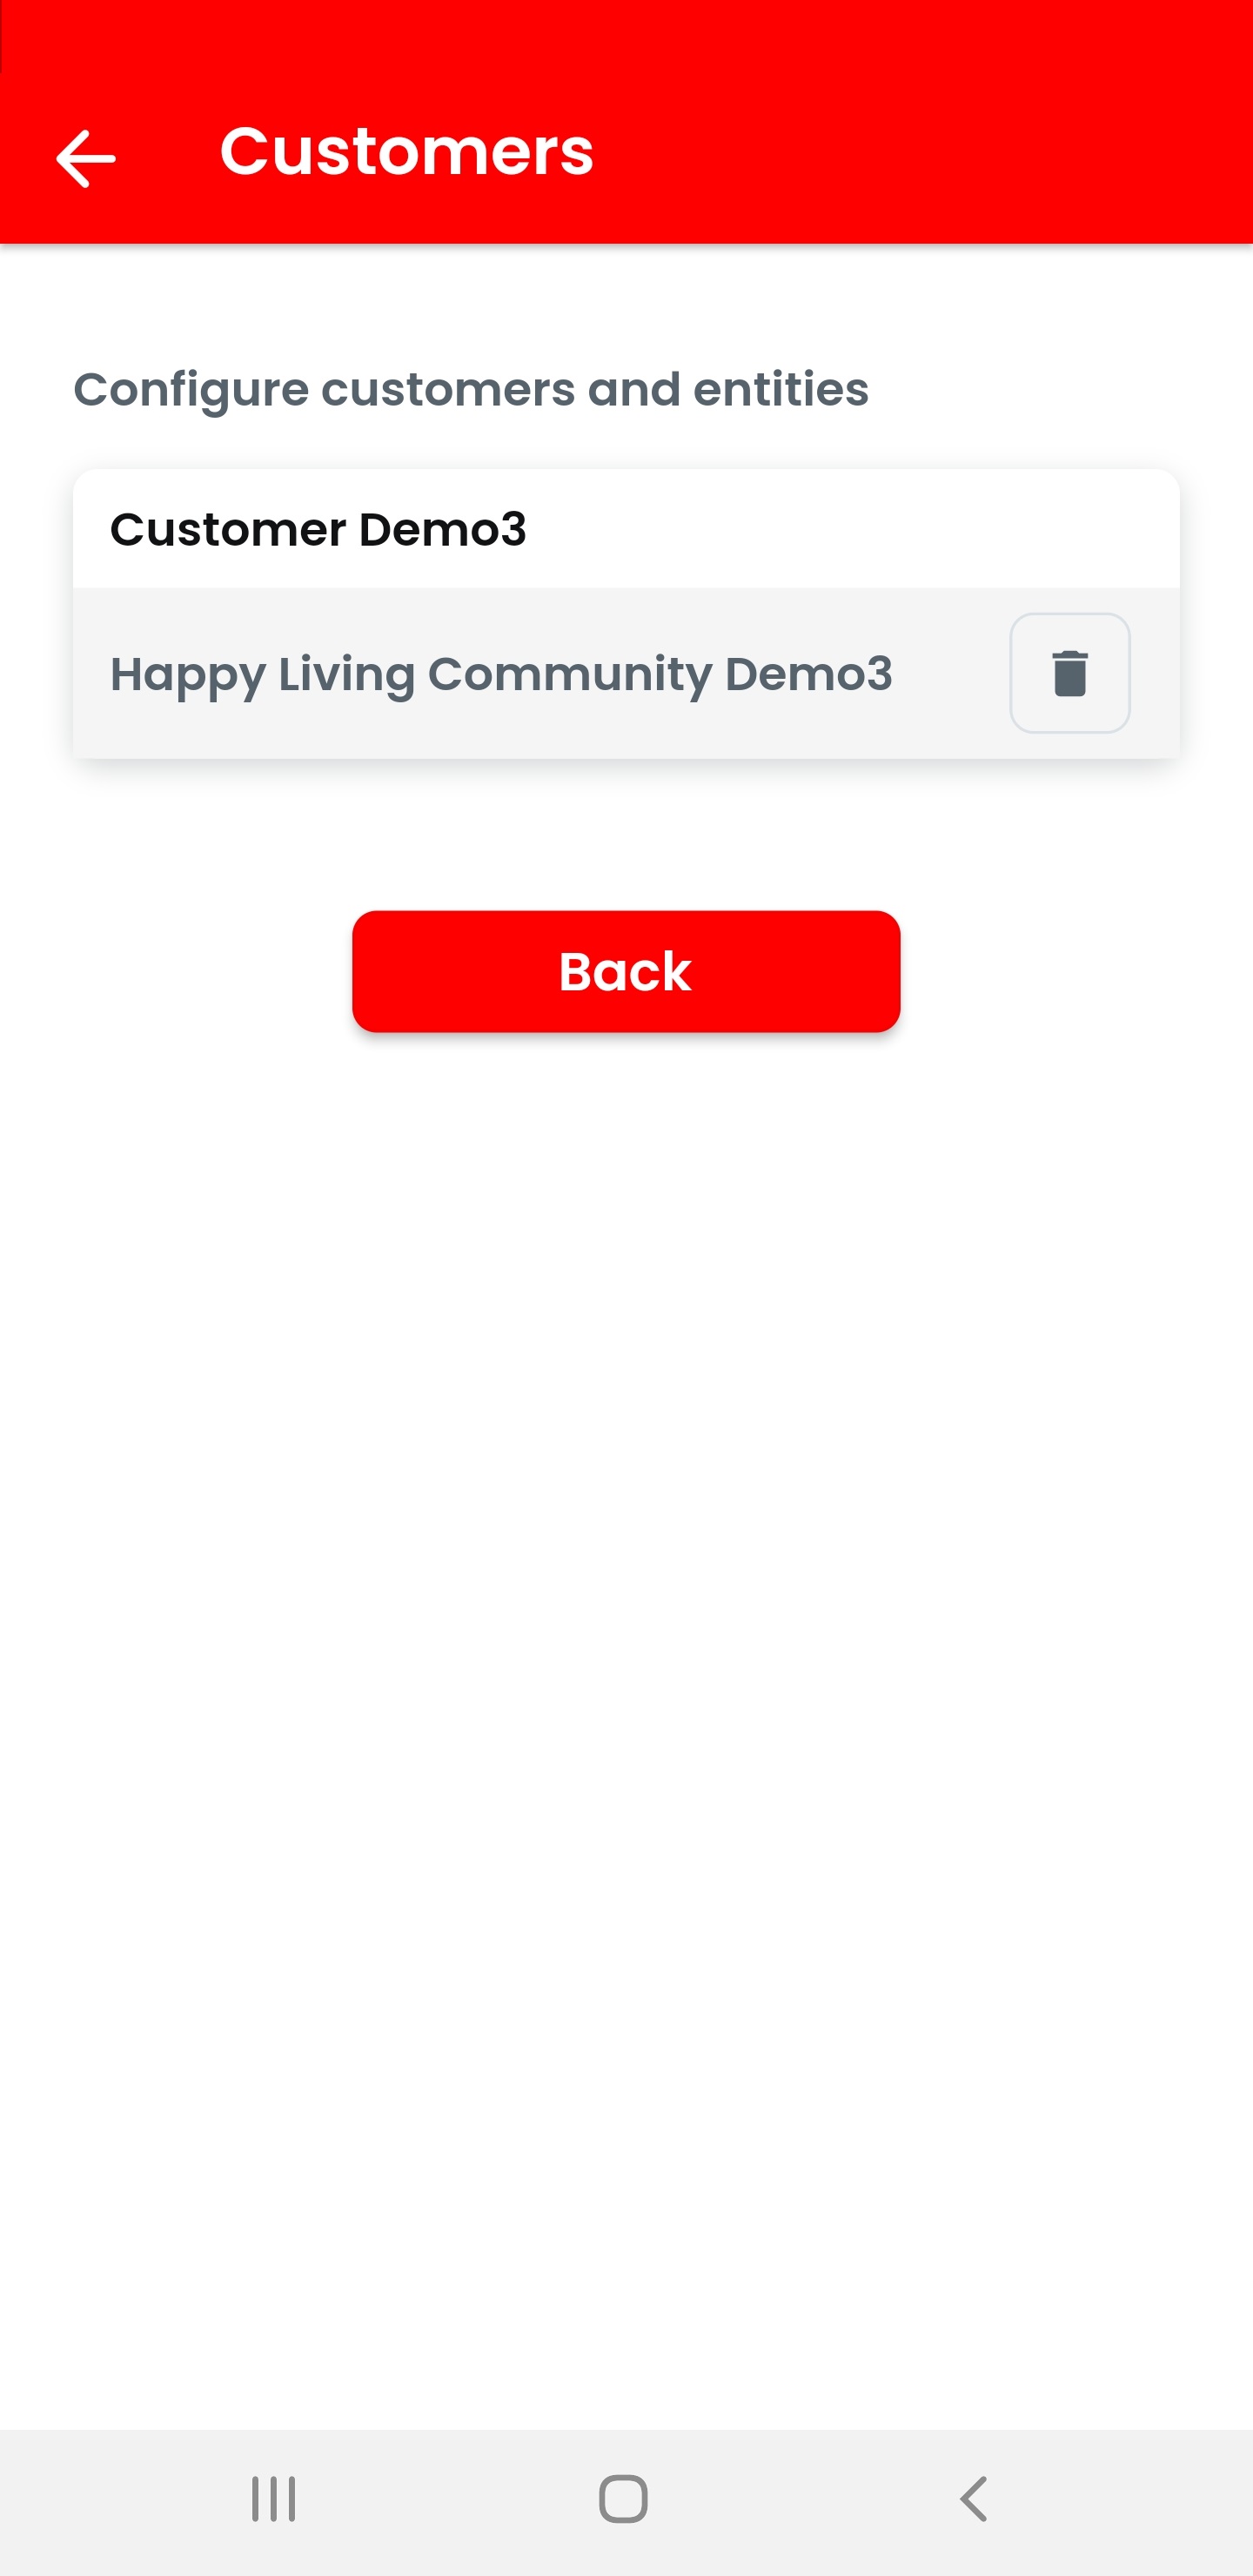
7.3 Disconnect the chosen entity
In case you may have more connected entities, e.g. two homes in different communities and sell one you may want to disconnect from a connection. To do this please select "Configure entities" from the settings menu and remove the connection no longer needed.
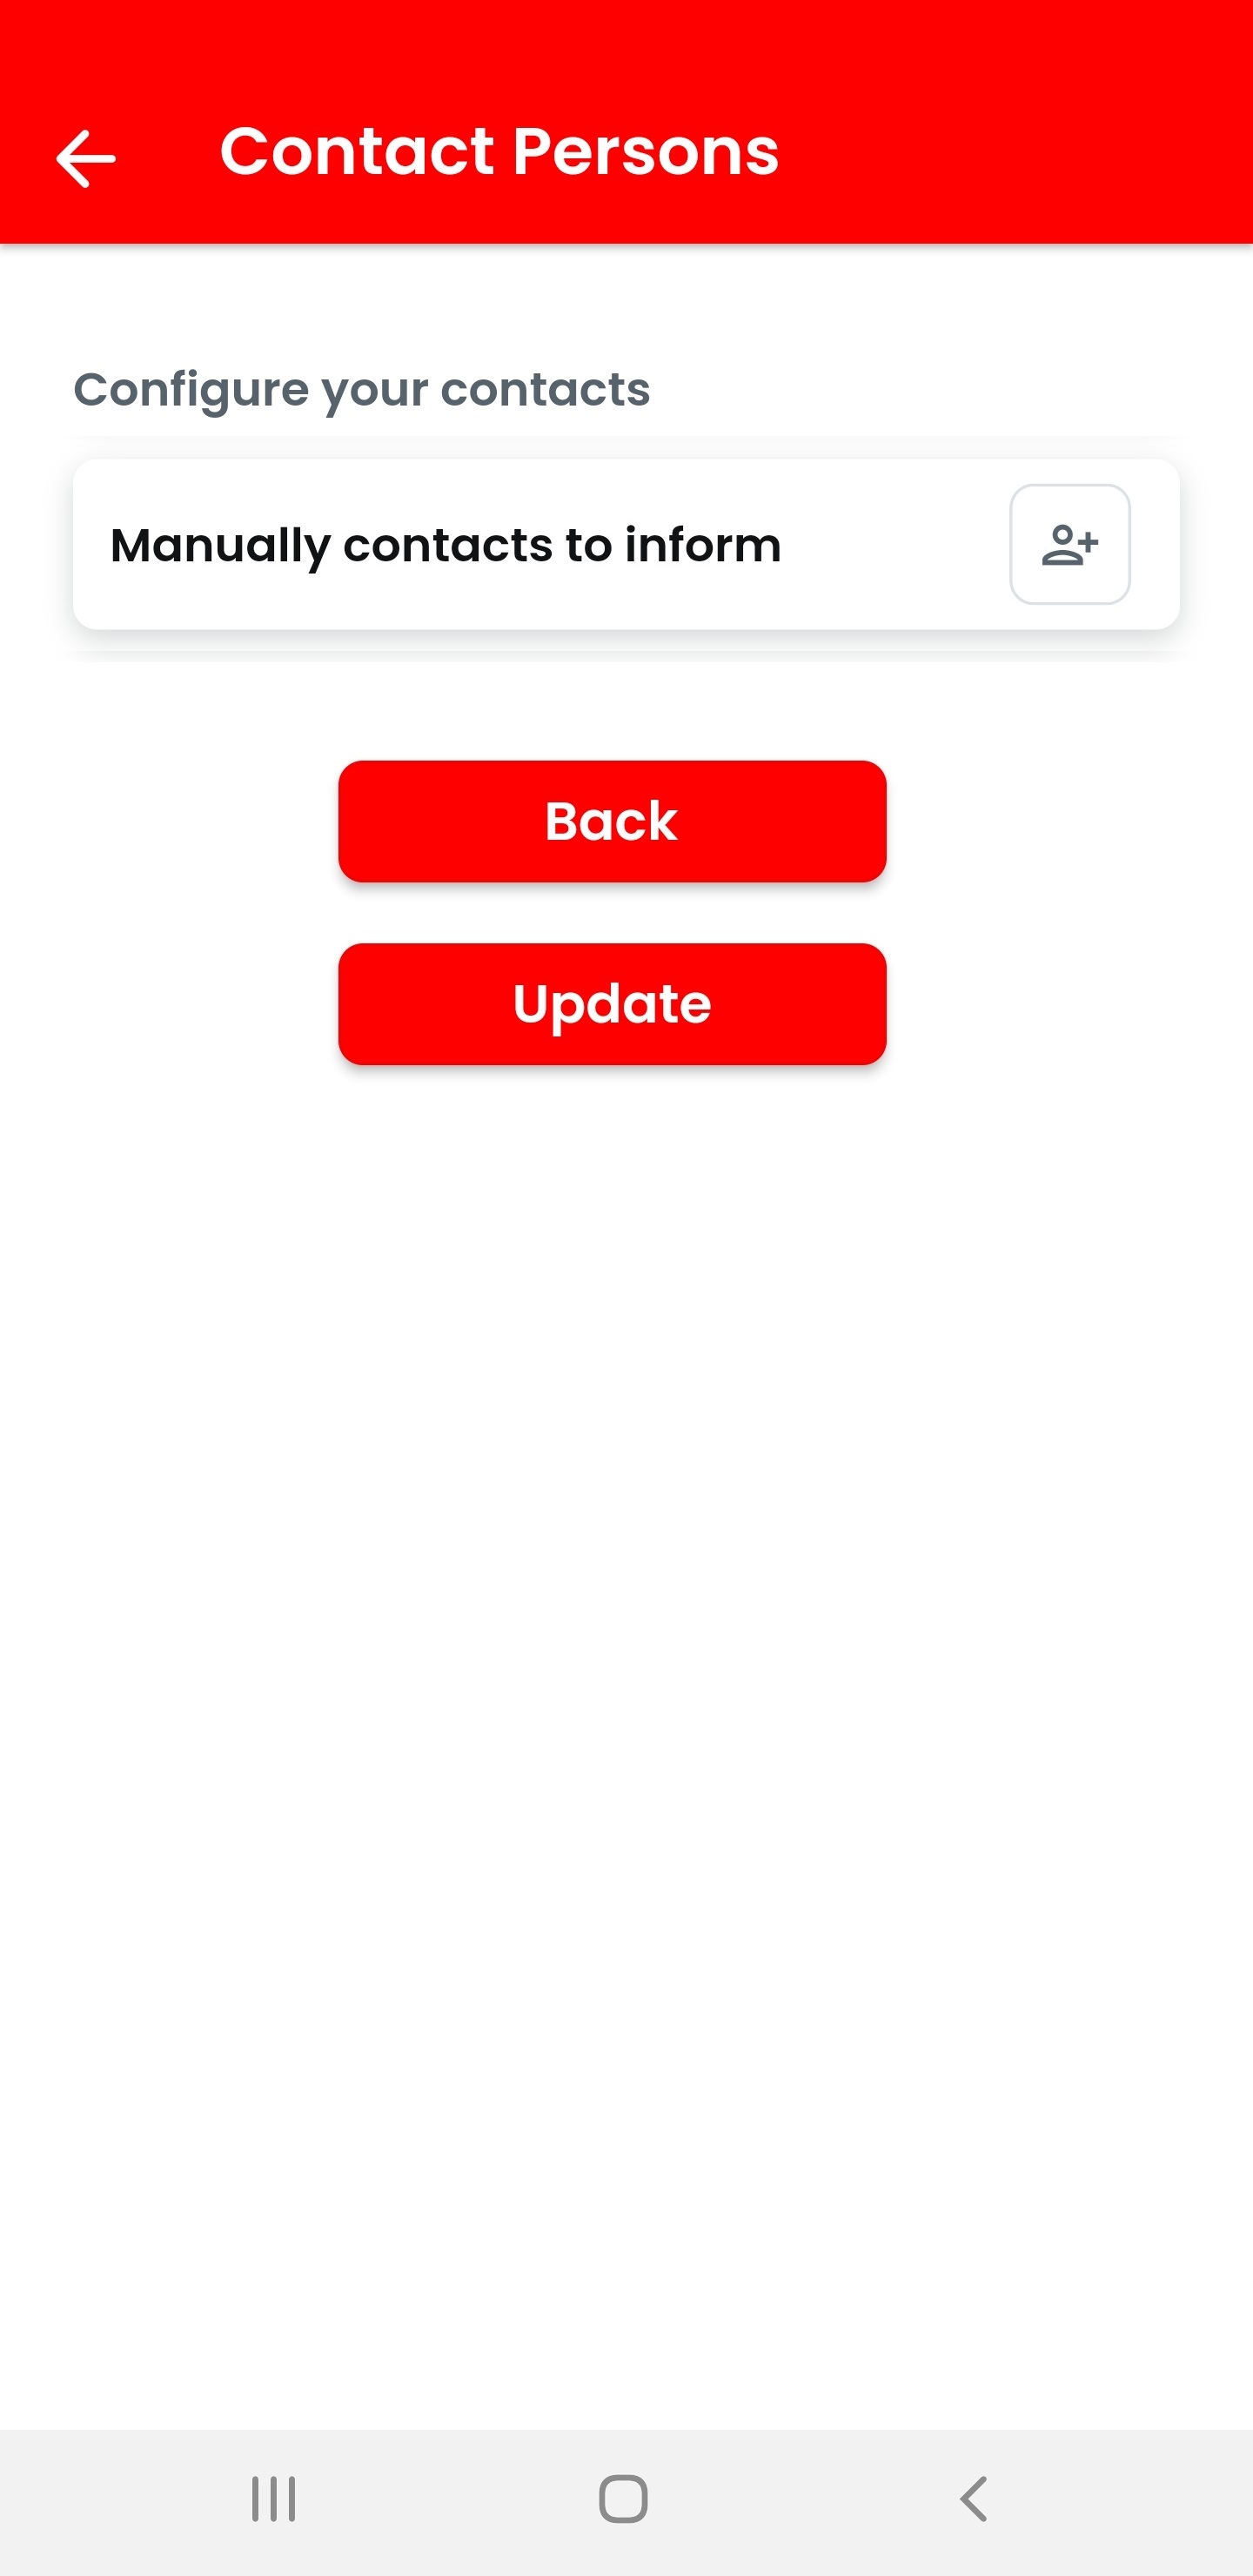
7.4 Send emails to yourself
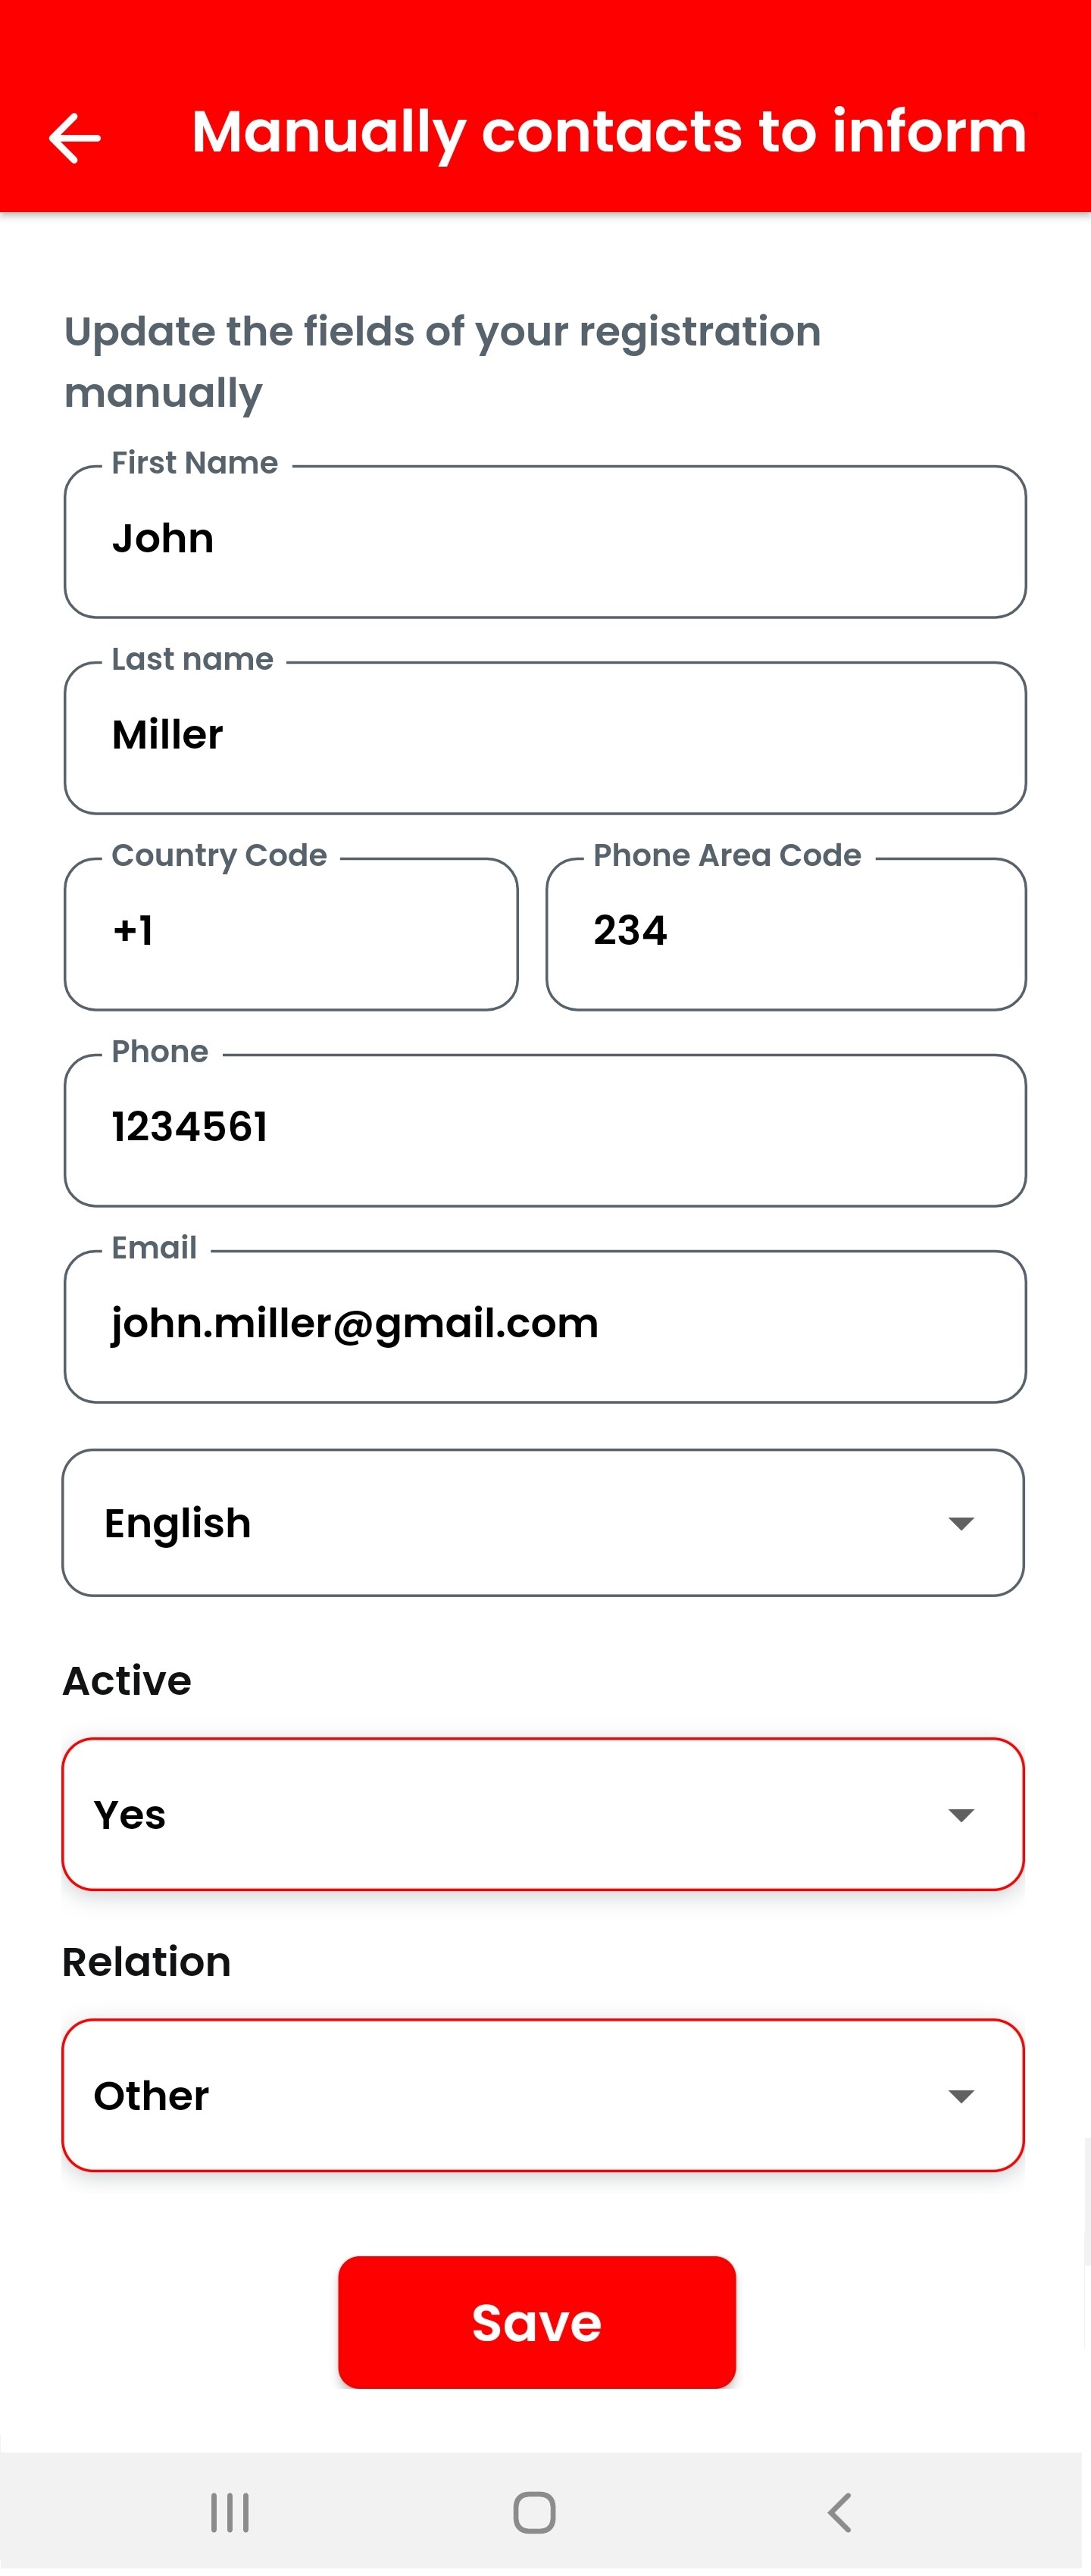
If you wish to also receive emails about your reported issue this can be done by selecting "Contact Persons" from the settings menu and then "Manually contacts to inform":
Please key in your data and specifically the email-address you want to get the emails sent to which cannot be taken automatically from the registration at this time. Set "Active" to "yes" to enable the sending process. "Relation" can be set to "other".
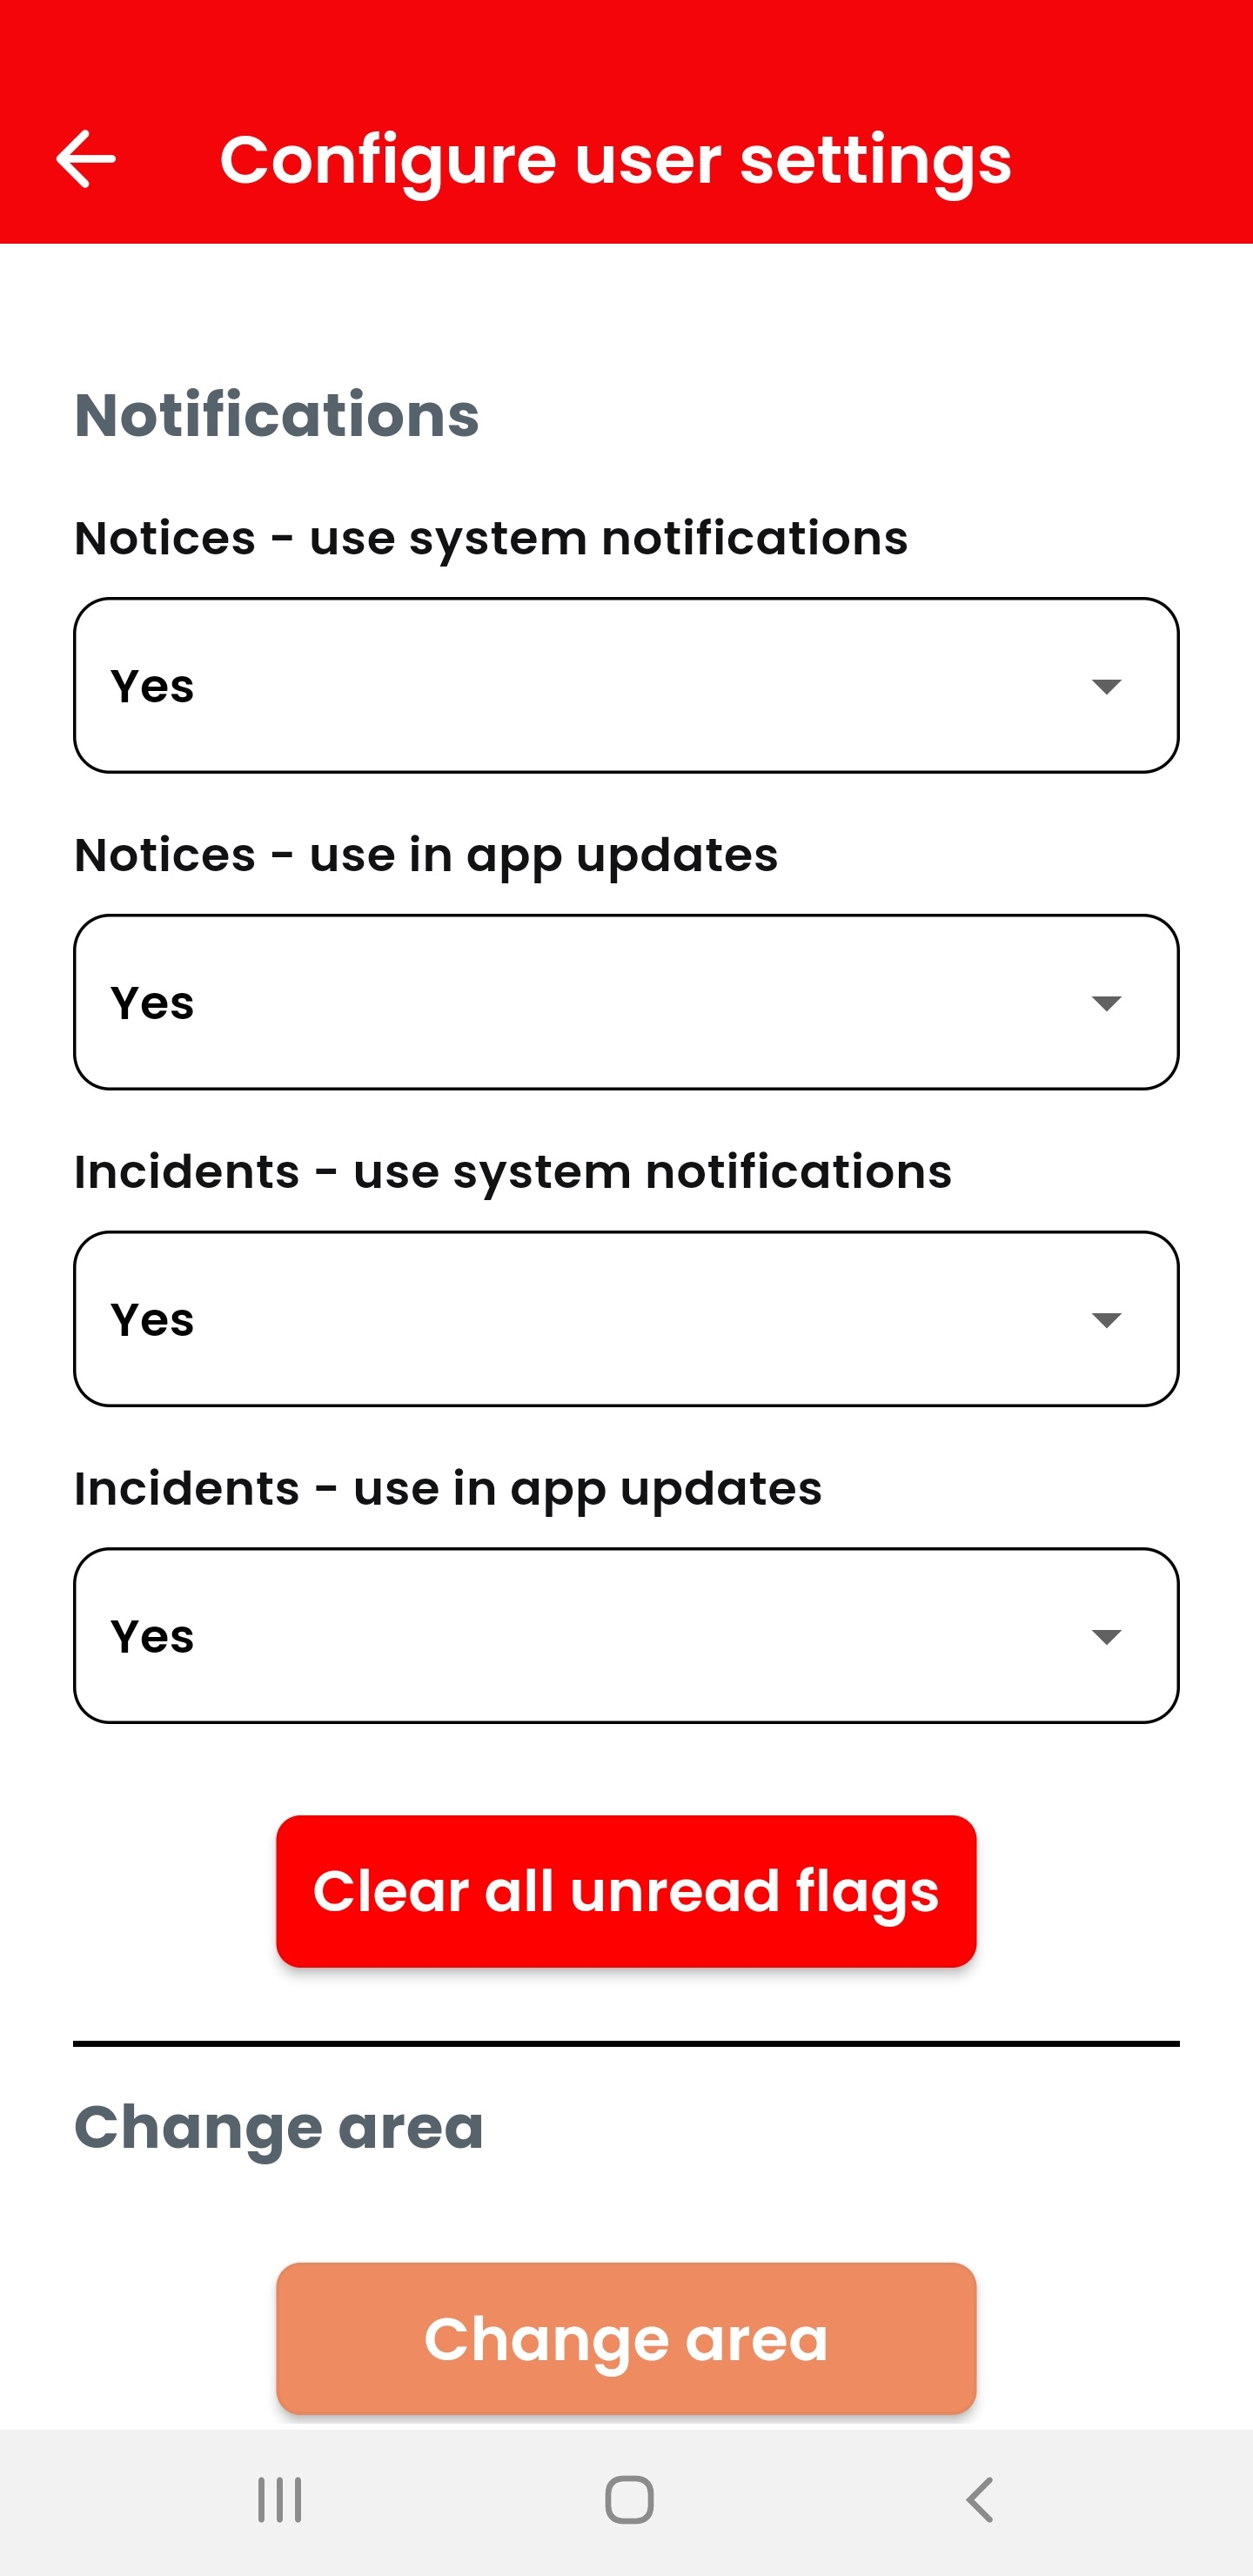
7.5 User settings
The user settings menu allows to specifiy whether ot not notices and/or new information about incidents shall be sent. Normally all flags should be set to "yes".
This menu also may display a button "Change area". This button can be used to connect to a different area, country or server. NOTE: As with registration the preselected area should normally be the one to be used. Switching to another area leads to having no more access to the previous one at the same time. Other areas have other organizations offering different connections. Therefore it is important to - normally - stick to the automatically assigned selection.
7.6 Delete account
If you wish to delete your Tellit account please select "Delete Account" from the settings menu and initiate the deletion.

8. Contact
If you have any questions or issues, you can contact us:
- By email: support@tellit-project.com
- Please add your organization's name to any request.